Lenovo ThinkCentre M52 User Manual - Page 36
Lenovo ThinkCentre M52 Manual
 |
View all Lenovo ThinkCentre M52 manuals
Add to My Manuals
Save this manual to your list of manuals |
Page 36 highlights
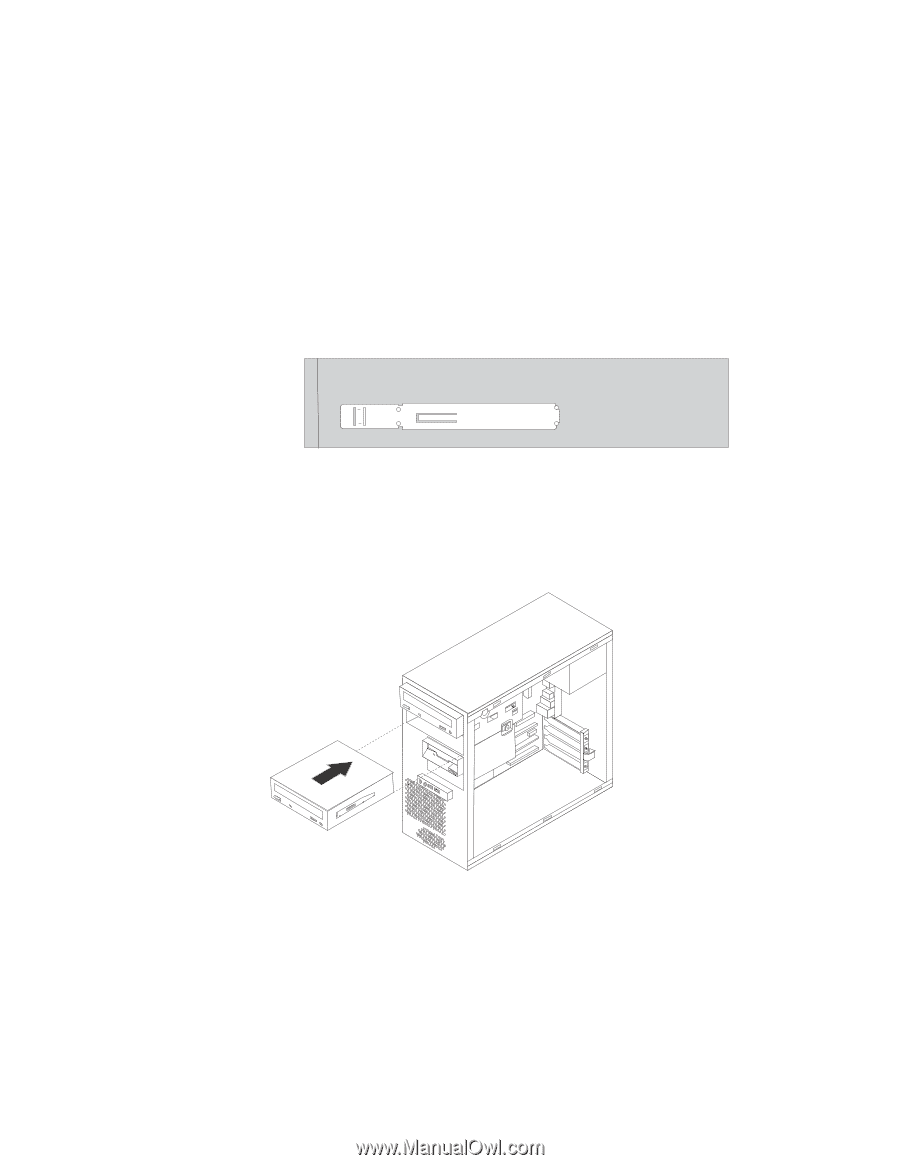
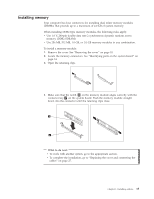
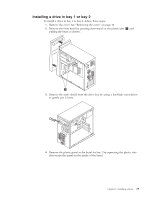
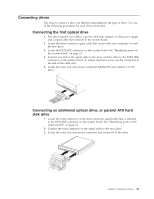
5. If you are installing any type of drive other than a serial ATA hard disk drive, make sure the drive that you are installing is set correctly as either a master or a slave device. Note: A serial ATA hard disk drive does not need to be set as either a master or a slave device. v If it is the first optical drive, set it as a master device. v If it is an additional drive, set it as a slave device. v If it is an additional parallel ATA hard disk drive, set it as a slave device. Refer to the documentation that comes with your drive for master/slave jumper information. 6. For an 5.25-inch optical drive, install a retainer bracket on the side of the drive. 7. For a 3.5-inch drive, install the drive into the Universal Adapter Bracket, 5.25 to 3.5-inch. 8. Install the drive into the bay until it snaps into position. Note: For the adapter bracket, install the screws that secure the bracket in the bay. 9. Install the front bezel by aligning the plastic tabs on the bottom of the bezel with the corresponding holes in chassis until it snaps into position. 10. Continue at "Connecting drives" on page 21. 20 User Guide
-
 1
1 -
2
-
3
-
4
-
5
-
6
-
7
-
8
-
9
-
10
-
11
-
12
-
13
-
14
-
15
-
16
-
17
-
18
-
19
-
20
-
21
-
22
-
23
-
24
-
25
-
26
-
27
-
28
-
29
-
30
-
 31
31 -
 32
32 -
 33
33 -
 34
34 -
 35
35 -
 36
36 -
 37
37 -
 38
38 -
 39
39 -
 40
40 -
 41
41 -
42
-
43
-
44
-
45
-
46
-
47
-
48
-
49
-
50
-
51
-
52
-
53
-
54
-
55
-
56
-
57
-
58
-
59
-
60
-
61
-
62
-
63
-
64
-
65
-
66
-
67
-
68
 |
 |