Lenovo ThinkCentre M70z English (User guide) - Page 20
Installing a computer wall mount, Replacing the keyboard, Replacing the mouse
 |
View all Lenovo ThinkCentre M70z manuals
Add to My Manuals
Save this manual to your list of manuals |
Page 20 highlights
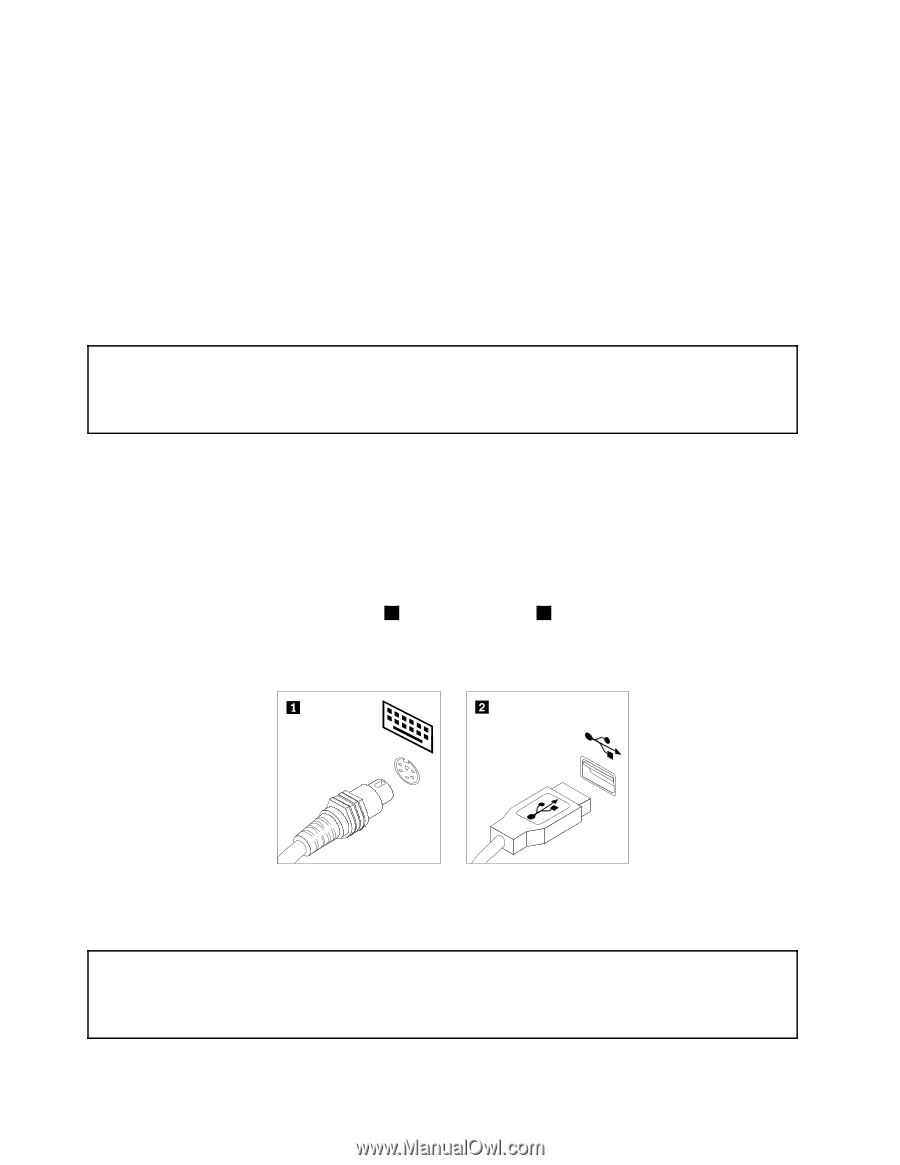
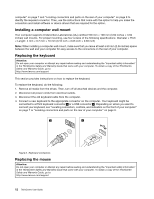
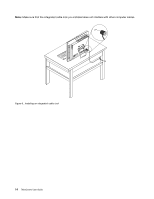
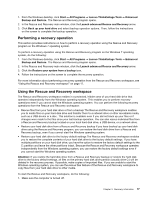
computer" on page 7 and "Locating connectors and parts on the rear of your computer" on page 9 to identify the required connector. Then, use the instructions that come with the option to help you make the connection and install software or device drivers that are required for the option. Installing a computer wall mount Your computer supports Underwriters Laboratories (UL) certified 100 mm × 100 mm (3.94 inches × 3.94 inches) wall mounts. For proper mounting, use four screws of the following specifications: Diameter × Pitch × Length: 4 mm × 0.7 mm × 10 mm (0.16 inch × 0.03 inch × 0.39 inch) Note: When installing a computer wall mount, make sure that you leave at least a 60 mm (2.36 inches) space between the wall and your computer for easy access to the connectors on the rear of your computer. Replacing the keyboard Attention: Do not open your computer or attempt any repair before reading and understanding the "Important safety information" in the ThinkCentre Safety and Warranty Guide that came with your computer. To obtain a copy of the ThinkCentre Safety and Warranty Guide, go to: http://www.lenovo.com/support This section provides instructions on how to replace the keyboard. To replace the keyboard, do the following: 1. Remove all media from the drives. Then, turn off all attached devices and the computer. 2. Disconnect all power cords from electrical outlets. 3. Disconnect the old keyboard cable from the computer. 4. Connect a new keyboard to the appropriate connector on the computer. Your keyboard might be connected to a PS/2 keyboard connector 1 or a USB connector 2 . Depending on where you want to connect your keyboard, see "Locating connectors, controls, and indicators on the front of your computer" on page 7 or "Locating connectors and parts on the rear of your computer" on page 9. Figure 3. Keyboard connectors Replacing the mouse Attention: Do not open your computer or attempt any repair before reading and understanding the "Important safety information" in the ThinkCentre Safety and Warranty Guide that came with your computer. To obtain a copy of the ThinkCentre Safety and Warranty Guide, go to: http://www.lenovo.com/support 12 ThinkCentre User Guide
-
 1
1 -
2
-
3
-
4
-
5
-
6
-
7
-
8
-
9
-
10
-
11
-
12
-
13
-
14
-
 15
15 -
 16
16 -
 17
17 -
 18
18 -
 19
19 -
 20
20 -
 21
21 -
 22
22 -
 23
23 -
 24
24 -
 25
25 -
26
-
27
-
28
-
29
-
30
-
31
-
32
-
33
-
34
-
35
-
36
-
37
-
38
-
39
-
40
-
41
-
42
-
43
-
44
-
45
-
46
-
47
-
48
-
49
-
50
 |
 |