Lenovo ThinkPad A21e English - A21e(2655) Service and Troubleshooting Guide - Page 38
Reinstall the screw., of the computer.
 |
View all Lenovo ThinkPad A21e manuals
Add to My Manuals
Save this manual to your list of manuals |
Page 38 highlights
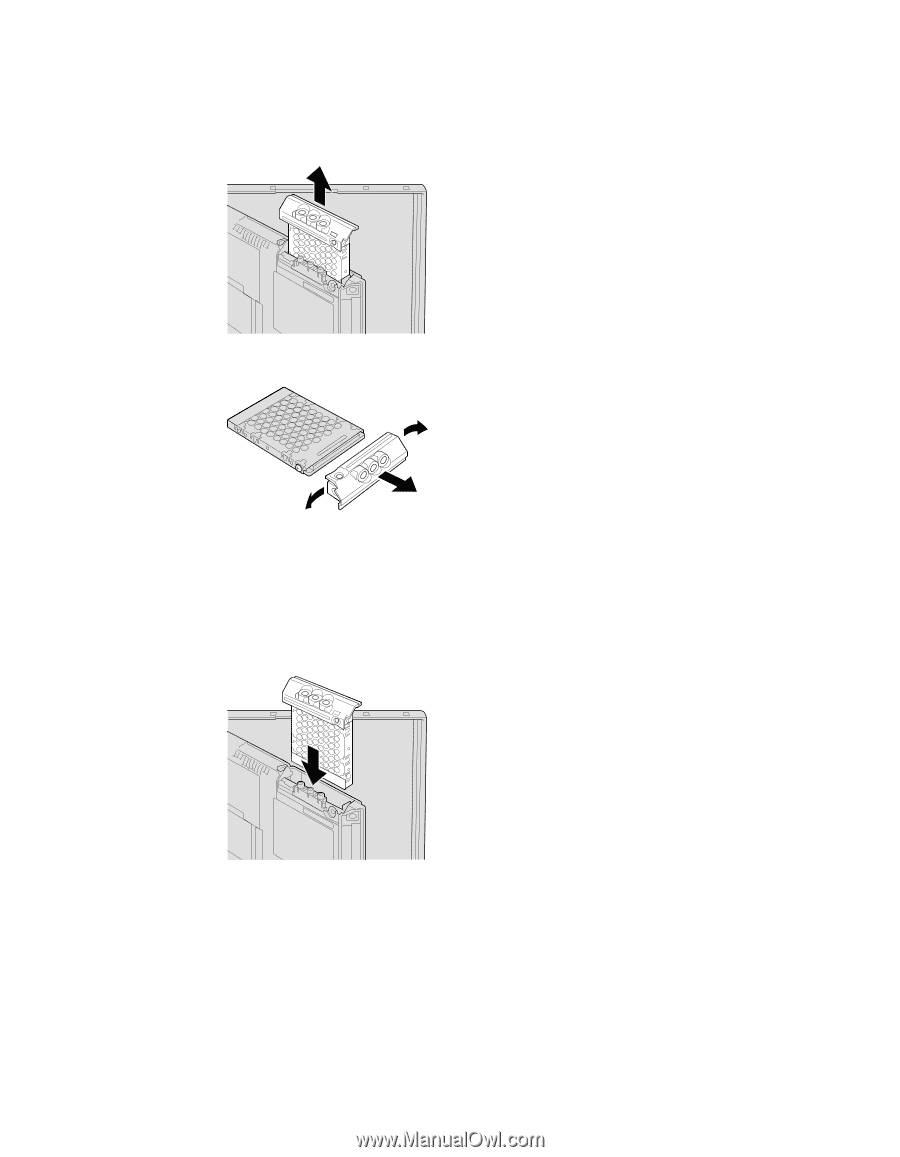
Upgrading the hard disk drive 5. Open the computer display; then stand the computer on its side and remove the hard disk drive by pulling the cover away from the computer. 6. Detach the cover from the hard disk drive. 7. Attach the cover to a new hard disk drive. 8. Insert the hard disk drive and its cover into the hard disk drive bay; then firmly install them. Note: Make sure that the label on the hard disk drive faces to the bottom of the computer. 9. Reinstall the screw. 10. Reinstall the battery. 11. Turn the computer over again. Connect the ac adapter and the cables to the computer. 30 ThinkPad® A21e Service and Troubleshooting Guide
-
 1
1 -
2
-
3
-
4
-
5
-
6
-
7
-
8
-
9
-
10
-
11
-
12
-
13
-
14
-
15
-
16
-
17
-
18
-
19
-
20
-
21
-
22
-
23
-
24
-
25
-
26
-
27
-
28
-
29
-
30
-
31
-
32
-
 33
33 -
 34
34 -
 35
35 -
 36
36 -
 37
37 -
 38
38 -
 39
39 -
 40
40 -
 41
41 -
 42
42 -
 43
43 -
44
-
45
-
46
-
47
-
48
-
49
-
50
-
51
-
52
-
53
-
54
-
55
-
56
-
57
-
58
-
59
-
60
-
61
-
62
-
63
-
64
-
65
-
66
-
67
-
68
-
69
-
70
-
71
-
72
-
73
-
74
-
75
-
76
-
77
-
78
 |
 |
5.
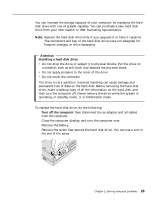
Open the computer display; then stand the computer on its side and
remove the hard disk drive by pulling the cover away from the
computer.
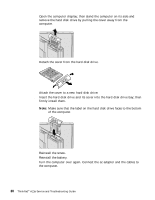
6.
Detach the cover from the hard disk drive.
7.
Attach the cover to a new hard disk drive.
8.
Insert the hard disk drive and its cover into the hard disk drive bay; then
firmly install them.
Note:
Make sure that the label on the hard disk drive faces to the bottom
of the computer.
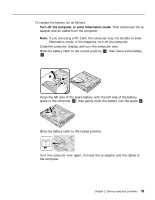
9.
Reinstall the screw.
10.
Reinstall the battery.
11.
Turn the computer over again. Connect the ac adapter and the cables to
the computer.
Upgrading the hard disk drive
30
ThinkPad
®
A21e Service and Troubleshooting Guide