Lenovo ThinkPad T40 Hardware Maintenance Manual - Page 175
Attach
 |
View all Lenovo ThinkPad T40 manuals
Add to My Manuals
Save this manual to your list of manuals |
Page 175 highlights
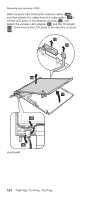
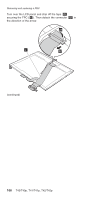
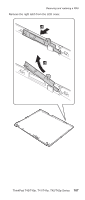
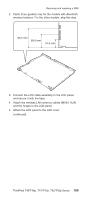
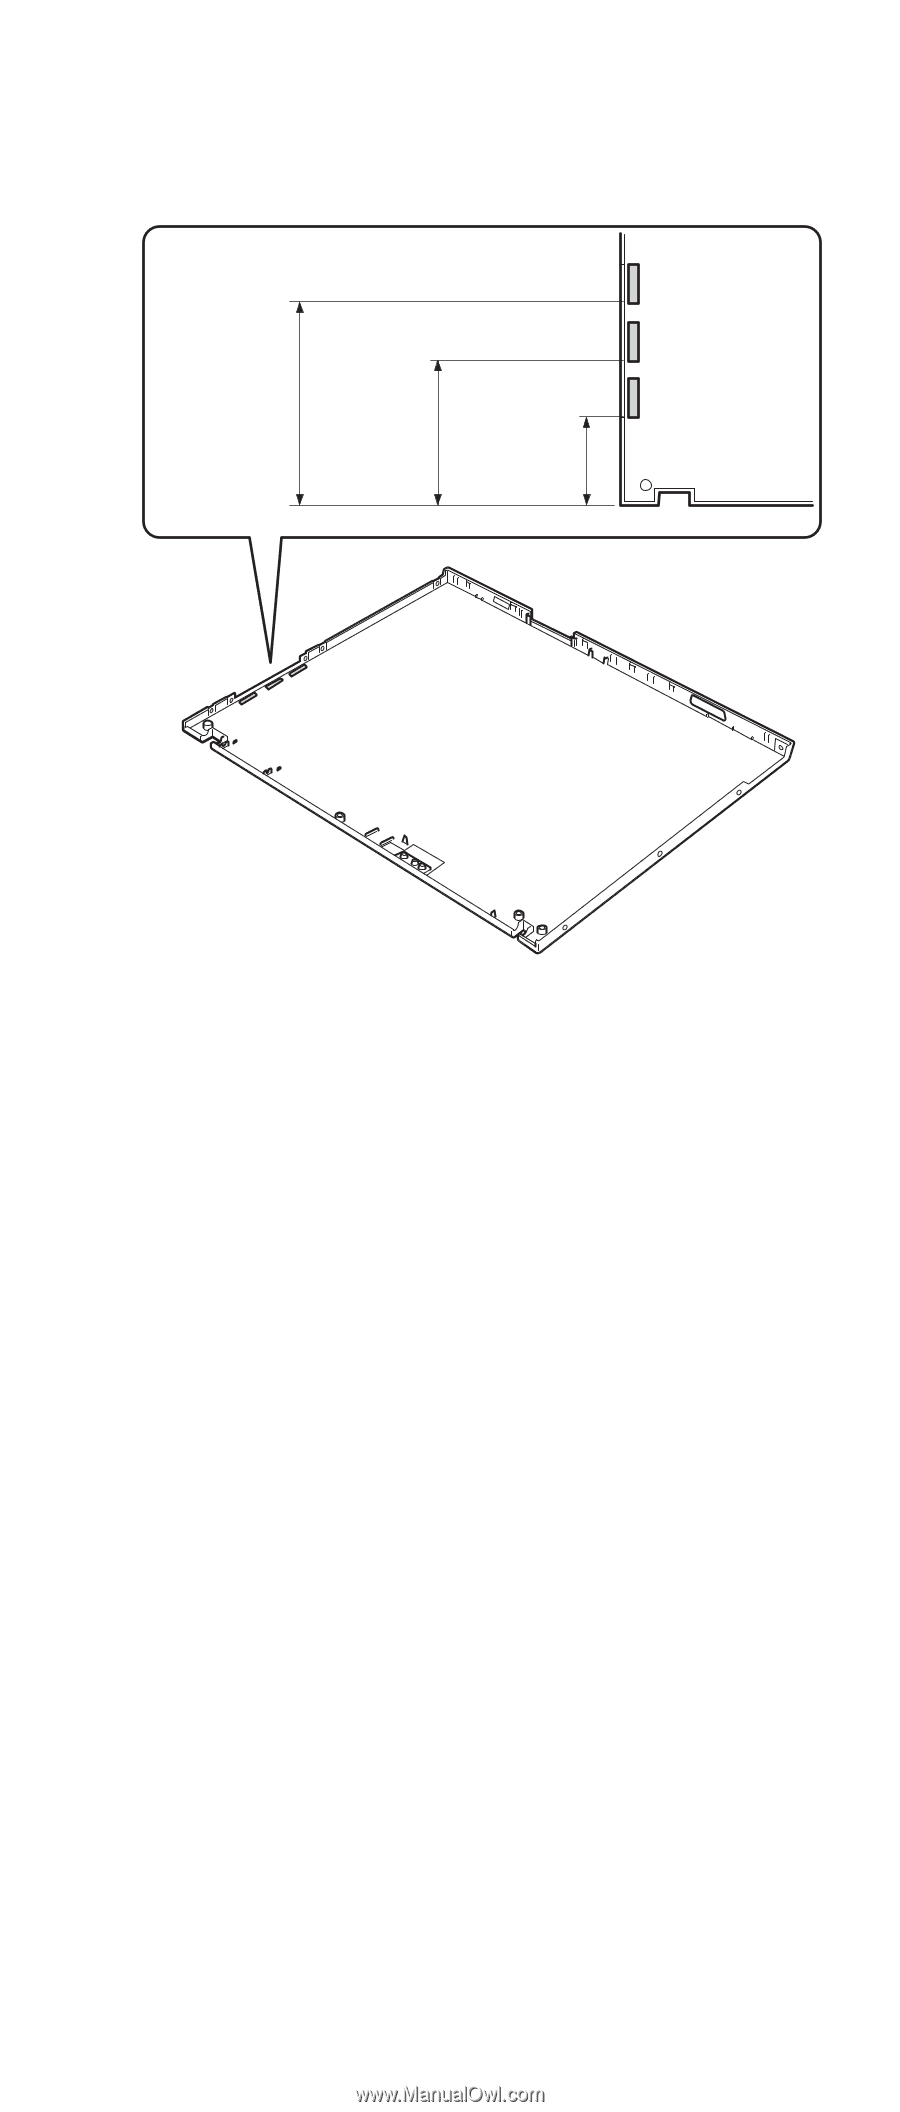
Removing and replacing a FRU 2. Paste three gaskets only for the models with Bluetooth wireless features. For the other models, skip this step. 95.5 mm 68.5 mm 41.5 mm 3. Connect the LCD cable assembly to the LCD panel and secure it with the tape. 4. Attach the wireless LAN antenna cables (MAIN, AUX) and the hinges to the LCD panel. 5. Attach the LCD panel to the LCD cover. (continued) ThinkPad T40/T40p, T41/T41p, T42/T42p Series 169
-
 1
1 -
2
-
3
-
4
-
5
-
6
-
7
-
8
-
9
-
10
-
11
-
12
-
13
-
14
-
15
-
16
-
17
-
18
-
19
-
20
-
21
-
22
-
23
-
24
-
25
-
26
-
27
-
28
-
29
-
30
-
31
-
32
-
33
-
34
-
35
-
36
-
37
-
38
-
39
-
40
-
41
-
42
-
43
-
44
-
45
-
46
-
47
-
48
-
49
-
50
-
51
-
52
-
53
-
54
-
55
-
56
-
57
-
58
-
59
-
60
-
61
-
62
-
63
-
64
-
65
-
66
-
67
-
68
-
69
-
70
-
71
-
72
-
73
-
74
-
75
-
76
-
77
-
78
-
79
-
80
-
81
-
82
-
83
-
84
-
85
-
86
-
87
-
88
-
89
-
90
-
91
-
92
-
93
-
94
-
95
-
96
-
97
-
98
-
99
-
100
-
101
-
102
-
103
-
104
-
105
-
106
-
107
-
108
-
109
-
110
-
111
-
112
-
113
-
114
-
115
-
116
-
117
-
118
-
119
-
120
-
121
-
122
-
123
-
124
-
125
-
126
-
127
-
128
-
129
-
130
-
131
-
132
-
133
-
134
-
135
-
136
-
137
-
138
-
139
-
140
-
141
-
142
-
143
-
144
-
145
-
146
-
147
-
148
-
149
-
150
-
151
-
152
-
153
-
154
-
155
-
156
-
157
-
158
-
159
-
160
-
161
-
162
-
163
-
164
-
165
-
166
-
167
-
168
-
169
-
 170
170 -
 171
171 -
 172
172 -
 173
173 -
 174
174 -
 175
175 -
 176
176 -
 177
177 -
 178
178 -
 179
179 -
 180
180 -
181
-
182
-
183
-
184
-
185
-
186
-
187
-
188
-
189
-
190
-
191
-
192
-
193
-
194
-
195
-
196
-
197
-
198
-
199
-
200
-
201
-
202
-
203
-
204
-
205
-
206
-
207
-
208
-
209
-
210
-
211
-
212
-
213
-
214
-
215
-
216
-
217
-
218
-
219
-
220
-
221
-
222
-
223
-
224
-
225
-
226
-
227
-
228
-
229
-
230
-
231
-
232
-
233
-
234
-
235
-
236
-
237
-
238
-
239
-
240
-
241
-
242
-
243
-
244
-
245
-
246
-
247
-
248
-
249
-
250
-
251
-
252
-
253
-
254
-
255
-
256
-
257
-
258
-
259
-
260
 |
 |
2.
Paste
three
gaskets
only
for
the
models
with
Bluetooth
wireless
features.
For
the
other
models,
skip
this
step.
41.5 mm
68.5 mm
95.5 mm
3.
Connect
the
LCD
cable
assembly
to
the
LCD
panel
and
secure
it
with
the
tape.
4.
Attach
the
wireless
LAN
antenna
cables
(MAIN,
AUX)
and
the
hinges
to
the
LCD
panel.
5.
Attach
the
LCD
panel
to
the
LCD
cover.
(continued)
Removing
and
replacing
a
FRU
ThinkPad
T40/T40p,
T41/T41p,
T42/T42p
Series
169