Lenovo ThinkPad T40 Hardware Maintenance Manual - Page 88
projections
 |
View all Lenovo ThinkPad T40 manuals
Add to My Manuals
Save this manual to your list of manuals |
Page 88 highlights
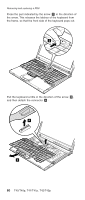
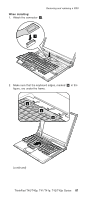
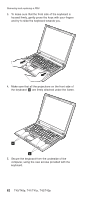
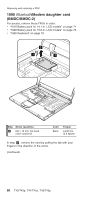
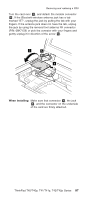
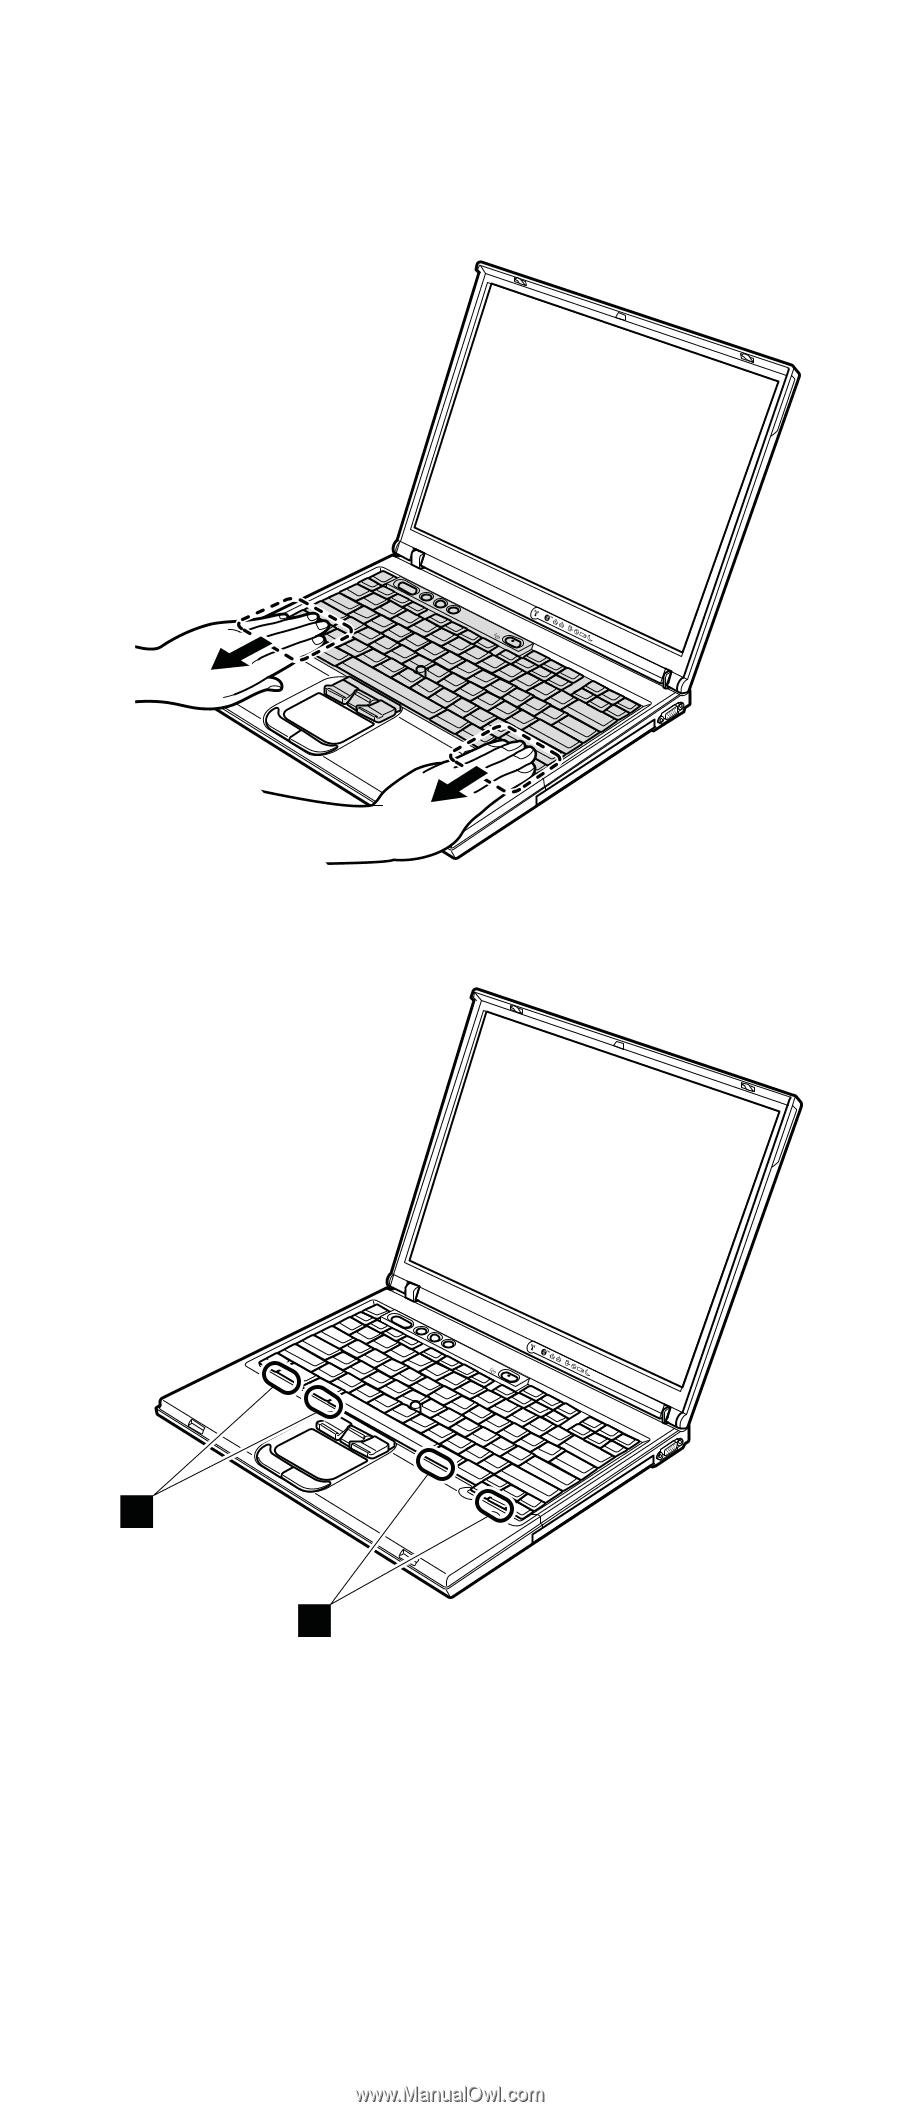
Removing and replacing a FRU 3. To make sure that the front side of the keyboard is housed firmly, gently press the keys with your fingers and try to slide the keyboard towards you. 4. Make sure that all the projections on the front side of the keyboard b are firmly attached under the frame. b b 5. Secure the keyboard from the underside of the computer, using the new screws provided with the keyboard. 82 T40/T40p, T41/T41p, T42/T42p
-
 1
1 -
2
-
3
-
4
-
5
-
6
-
7
-
8
-
9
-
10
-
11
-
12
-
13
-
14
-
15
-
16
-
17
-
18
-
19
-
20
-
21
-
22
-
23
-
24
-
25
-
26
-
27
-
28
-
29
-
30
-
31
-
32
-
33
-
34
-
35
-
36
-
37
-
38
-
39
-
40
-
41
-
42
-
43
-
44
-
45
-
46
-
47
-
48
-
49
-
50
-
51
-
52
-
53
-
54
-
55
-
56
-
57
-
58
-
59
-
60
-
61
-
62
-
63
-
64
-
65
-
66
-
67
-
68
-
69
-
70
-
71
-
72
-
73
-
74
-
75
-
76
-
77
-
78
-
79
-
80
-
81
-
82
-
 83
83 -
 84
84 -
 85
85 -
 86
86 -
 87
87 -
 88
88 -
 89
89 -
 90
90 -
 91
91 -
 92
92 -
 93
93 -
94
-
95
-
96
-
97
-
98
-
99
-
100
-
101
-
102
-
103
-
104
-
105
-
106
-
107
-
108
-
109
-
110
-
111
-
112
-
113
-
114
-
115
-
116
-
117
-
118
-
119
-
120
-
121
-
122
-
123
-
124
-
125
-
126
-
127
-
128
-
129
-
130
-
131
-
132
-
133
-
134
-
135
-
136
-
137
-
138
-
139
-
140
-
141
-
142
-
143
-
144
-
145
-
146
-
147
-
148
-
149
-
150
-
151
-
152
-
153
-
154
-
155
-
156
-
157
-
158
-
159
-
160
-
161
-
162
-
163
-
164
-
165
-
166
-
167
-
168
-
169
-
170
-
171
-
172
-
173
-
174
-
175
-
176
-
177
-
178
-
179
-
180
-
181
-
182
-
183
-
184
-
185
-
186
-
187
-
188
-
189
-
190
-
191
-
192
-
193
-
194
-
195
-
196
-
197
-
198
-
199
-
200
-
201
-
202
-
203
-
204
-
205
-
206
-
207
-
208
-
209
-
210
-
211
-
212
-
213
-
214
-
215
-
216
-
217
-
218
-
219
-
220
-
221
-
222
-
223
-
224
-
225
-
226
-
227
-
228
-
229
-
230
-
231
-
232
-
233
-
234
-
235
-
236
-
237
-
238
-
239
-
240
-
241
-
242
-
243
-
244
-
245
-
246
-
247
-
248
-
249
-
250
-
251
-
252
-
253
-
254
-
255
-
256
-
257
-
258
-
259
-
260
 |
 |
3.
To
make
sure
that
the
front
side
of
the
keyboard
is
housed
firmly,
gently
press
the
keys
with
your
fingers
and
try
to
slide
the
keyboard
towards
you.
4.
Make
sure
that
all
the
projections
on
the
front
side
of
the
keyboard
±b²
are
firmly
attached
under
the
frame.
b
b
5.
Secure
the
keyboard
from
the
underside
of
the
computer,
using
the
new
screws
provided
with
the
keyboard.
Removing
and
replacing
a
FRU
82
T40/T40p,
T41/T41p,
T42/T42p