Lexmark Apps Fax Forward - Page 8
Using a network license, Using MarkVision Professional - store
 |
View all Lexmark Apps manuals
Add to My Manuals
Save this manual to your list of manuals |
Page 8 highlights
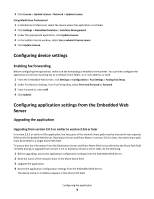
Using MarkVision Professional 1 In MarkVision Professional, select the device where the application is installed. 2 Click Settings > Embedded Solutions > Solutions Management. 3 Under the appropriate application, click Update License. 4 In the Update License window, select Use a local license file. 5 Click Browse to locate the license file. 6 Click Update License. Using a network license Copying the license file to the Lexmark License Server Note: Before installing a network license using either the Embedded Web Server or MarkVision Professional, copy the license files to the license server. 1 Copy the license file to the following directory on the network license server: C:\Program Files\Lexmark\LicenseServer\Licenses 2 On the host computer, click , or click Start and then click Run. 3 In the Start Search or Run box, type control admintools. 4 Press Enter, or click OK. 5 Click Services > License Server. 6 Stop the License Server service, and then restart it. Configuring the network license 1 From the Embedded Web Server, click Settings or Configuration. 2 Click Device Solutions > Solutions (eSF), or click Embedded Solutions. 3 Click Network License. 4 Enter the IP address or host name and optional port for the network license server where the license is stored. You can enter values for up to three separate servers. 5 In the Heartbeat Period field, enter a value of 2 to 60 minutes to designate how often the printer will ping the network license server to check for updates and maintain access to an electronic license. 6 In the "Number of Retries" field, enter a number of 1 to 5 to set the maximum number of times the printer can attempt to obtain a license before quitting. 7 Click Apply. Updating the network license Using the Embedded Web Server 1 Click Solutions. 2 From Installed Solutions, click the appropriate application link. Configuring the application 8
-
 1
1 -
2
-
 3
3 -
 4
4 -
 5
5 -
 6
6 -
 7
7 -
 8
8 -
 9
9 -
 10
10 -
 11
11 -
 12
12 -
 13
13 -
14
-
15
-
16
-
17
-
18
-
19
 |
 |