Lexmark Apps MyShortcut Administrator's Guide - Page 6
Configuring the application, Obtaining a license file - for windows 8
 |
View all Lexmark Apps manuals
Add to My Manuals
Save this manual to your list of manuals |
Page 6 highlights
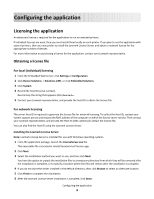
Configuring the application Licensing the application An electronic license is required for the application to run on selected printers. If individual licenses are used, then you must install them locally on each printer. If you plan to use the application with several printers, then you may prefer to install the Lexmark License Server and obtain a network license for the appropriate number of devices. For more information on purchasing a license for the application, contact your Lexmark representative. Obtaining a license file For local (individual) licensing 1 From the Embedded Web Server, click Settings or Configuration. 2 Click Device Solutions > Solutions (eSF), or click Embedded Solutions. 3 Click System. 4 Record the host ID (serial number). Record only the string that appears after Serial=. 5 Contact your Lexmark representative, and provide the host ID to obtain the license file. For network licensing The server Host ID is required to generate the license file for network licensing. To collect the Host ID, contact your system support person and request the MAC address of the computer on which the license server resides. Then contact your Lexmark representative, and provide the Host ID (MAC address) to obtain the license file. You can also find the Host ID using the Lexmark License Server. Installing the Lexmark License Server Note: Lexmark License Server is intended for use with Windows operating systems. 1 From the application package, launch the LicenseServer.exe file. This executable file is located in \esf-license-app. 2 Click Next. 3 Select the installation method you want to use, and then click Next. You have the option to unpack the installation files to a temporary directory from which they will be removed after the installation is complete, or to specify a location where the files will remain after the installation is complete. 4 If you do not want the server installed in the default directory, then click Browse to select an alternate location. 5 Click Finish to complete the installation. 6 After the Lexmark License Server installation is complete, click Done. Configuring the application 6
-
 1
1 -
 2
2 -
 3
3 -
 4
4 -
 5
5 -
 6
6 -
 7
7 -
 8
8 -
 9
9 -
 10
10 -
 11
11 -
 12
12 -
13
-
14
-
15
-
16
-
17
 |
 |