Lexmark MC2325 Embedded Web Server Administrator s Guide - Page 53
Erasing printer memory
 |
View all Lexmark MC2325 manuals
Add to My Manuals
Save this manual to your list of manuals |
Page 53 highlights
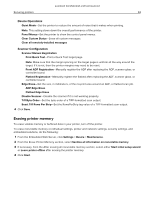
Lexmark Confidential until announced Securing printers 53 Device Operations • Quiet Mode-Set the printer to reduce the amount of noise that it makes when printing. Note: This setting slows down the overall performance of the printer. • Panel Menus-Set the printer to show the control panel menus. • Clear Custom Status-Erase all custom messages. • Clear all remotely‑installed messages Scanner Configuration • Scanner Manual Registration - Print Quick Test-Print a Quick Test target page. Note: Make sure that the margin spacing on the target page is uniform all the way around the target. If it is not, then the printer margins may need to be reset. - Front ADF Registration-Manually register the ADF after replacing the ADF, scanner glass, or controller board. - Flatbed Registration-Manually register the flatbed after replacing the ADF, scanner glass, or controller board. • Edge Erase-Set the size, in millimeters, of the no-print area around an ADF, or flatbed scan job. - ADF Edge Erase - Flatbed Edge Erase • Disable Scanner-Disable the scanner if it is not working properly. • Tiff Byte Order-Set the byte order of a TIFF-formatted scan output. • Exact Tiff Rows Per Strip-Set the RowsPerStrip tag value of a TIFF-formatted scan output. 4 Click Save. Erasing printer memory To erase volatile memory or buffered data in your printer, turn off the printer. To erase nonvolatile memory or individual settings, printer and network settings, security settings, and embedded solutions, do the following: 1 From the Embedded Web Server, click Settings > Device > Maintenance. 2 From the Erase Printer Memory section, select Sanitize all information on nonvolatile memory. 3 If necessary, from the After erasing all nonvolatile memory section, select either Start initial setup wizard or Leave printer offline after erasing the printer memory. 4 Click Start.
-
 1
1 -
2
-
3
-
4
-
5
-
6
-
7
-
8
-
9
-
10
-
11
-
12
-
13
-
14
-
15
-
16
-
17
-
18
-
19
-
20
-
21
-
22
-
23
-
24
-
25
-
26
-
27
-
28
-
29
-
30
-
31
-
32
-
33
-
34
-
35
-
36
-
37
-
38
-
39
-
40
-
41
-
42
-
43
-
44
-
45
-
46
-
47
-
 48
48 -
 49
49 -
 50
50 -
 51
51 -
 52
52 -
 53
53 -
 54
54 -
 55
55 -
 56
56 -
 57
57 -
 58
58 -
59
-
60
-
61
-
62
-
63
-
64
-
65
-
66
-
67
-
68
-
69
-
70
-
71
 |
 |