Lexmark MX6500e 6500e ADF Card Copy Administrator's Guide - Page 4
Configuring applications using the Embedded Web Server, Configuring ADF Card Copy
 |
View all Lexmark MX6500e 6500e manuals
Add to My Manuals
Save this manual to your list of manuals |
Page 4 highlights
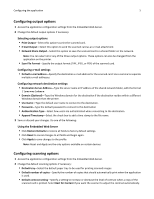
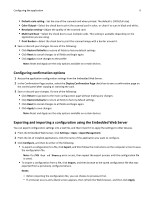
Configuring the application 4 Configuring the application Configuring applications using the Embedded Web Server (EWS) Accessing application configuration settings using the Embedded Web Server 1 Obtain the scanner IP address: • From the scanner home screen • From the TCP/IP section in the Network/Ports menu • By printing a network setup page or menu settings page, and then finding the TCP/IP section Note: An IP address appears as four sets of numbers separated by periods, such as 123.123.123.123. 2 Open a Web browser, and then type the scanner IP address in the address field. The Embedded Web Server appears. 3 From the navigation menu on the left, click Settings > Apps > Apps Management. 4 From the list of installed applications, click the application you want to configure, and then click Configure. Customizing the display icon 1 Access the application configuration settings from the Embedded Web Server. 2 From the Configure page, add or edit a profile, and then change the settings if necessary: • Button Text or Text-Type up to 20 characters that will appear above the profile button on the scanner home screen. This field is optional. • Button Icon or Icon-Browse to a new image file that represents the profile on the scanner home screen. This field is optional. • Button Icon when pressed or Icon when pressed-Browse to a new image file that will appear while the profile icon is being pressed. This field is optional. 3 Save or discard your changes. Configuring ADF Card Copy Configuring the network and e‑mail function of the scanner This application uses the network and e‑mail server setup and options of the scanner. Before running the application, you must first complete the network and e‑mail server setup. For more information on configuring the network and e‑mail settings of the scanner, see the User's Guide and other networking information on the Software and Documentation CD that came with the scanner.
-
 1
1 -
 2
2 -
 3
3 -
 4
4 -
 5
5 -
 6
6 -
 7
7 -
 8
8 -
 9
9 -
 10
10 -
11
-
12
-
13
-
14
 |
 |