Lexmark P122 Photo Jetprinter Service Manual - Page 34
Code Level, LCD Test, Button Test, Select., Print, Return
 |
View all Lexmark P122 Photo Jetprinter manuals
Add to My Manuals
Save this manual to your list of manuals |
Page 34 highlights
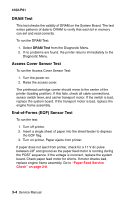
4102-P01 Code Level Displays the current code level on the Controller Board. Code upgrades to the System Board can be downloaded from either camera card slot or through the parallel port such as an external storage drive. Use the following procedure to upgrade the code: 1. With printer at Ready, insert the camera card containing the newer code level in the proper slot. 2. The message "Upgrade printer? *=Yes" appears. Press Select. 3. The message "00.xx" to "00.xx" "*=continue" appears. Press Select. 4. The message "Upgrading Flash ROM" appears and a processing percent begins counting up. 5. Upon reaching 100 percent, the printer goes into a reprogramming state, where the display message is "Reprogramming". 6. When reprogramming is complete, the new code level appears. 7. Remove the camera card from the slot and continue printing. LCD Test To run the LCD Test: 1. Select LCD Test from the Diagnostic Menu. The LCD test runs continually. 2. Press Print to stop the test. Button Test To run the Button Test: 1. Select Button Test from the Diagnostic Menu. With no buttons pressed, OP (Open) appears several times on the display. 2. Press each button, one at a time, and a CL (Closed) appears in place of the OP. This checks the proper operation of each of the buttons. 3. Press Print and Return together to stop the test. 3-2 Service Manual
-
 1
1 -
2
-
3
-
4
-
5
-
6
-
7
-
8
-
9
-
10
-
11
-
12
-
13
-
14
-
15
-
16
-
17
-
18
-
19
-
20
-
21
-
22
-
23
-
24
-
25
-
26
-
27
-
28
-
 29
29 -
 30
30 -
 31
31 -
 32
32 -
 33
33 -
 34
34 -
 35
35 -
 36
36 -
 37
37 -
 38
38 -
 39
39 -
40
-
41
-
42
-
43
-
44
-
45
-
46
-
47
-
48
-
49
-
50
-
51
-
52
-
53
-
54
-
55
-
56
-
57
-
58
-
59
-
60
-
61
-
62
-
63
-
64
-
65
-
66
-
67
-
68
-
69
-
70
 |
 |
