Lexmark X340 User's Guide - Page 16
Getting the MFP ready to copy - x340n
 |
View all Lexmark X340 manuals
Add to My Manuals
Save this manual to your list of manuals |
Page 16 highlights
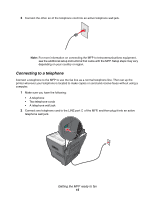
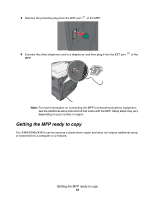
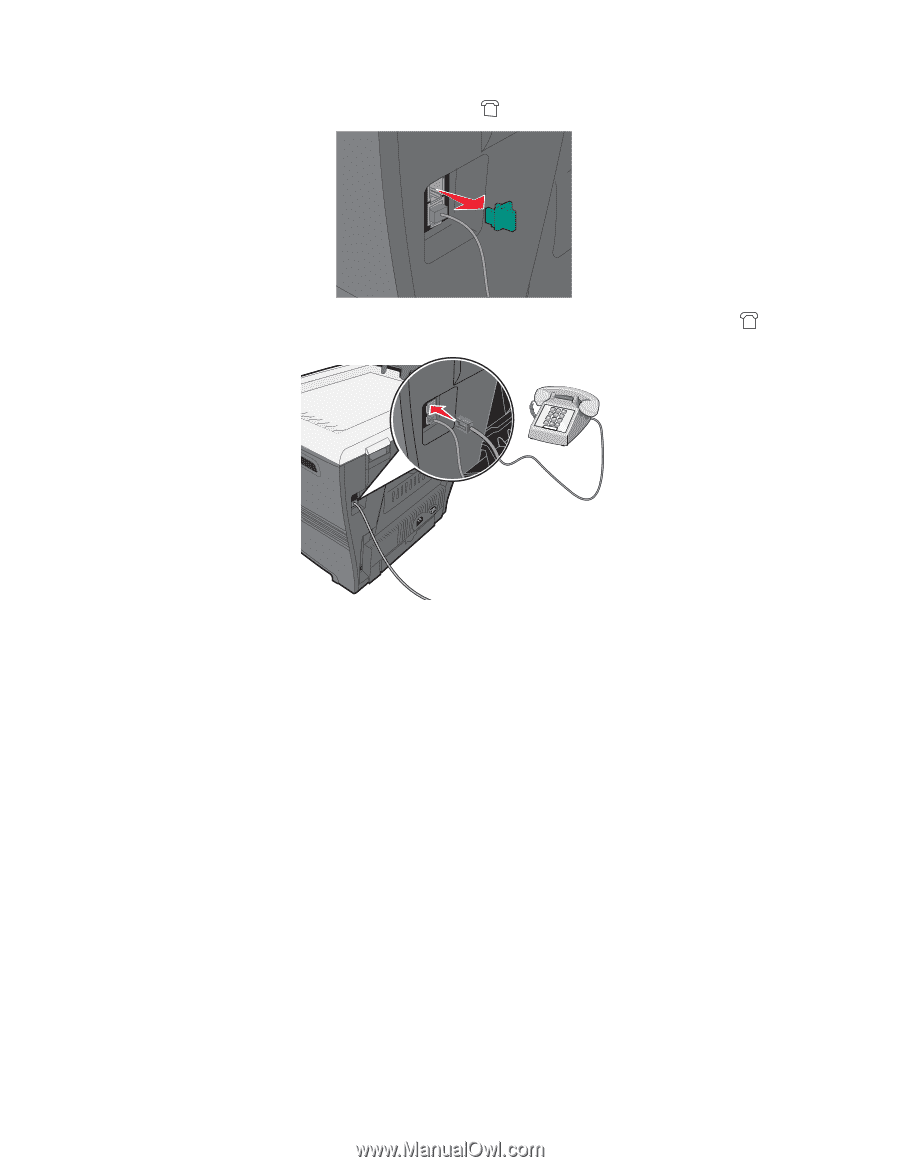
3 Remove the protective plug from the EXT port of the MFP. 4 Connect the other telephone cord to a telephone, and then plug it into the EXT port of the MFP. Note: For more information on connecting the MFP to telecommunications equipment, see the additional setup instructions that came with the MFP. Setup steps may vary depending on your country or region. Getting the MFP ready to copy The X340/X340n/X342n can be used as a stand-alone copier and does not require additional setup or connection to a computer or a network. Getting the MFP ready to copy 16
-
 1
1 -
2
-
3
-
4
-
5
-
6
-
7
-
8
-
9
-
10
-
 11
11 -
 12
12 -
 13
13 -
 14
14 -
 15
15 -
 16
16 -
 17
17 -
 18
18 -
 19
19 -
 20
20 -
 21
21 -
22
-
23
-
24
-
25
-
26
-
27
-
28
-
29
-
30
-
31
-
32
-
33
-
34
-
35
-
36
-
37
-
38
-
39
-
40
-
41
-
42
-
43
-
44
-
45
-
46
-
47
-
48
-
49
-
50
-
51
-
52
-
53
-
54
-
55
-
56
-
57
-
58
-
59
-
60
-
61
-
62
-
63
-
64
-
65
-
66
-
67
-
68
-
69
-
70
-
71
-
72
-
73
-
74
-
75
-
76
-
77
-
78
-
79
-
80
-
81
-
82
-
83
-
84
-
85
-
86
-
87
-
88
-
89
-
90
-
91
-
92
-
93
-
94
-
95
-
96
-
97
-
98
-
99
-
100
-
101
-
102
-
103
-
104
-
105
 |
 |
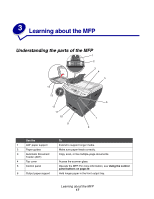
Getting the MFP ready to copy
16
3
Remove the protective plug from the EXT port
of the MFP.
4
Connect the other telephone cord to a telephone, and then plug it into the EXT port
of the
MFP.
Note:
For more information on connecting the MFP to telecommunications equipment,
see the additional setup instructions that came with the MFP. Setup steps may vary
depending on your country or region.
Getting the MFP ready to copy
The X340/X340n/X342n can be used as a stand-alone copier and does not require additional setup
or connection to a computer or a network.