Linksys LNE100TX User Guide - Page 10
Client for Microsoft Networks - lan card
 |
UPC - 745883548675
View all Linksys LNE100TX manuals
Add to My Manuals
Save this manual to your list of manuals |
Page 10 highlights
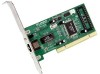
Linksys Instant EtherFast® Series 6. After making sure that all of the listed network components are installed on your system, verify that Client for Microsoft Networks is listed in the Primary Network Logon box. 7. Under Network Components, select Linksys LNE100TX (v5) Fast Ethernet Adapter, and click the Properties button. A screen similar to that below will appear. 8. Select the Driver Type tab and make sure that Enhanced Mode (32 bit and 16 bit) NDIS Driver is selected. 9. The Bindings tab will show you what network protocols are presently utilized by the card. There is no need to modify any setting on this tab. 10. The Advanced Tab has two settings. First, is the Media Type setting. This should be set at AutoSense. The next setting, Select Media, should be set at Ethernet. EtherFast® 10/100 LAN Cards 11. Click on the Identification tab and the following window will appear. Type the name of your computer in the Computer Name box. Choose a name that is unique from the other computer names on the network. Note: Your Computer Name and Workgroup Name must both be fewer than 15 characters, and should only consist of numbers and letters. 12. Type the name of your workgroup in the Workgroup box. The Workgroup name should be the same Workgroup Name in use by all of the other PCs on the network. Use the same Workgroup Name that is in use on your other computers. Do not click OK when you have completed these fields. 13. Enter a description of your computer in the Computer Description box. This box is optional. Do not click the OK button when you have completed these fields. 13 14
-
 1
1 -
2
-
3
-
4
-
 5
5 -
 6
6 -
 7
7 -
 8
8 -
 9
9 -
 10
10 -
 11
11 -
 12
12 -
 13
13 -
 14
14 -
 15
15 -
16
-
17
-
18
-
19
-
20
-
21
-
22
-
23
-
24
-
25
-
26
-
27
-
28
-
29
-
30
-
31
-
32
-
33
-
34
-
35
-
36
-
37
-
38
-
39
-
40
-
41
-
42
 |
 |
