Logitech 904360-0403 Manual - Page 4
Installing the Batteries, Battery Warning
 |
UPC - 097855010162
View all Logitech 904360-0403 manuals
Add to My Manuals
Save this manual to your list of manuals |
Page 4 highlights
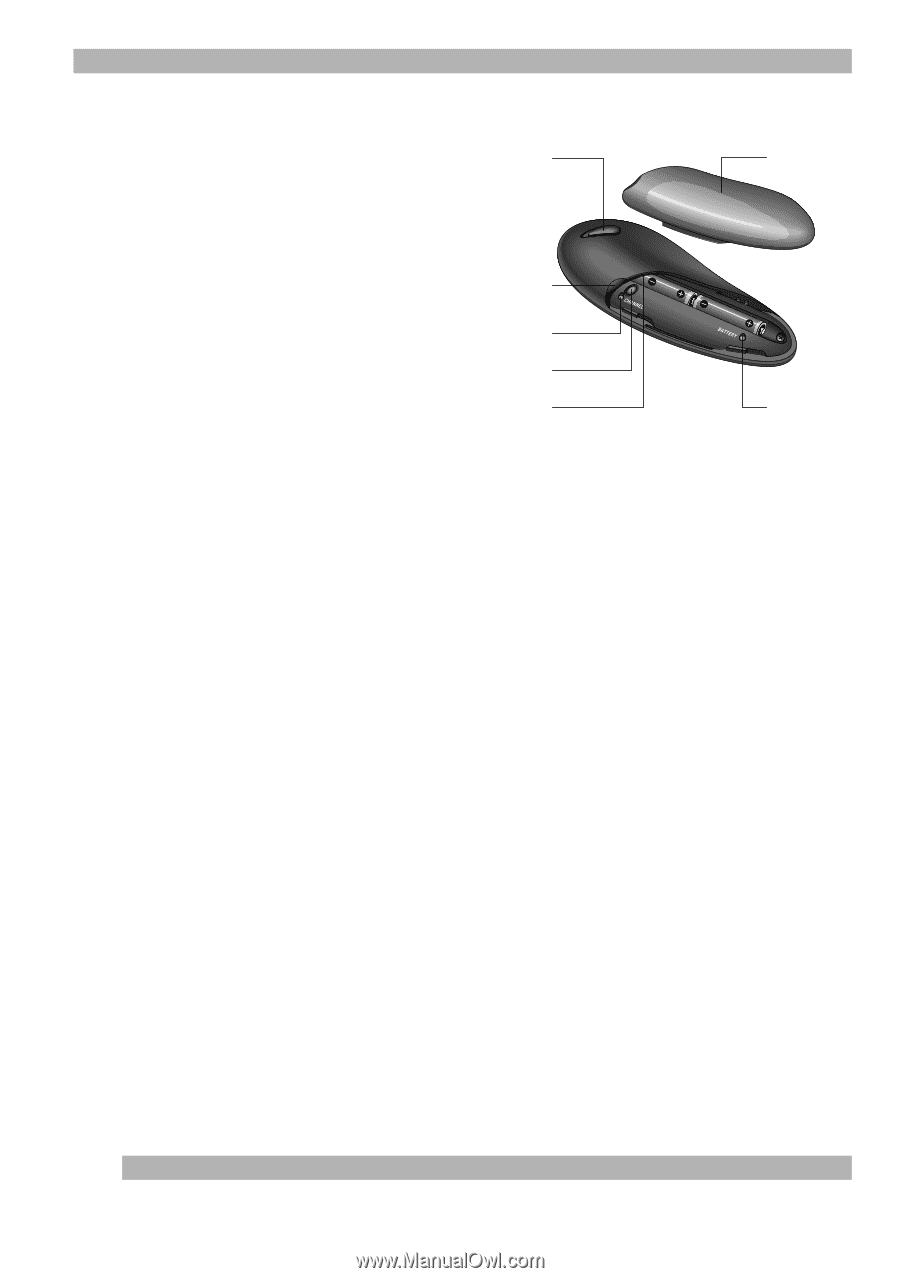
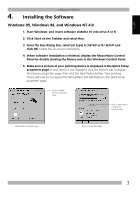
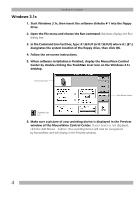
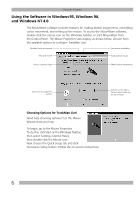
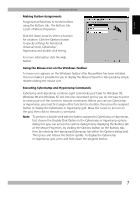
Installing the Batteries 2. Installing the Batteries 1. Remove the cover on Range TrackMan Live! by using switch your thumbs to pull the cover toward the narrow end of the unit. 2. Place the flat ends (negative Recess pole) of the AAA batteries against the spring(s). A diagram in the battery compartment shows the correct battery installation. Channel light Channel button 3. When the batteries are Spring (not in view) installed, carefully slide (or snap) the cover back into place. Cover Battery light 4. Slide the Range switch from Off to Lo or Hi. (The Lo setting extends battery life.) If the battery light near the battery compartment remains lit for a few seconds, the batteries are good. If the light flashes, or there is no light, change the batteries. Use the Lo setting for distances of up to 2 meters and the Hi setting for distances up to 10 meters. 3. Battery Warning When replacing the batteries, use only AAA alkaline batteries. Do not mix batteries of different types. Discard all used batteries according to the battery manufacturer's instructions. Exercise care when handling batteries. When batteries are misused, they may explode or leak, causing burns and personal injury. Do not open a battery or mutilate, dispose of in a fire, expose to heat above 100o C, immerse in water, install improperly, or recharge. Conducting materials, such as rings, bracelets, and keys, can short out a battery causing it to overheat and possibly leak or explode. When TrackMan Live! is not used for long periods of time, remove the batteries and store them in a dry place at normal room temperature. 2
-
 1
1 -
 2
2 -
 3
3 -
 4
4 -
 5
5 -
 6
6 -
 7
7 -
 8
8 -
 9
9 -
 10
10 -
11
-
12
-
13
-
14
-
15
-
16
-
17
-
18
-
19
-
20
-
21
-
22
-
23
-
24
-
25
-
26
-
27
-
28
-
29
-
30
-
31
-
32
-
33
-
34
-
35
-
36
-
37
-
38
-
39
-
40
-
41
-
42
-
43
-
44
-
45
-
46
-
47
-
48
-
49
-
50
-
51
-
52
-
53
-
54
-
55
-
56
-
57
-
58
-
59
-
60
-
61
-
62
-
63
-
64
-
65
-
66
-
67
-
68
-
69
-
70
-
71
-
72
-
73
-
74
-
75
-
76
-
77
-
78
-
79
-
80
 |
 |