Logitech 915-000120 User Manual - Page 8
Using your Harmony 700
 |
UPC - 097855062086
View all Logitech 915-000120 manuals
Add to My Manuals
Save this manual to your list of manuals |
Page 8 highlights
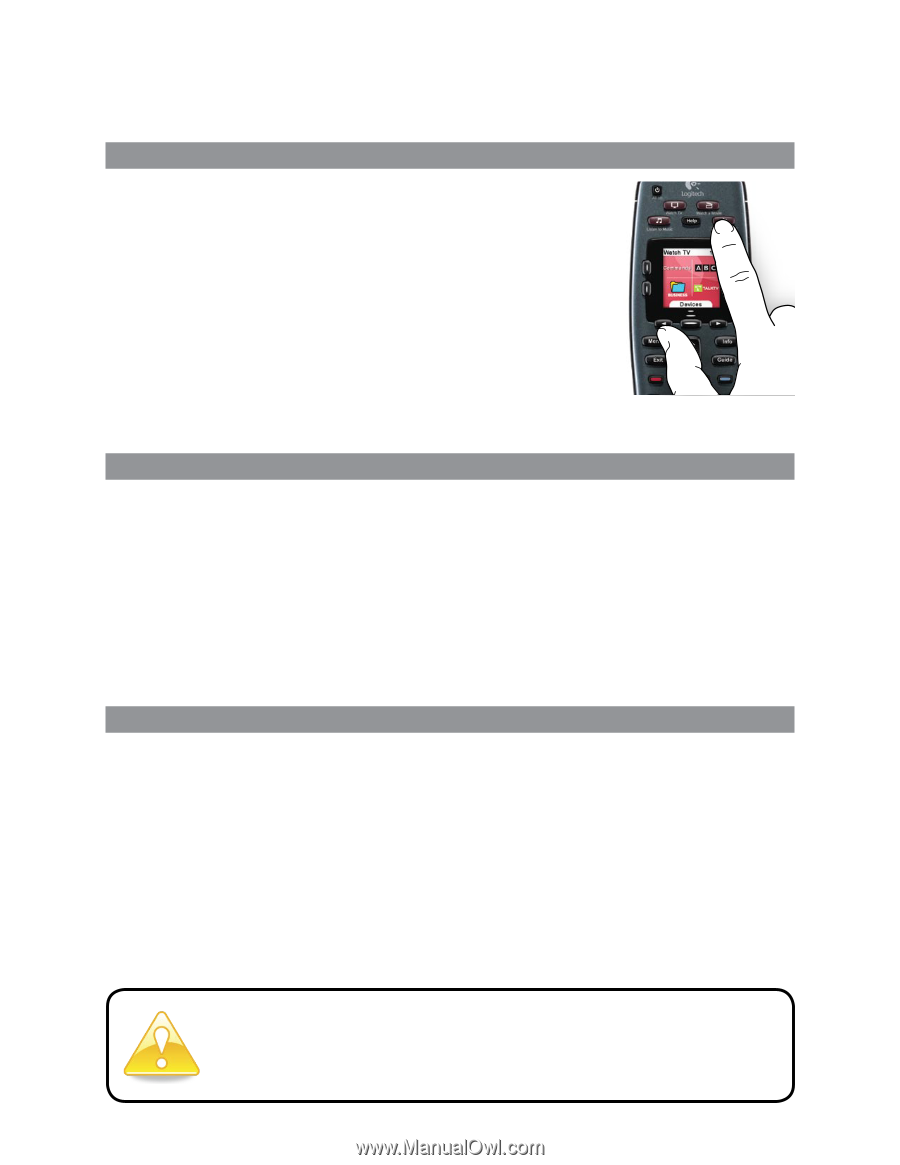
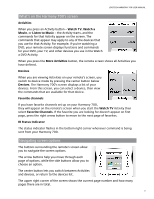
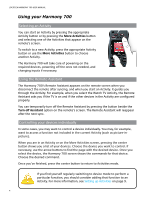
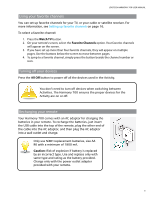
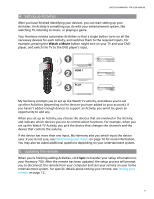
LOGITECH HARMONY 700 USER MANUAL Using your Harmony 700 Selecting an Activity You can start an Activity by pressing the appropriate Activity button or by pressing the More Activities button and selecting one of the Activities that appear on the remote's screen. To switch to a new Activity, press the appropriate Activity button or use the More Activities button to choose another Activity. The Harmony 700 will take care of powering on the required devices, powering off the ones not needed, and changing inputs if necessary. Using the Remote Assistant The Harmony 700's Remote Assistant appears on the remote screen when you disconnect the remote after syncing, and when you start an Activity. It guides you through the Activity. For example, when you select the Watch TV Activity, the Remote Assistant asks you if the TV is on and if the other devices in the Activity are configured properly. You can temporarily turn off the Remote Assistant by pressing the button beside the Turn off Assistant option on the remote's screen. The Remote Assistant will reappear after the next sync. Controlling your devices individually In some cases, you may want to control a device individually. You may, for example, want to access a function not included in the current Activity (such as picture-inpicture). When you are in an Activity or on the More Activities screen, pressing the center button shows you a list of your devices. Choose the device you want to control. If necessary, use the arrow buttons to find the page with the desired device. Once you select the device, the Harmony 700 screen shows the commands for that device. Choose the desired command. Once you've finished, press the center button to return to Activities mode. If you find yourself regularly switching to device mode to perform a particular function, you should consider adding that function to an Activity. For more information, see Setting up Activities on page 9. 4
-
 1
1 -
2
-
 3
3 -
 4
4 -
 5
5 -
 6
6 -
 7
7 -
 8
8 -
 9
9 -
 10
10 -
 11
11 -
 12
12 -
 13
13 -
14
-
15
-
16
-
17
-
18
-
19
-
20
-
21
-
22
-
23
-
24
-
25
-
26
 |
 |