Logitech Harmony 680 User Manual - Page 5
Setting up Your Harmony Remote - software
 |
View all Logitech Harmony 680 manuals
Add to My Manuals
Save this manual to your list of manuals |
Page 5 highlights
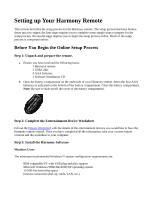
Setting up Your Harmony Remote This section describes the setup process for the Harmony remote. The setup process has been broken down into two stages: the first stage requires you to complete some simple steps to prepare for the setup process; the second stage requires you to begin the setup process online. Much of the setup process is completed online. Before You Begin the Online Setup Process Step 1: Unpack and prepare the remote. a. Ensure you have received the following items: • 1 Harmony remote • 1 USB Cable • 4 AAA batteries • 1 Software Installation CD b. Open the battery compartment on the underside of your Harmony remote. Insert the four AAA batteries as indicated on the bottom of the battery compartment. Close the battery compartment. Note: Be sure to slide on/off the cover of the battery compartment. Step 2: Complete the Entertainment Device Worksheet Fill out the Device Worksheet with the details of the entertainment devices you would like to have the Harmony remote control. Once you have completed all the information, take your current remote controls and the worksheet to your computer. Step 3: Install the Harmony Software Windows Users The minimum recommended Windows™ system configuration requirements are: • IBM compatible PC with USB plug and play support • Microsoft Windows 98SE/Me/2000/XP operating system • 10 MB free hard drive space • Internet connection (dial-up, cable, LAN, etc.)
-
 1
1 -
 2
2 -
 3
3 -
 4
4 -
 5
5 -
 6
6 -
 7
7 -
 8
8 -
 9
9 -
 10
10 -
 11
11 -
12
-
13
-
14
-
15
-
16
-
17
 |
 |
