Logitech Harmony Ultimate User's Guide - Page 35
Changing your Setup - login
 |
View all Logitech Harmony Ultimate manuals
Add to My Manuals
Save this manual to your list of manuals |
Page 35 highlights
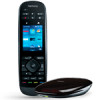
Logitech Harmony Ultimate Use the Fix It Myself function to put the remote back in step with devices Sometimes Harmony becomes out of sync with your devices and confuses when they are on or off, or which input they are on. This occurs when there is an obstacle between the IR transmitters in the hub, IR mini blaster or remote; or if the devices are operated manually or by using their original remote control. If you know what the problem is you may bypass the Help feature and directly fix it yourself. 1. Tap the icon. 2. Select Fix it Myself. 3. Select the device to fix. 4. Tap the command you want the remote to send to the device. Changing your Setup Once you have completed the initial setup process on MyHarmony, you can make additional changes on MyHarmony, such as: adding or removing devices creating, updating, or deleting Activities managing Favorite Channels reordering screen commands changing the behavior of buttons MyHarmony also allows advanced configuration changes such as: adjusting a device's power settings adjusting a device's input settings adjusting device delays fine tuning how Activities control your devices when they start and stop Changing your setup with MyHarmony Follow these steps to manage your remote setup on MyHarmony 1. Login to your MyHarmony account. The Remote Gallery displays. 2. Click the Harmony Ultimate image. If your remote is not connected to Wi-Fi, you will be prompted to connect your remote to your computer to ensure that any changes made on-remote are saved back to your MyHarmony account. 3. Make the desired changes, then sync your remote. Syncing your remote After changing settings on MyHarmony, be sure to sync your remote. This will update the remote with any setup changes you have made. There are two ways to sync your remote: If your Harmony Ultimate is configured to your home's Wi-Fi network, you can wireless sync any changes made on MyHarmony with your remote without connecting it to your computer. To initiate a sync, tap the icon, tap Settings, and select Sync remote. The remote, hub, and Harmony App on your smartphone will automatically stay in sync with each other. If your Harmony Ultimate is not configured to your home's Wi-Fi network you may still make changes on either the remote or on MyHarmony; however you must connect the remote to your computer to sync these changes. Connect your Harmony Ultimate remote using the supplied USB cable and click the Sync button in 35
-
 1
1 -
2
-
3
-
4
-
5
-
6
-
7
-
8
-
9
-
10
-
11
-
12
-
13
-
14
-
15
-
16
-
17
-
18
-
19
-
20
-
21
-
22
-
23
-
24
-
25
-
26
-
27
-
28
-
29
-
 30
30 -
 31
31 -
 32
32 -
 33
33 -
 34
34 -
 35
35 -
 36
36 -
 37
37 -
 38
38 -
 39
39 -
 40
40 -
41
-
42
-
43
-
44
-
45
-
46
-
47
-
48
-
49
-
50
-
51
-
52
-
53
-
54
 |
 |
