Maytag MDB4651AWS Installation Instructions - Page 3
Installation - model
 |
View all Maytag MDB4651AWS manuals
Add to My Manuals
Save this manual to your list of manuals |
Page 3 highlights
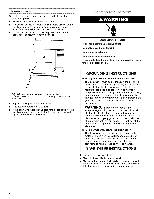
Tip Over Hazard Do not use dishwasher until completely installed. Do not push down on open door. Doing so can result in serious injury or cuts. You need to: • Slowly open dishwasher door while someone grasps the rear of the dishwasher. Remove shipping materials. Close dishwasher door. Latch the dishwasher door closed, • Observe all governing codes and ordinances, • Install this dishwasher as specified in these instructions. • Have everything you need to properly install dishwasher. • Contact a qualified installer to ensure that dishwasher is installed to meet all electrical and plumbing national and local codes and ordinances. INSTALLATIONREQUIREMENTS Gather the required tools and parts before starting installation. Read and follow the instructions provided with any tools listed here. Tools Needed • Pliers • Wood block • Phillips screwdriver • Flat-blade screwdriver • 8/8"open-end wrench • Level • ¾e" and 1¼,,nut drivers or hex sockets • Measuring tape or ruler • 10" adjustable wrench (opens to 11/8"[2.9 cm]) • Utility knife • Flashlight • Shallow pan • Bath towel • Cordless drill (new installations only) • 1/2",3/4"and 11/2"hole saw bits (new installations only) • Small tubing cutter (new installations only) • Wire stripper (new installations only) Parts Needed • 90 ° elbow fitting with 3/8" N.P.T. external threads on one end NOTE: The other end must fit your water supply line. • UL-listed/CSA-approved twist-on wire connectors sized to connect household wiring to 16-gauge wiring • Plumber's tape or pipe joint compound • Copper tubing (3/8"O.D. suggested) or flexible braided water supply line • Direct Wire Connection Only: UL-listed/CSAapproved conduit connector to fit 7/8" (2.2 cm) hole (see "Electrical Requirements") • Power SupplyCord Connection: UL-listed power supply cord kit (Part Number 4317824) marked for use with dishwashers (see "Electrical Requirements") NOTES: • Parts available for purchase in plumbing supply stores. • Check local codes. • Check existing electrical supply. See "Electrical Requirements." Parts Supplied Check that all parts are included. B A. Sound seals (on some models) (2) B. Countertop mounting screws (2) C. Mounting screws (8) D. Toekick panel seal (on some models) E. Mounting strips (2) F. Large drain hose clamp o IMPORTANT." Observe all governing codes and ordinances. Failure to meet codes and ordinances could lead to fire or electrical shock. Proper installation is your responsibility. • Grounded electrical supply required • Contact a qualified installer to ensure that the dishwasher is installed to meet all electrical and plumbing national and local codes and ordinances. • Install the dishwasher as specified in these instructions. • Have everything you need to properly install dishwasher. • Keep water lines leading to the dishwasher from freezing to avoid damage to the dishwasher. Damage from freezing is not covered by the warranty. • This dishwasher is manufactured for indoor use only. • Do not run drain lines, water lines or electrical wiring where they can interfere with or contact the dishwasher motor or legs. • The location where the dishwasher will be installed must provide clearance between motor and flooring. Motor should not touch the floor. • Do not install dishwasher over carpeted flooring.
-
 1
1 -
 2
2 -
 3
3 -
 4
4 -
 5
5 -
 6
6 -
 7
7 -
 8
8 -
 9
9 -
10
-
11
-
12
-
13
-
14
-
15
-
16
-
17
-
18
-
19
-
20
-
21
-
22
-
23
-
24
-
25
-
26
-
27
-
28
-
29
-
30
-
31
-
32
-
33
-
34
-
35
-
36
 |
 |
