Maytag MEDB700VQ Use and Care Guide - Page 19
Remove the 4 screws and 2 hinges from the dryer door., Replace the 4 screws in the same holes.
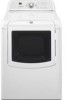 |
UPC - 883049140483
View all Maytag MEDB700VQ manuals
Add to My Manuals
Save this manual to your list of manuals |
Page 19 highlights
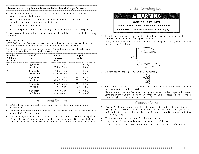
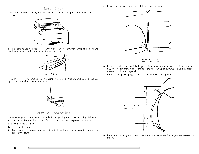
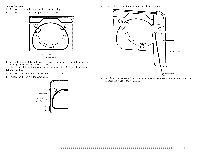
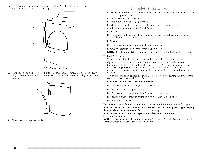
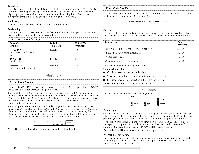
Reverse the strike 1. Remove the door strike from the dryer door opening. 2. Remove the cosmetic cover opposite the door strike. A[ / \ B 3. Remove the 4 screws from the opposite side of the door. A. Door strike B. Cosmetic cover 3. Reinstall the door strike and cosmetic cover on the opposite side of the dryer door opening from where they were removed. NOTE: Door strike and plugs must be on the same side of the dryer door opening. Reinstall the door 1. Remove the 4 screws and 2 hinges from the dryer door. 2. Replace the 4 screws in the same holes. 4o Install the 2 hinges to the front panel of the dryer using 4 screws. Use the non-slotted side to attach the hinge to the front panel. Screw oR,hinge locations --}D,_
-
 1
1 -
2
-
3
-
4
-
5
-
6
-
7
-
8
-
9
-
10
-
11
-
12
-
13
-
 14
14 -
 15
15 -
 16
16 -
 17
17 -
 18
18 -
 19
19 -
 20
20 -
 21
21 -
 22
22 -
 23
23 -
 24
24 -
25
-
26
-
27
-
28
-
29
-
30
-
31
-
32
-
33
-
34
-
35
-
36
-
37
-
38
-
39
-
40
-
41
-
42
-
43
-
44
-
45
-
46
-
47
-
48
-
49
-
50
-
51
-
52
-
53
-
54
-
55
-
56
-
57
-
58
-
59
-
60
 |
 |

Reverse the
strike
1.
Remove
the
door
strike
from
the dryer
door
opening.
2.
Remove
the
cosmetic
cover
opposite
the
door
strike.
A[
/
\
B
3.
Remove
the
4 screws
from
the opposite
side
of the
door.
A. Door
strike
B. Cosmetic
cover
3.
Reinstall
the
door
strike
and
cosmetic
cover
on the opposite
side
of the
dryer
door
opening
from
where
they
were
removed.
NOTE:
Door
strike
and
plugs
must
be on
the
same side
of the dryer
door
opening.
Reinstall
the
door
1.
Remove the 4 screws and 2 hinges from the dryer door.
2.
Replace the 4 screws in the same holes.
Screw
oR,
hinge
locations
--}D,_
4o
Install
the 2 hinges
to the
front
panel
of the dryer
using
4 screws.
Use the
non-slotted
side
to
attach
the
hinge
to the front
panel.