Maytag MER6875BA Use and Care Manual - Page 15
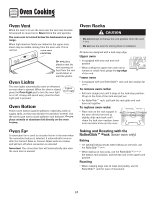
Broiling
 |
UPC - 719881178622
View all Maytag MER6875BA manuals
Add to My Manuals
Save this manual to your list of manuals |
Page 15 highlights
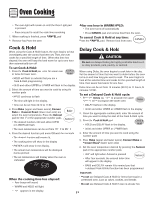
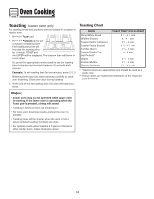
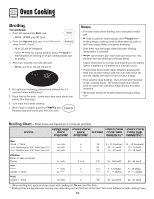
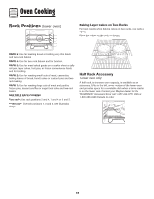
Oven Cooking Broiling To set Broil: 1. Press the appropriate Broil pad. • BROIL, UPPER and SET flash. 2. Press the Autoset pad once to set HI broil or twice to set LO broil. • HI or LO will be displayed. Select HI broil for normal broiling. Select LO broil for low-temperature broiling of longer cooking foods such as poultry. 3. After four seconds, the oven will start. • BROIL and HI or LO will remain lit. 4. For optimum browning, preheat broil element for 3-4 minutes before adding food. 5. Place food in the oven. Leave oven door open about four inches (the first stop). 6. Turn meat once while cooking. 7. When food is cooked, press the CANCEL pad. Remove food and broiler pan from the oven. Notes: • For best results when broiling, use a two-piece broiler pan. • HI broil is used for most broiling. Use LO broil when broiling longer cooking foods to allow them to cook to well done stage without excessive browning. • Broil times may be longer when the lower broiling temperature is selected. • Never cover broiler pan insert with aluminum foil. This prevents fat from draining to the pan below. • Expect broil times to increase and browning to be slightly lighter if appliance is installed on a 208-volt circuit. • If more than 30 seconds elapse between pressing the Broil pad and the Autoset pad, the oven will not be set and the display will return to the previous display. • HI is used for most broiling. Use LO broil when broiling longer cooking foods. The lower temperature allows food to cook to the well done stage without excessive browning. • Most foods should be turned halfway through broiling time. Broiling Chart - Broil times are based on a 4 minute preheat. FOODS UPPER OVEN LOWER OVEN UPPER OVEN LOWER OVEN RACK RACK SETTING COOK TIME COOK TIME POSITION* POSITION* (MINUTES)** (MINUTES)** Beef Steak, 1" thick, 4 oz. Hamburgers, 3/4" thick (up to 12) 4 oz. Hamburgers, 3/4" thick (up to 6) Chicken Bone-in, skin-on breast Pieces Fish Filets Steaks, 1" thick Pork Chops, 1" thick on rack on rack on rack on rack on rack on rack on rack 4 4 4 3 or 4 4 4 4 HI 8 - 11 (medium) 15 - 19 (medium) HI 15 - 20 (well) 15 - 19 (well) HI 12 - 16 (well) 15 - 19 (well) LO 25 - 36 (well) 28 - 39 (well) LO 8 - 12 (flaky) 8 - 13 (flaky) LO 10 - 14 (flaky) 10 - 16 (flaky) HI 18 - 24 (well) 22 - 27 (well) * When broiling fish, spray broil pan insert with cooking oil. Do not turn fish filets. ** Broiling times are approximate and may vary depending on the thickness of the food. Turn meat halfway through cooking times. 14
-
 1
1 -
2
-
3
-
4
-
5
-
6
-
7
-
8
-
9
-
 10
10 -
 11
11 -
 12
12 -
 13
13 -
 14
14 -
 15
15 -
 16
16 -
 17
17 -
 18
18 -
 19
19 -
 20
20 -
21
-
22
-
23
-
24
-
25
-
26
-
27
-
28
-
29
-
30
-
31
-
32
-
33
-
34
-
35
-
36
-
37
-
38
-
39
-
40
-
41
-
42
-
43
-
44
-
45
-
46
-
47
-
48
-
49
-
50
-
51
-
52
-
53
-
54
-
55
-
56
-
57
-
58
-
59
-
60
-
61
-
62
-
63
-
64
-
65
-
66
-
67
-
68
-
69
-
70
-
71
-
72
-
73
-
74
-
75
-
76
-
77
-
78
-
79
-
80
-
81
-
82
-
83
-
84
-
85
-
86
-
87
-
88
 |
 |
