Meade LX70 R5 5 inch Instruction Manual - Page 10
Balancing the Telescope
 |
View all Meade LX70 R5 5 inch manuals
Add to My Manuals
Save this manual to your list of manuals |
Page 10 highlights
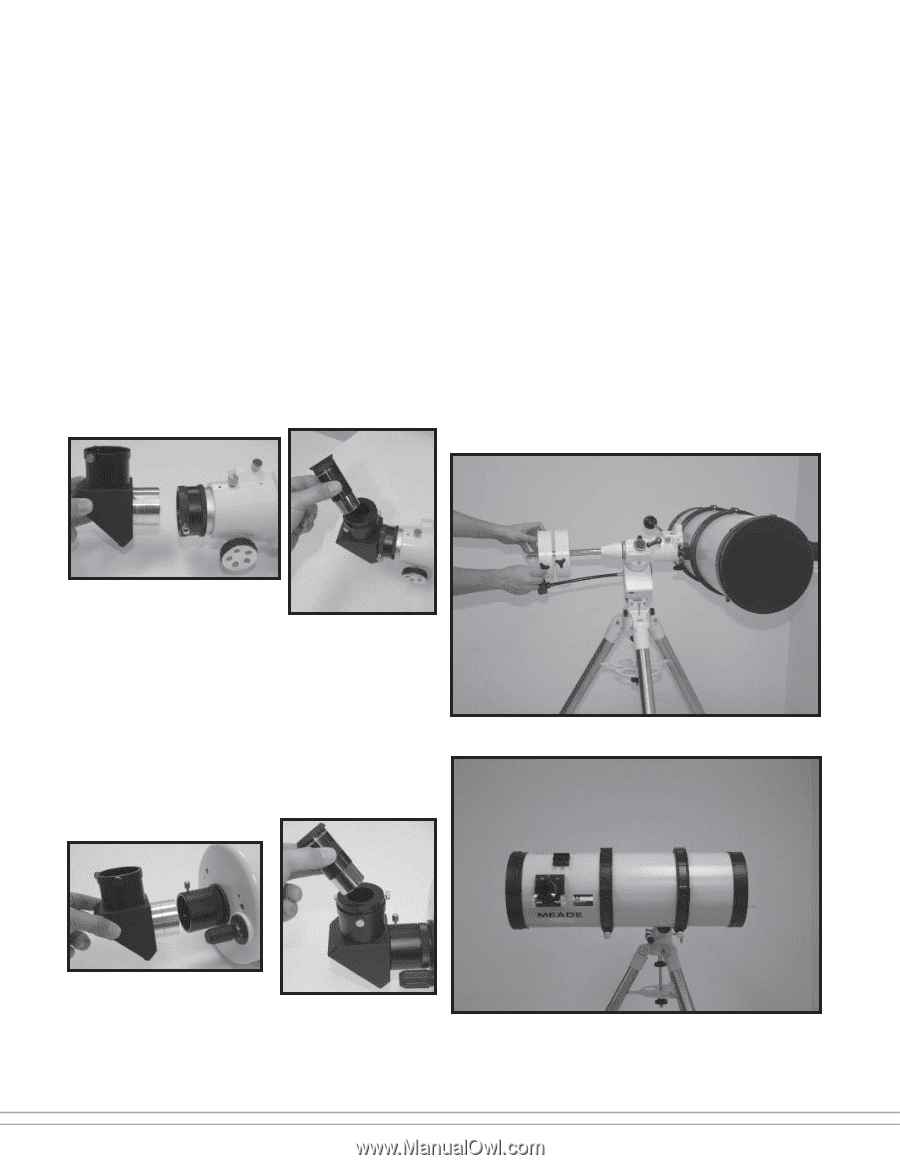
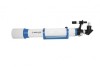
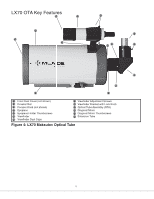
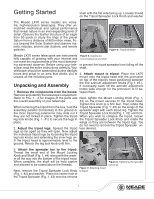
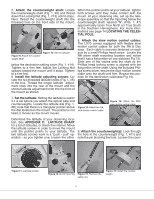
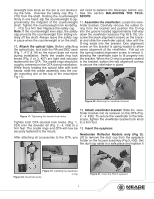
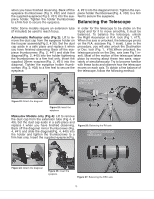
when you have finished observing. Back off the eyepiece thumbscrews (Fig 3, #32) and insert the supplied eyepiece( Fig 3. #31) into the eyepiece holder. Tighten the holder thumbscrews to a firm feel to secure the eyepiece. 4, #31) into the diagonal mirror. Tighten the eyepiece holder thumbscrews(Fig. 4, #32) to a firm feel to secure the eyepiece. Balancing the Telescope Note: Some models require an extension tube (if included) be used to reach focus. Achromatic Refractor only (Fig 2): Lift to remove the dust cap from the eyepiece holder on the focuser assembly(Fig 2, # 30). Set the dust cap aside in a safe place and replace it when you have finished observing. Back off the eyepiece thumbscrews (Fig. 2, #41) and slide the diagonal(Fig. 2, #40) into the holder tightening the thumbscrews to a firm feel only. Insert the supplied 26mm eyepiece(Fig. 2, #31) into the diagonal. Tighten the eyepiece holder thumbscrews (Fig. 2, #32) to a firm feel to secure the eyepiece. In order for the telescope to be stable on the tripod and for it to move smoothly, it must be balanced. To balance the telescope, unlock the Right Ascension or R.A. lock (Fig 1, #17). When this axis is unlocked, the telescope pivots on the R.A. axis(see Fig. 1 inset). Later in the procedure, you will also unlock the Declination or Dec. lock (Fig. 1, #18).When unlocked, the telescope pivots on the Dec. axis (see Fig 1 inset). Most of the motion of the telescope takes place by moving about these two axes, separately or simultaneously. Try to become familiar with these locks and observe how the telescope moves on each axis. To obtain a fine balance of the telescope, follow the following method: Adjust counterweights until balanced Figure 22: Attach the diagonal Figure 23: Insert the eyepiece ↔ Maksutov Models only (Fig 4): Lift to remove the dust cap from the extension tube (Fig 4, # 49). Set the dust cap aside in a safe place and replace it when you have finished observing. Back off the diagonal mirror thumbscrews (Fig. 4, #41) and slide the diagonal(Fig. 4, #40) into the holder and tighten the thumbscrews to a firm feel only. Insert the supplied eyepiece(Fig. Figure 26: Balancing the RA axis ↔ Adjust OTA or dovetail rail until balanced Figure 24: Attach the diagonal Figure 25: Insert the eyepiece Figure 27: Balancing the DEC axis. 10
-
 1
1 -
2
-
3
-
4
-
 5
5 -
 6
6 -
 7
7 -
 8
8 -
 9
9 -
 10
10 -
 11
11 -
 12
12 -
 13
13 -
 14
14 -
 15
15 -
16
-
17
-
18
-
19
-
20
-
21
-
22
-
23
-
24
-
25
-
26
-
27
-
28
 |
 |