Meade Tripod LX90-ACF 10 inch User Manual - Page 31
Advanced Autostar Features
 |
View all Meade Tripod LX90-ACF 10 inch manuals
Add to My Manuals
Save this manual to your list of manuals |
Page 31 highlights
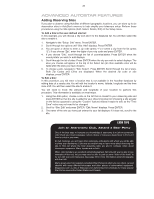
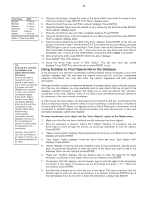
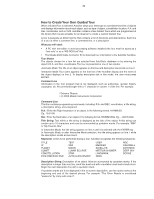
31 ADVANCED AUTOSTAR FEATURES Adding Observing Sites If you plan to observe using AutoStar at different geographic locations, you can store up to six observation sites in AutoStar's memory to help simplify your telescope setup. Perform these procedures using the Site options (Add, Select, Delete, Edit) of the Setup menu. To Add a Site to the user-defined site list: In this example, you will choose a city and add it to the database list. You will then select the site to enable it. 1. Navigate to the "Setup: Site" menu. Press ENTER, 2. Scroll through the options until "Site: Add" displays. Press ENTER. 3. You are given a choice to enter a zip code (press "1") or select a city from the list (press "2"). If you choose "Zip", enter the digits of your zip code and press ENTER. 4. If you choose "City", scroll through the list of countries/states. Press ENTER when the country/state you wish to add displays. 5. Scroll through the list of cities. Press ENTER when the city you wish to select displays. The sites you choose will appear at the top of the Select list (all other available sites will be listed after the sites you have chosen). 6. To choose a site, navigate to "Site: Select". Press ENTER. Scroll through the list of sites. Both Zip Codes and Cities are displayed. When the desired zip code or site displays, press ENTER. To Edit a Site: In this procedure, you will enter a location that is not available in the AutoStar database by editing data of a nearby site. You will edit the location's name, latitude, longitude and the time zone shift. You will then select the site to enable it. You will need to know the latitude and longitude of your location to perform this procedure. This information is available on most maps. 1. Using the Add option, choose a site on the list that is closest to your observing site and press ENTER so that the site is added to your observing sites list. Choosing a site already on the list (as opposed to using the "Custom" feature) makes it easier to edit, as the "Time Zone" value may not need to be changed. 2. Scroll to "Site: Edit" and press ENTER. "Edit: Name" displays. Press ENTER. 3. The name of the site you have just entered to your list displays; if it does not, scroll to the site. LX90 TIPS Join an Astronomy Club, Attend a Star Party One of the best ways to increase your knowledge of astronomy is to join an astronomy club. Check your local newspaper, school, library or telescope dealer/store to find out if there's a club in your area. At club meetings, you will meet other astronomy enthusiasts with whom you will be able to share your discoveries. Clubs are an excellent way to learn more about observing the sky, to find out where the best observing sites are and to compare notes about telescopes, eyepieces, filters, tripods and so forth. Often, club members are excellent astrophotographers. Not only will you be able to see examples of their art, but you may even be able to pick up some "tricks of the trade" to try out with your LX90 telescope. See page 40 for more information about photography with the LX90. Many groups also hold regularly scheduled Star Parties at which you can check out and observe with many different telescopes and other pieces of astronomical equipment. Magazines such as Sky & Telescope and Astronomy print schedules for many popular Star Parties around the United States and Canada.
-
 1
1 -
2
-
3
-
4
-
5
-
6
-
7
-
8
-
9
-
10
-
11
-
12
-
13
-
14
-
15
-
16
-
17
-
18
-
19
-
20
-
21
-
22
-
23
-
24
-
25
-
 26
26 -
 27
27 -
 28
28 -
 29
29 -
 30
30 -
 31
31 -
 32
32 -
 33
33 -
 34
34 -
 35
35 -
 36
36 -
37
-
38
-
39
-
40
-
41
-
42
-
43
-
44
-
45
-
46
-
47
-
48
-
49
-
50
-
51
-
52
-
53
-
54
-
55
-
56
-
57
-
58
-
59
-
60
 |
 |
