Memorex MI4290 User Guide - Page 7
Power Source - clock radio
 |
View all Memorex MI4290 manuals
Add to My Manuals
Save this manual to your list of manuals |
Page 7 highlights
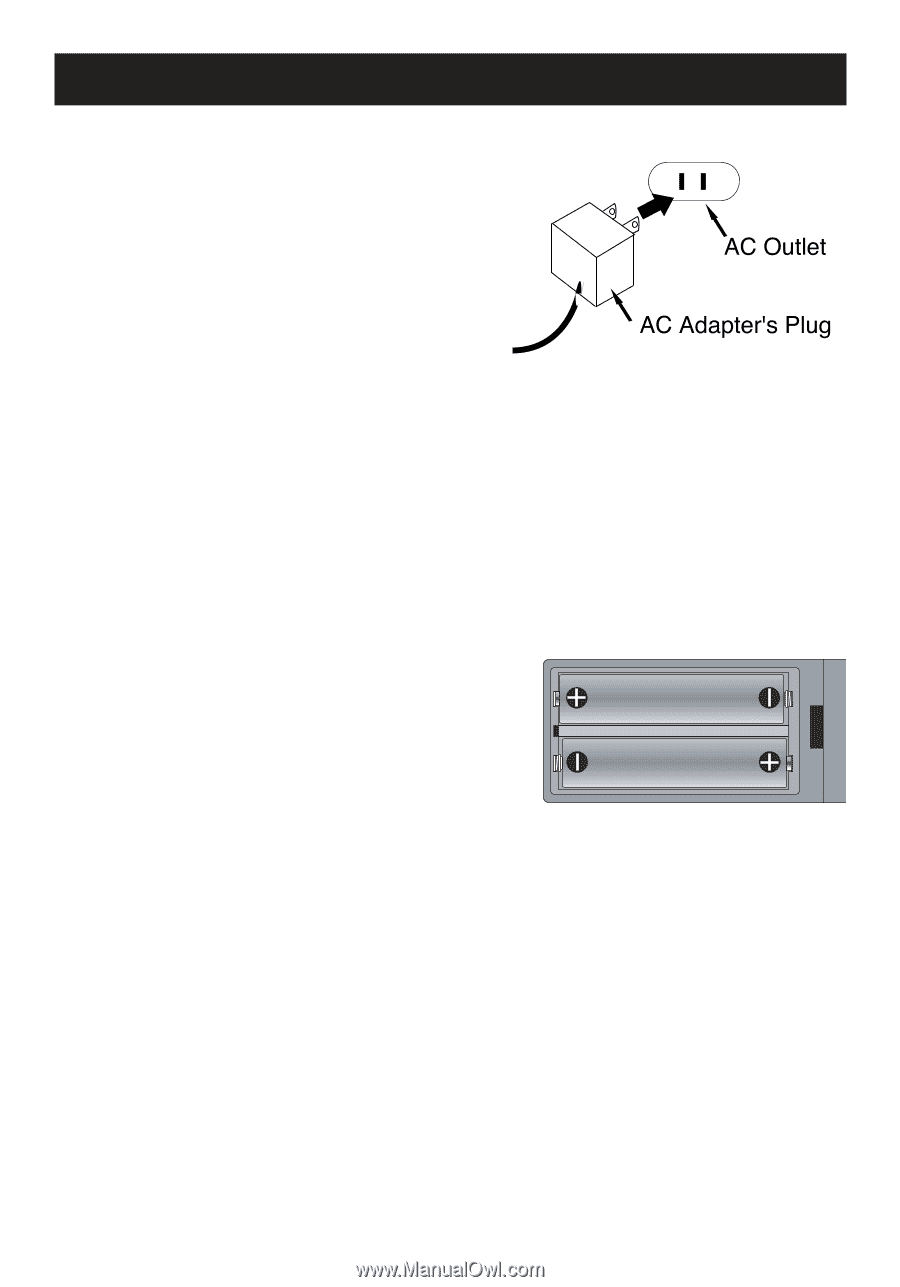
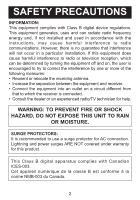
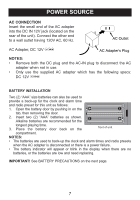
POWER SOURCE AC CONNECTION Insert the small end of the AC adapter into the DC IN 12V jack (located on the rear of the unit). Connect the other end to a wall outlet having 120V AC, 60 Hz. AC Adapter, DC 12V Z NOTES: • Remove both the DC plug and the AC-IN plug to disconnect the AC adapter when not in use. • Only use the supplied AC adapter which has the following specs: DC 12V Z BATTERY INSTALLATION Two (2) "AAA" size batteries can also be used to provide a back-up for the clock and alarm time and radio preset for this unit as follows: 1. Open the battery door by pushing in on the tab, then removing the door. 2. Insert two (2) "AAA" batteries as shown. Alkaline batteries are recommended for the longest playing time. 3. Place the battery door back on the front of unit compartment. NOTES: • The batteries are used to back-up the clock and alarm times and radio presets when the AC adapter is disconnected or there is a power failure. • The battery indicator will appear or blink in the display when there are no batteries, or the batteries are low and need replacing. IMPORTANT! See BATTERY PRECAUTIONS on the next page. 7
-
 1
1 -
 2
2 -
 3
3 -
 4
4 -
 5
5 -
 6
6 -
 7
7 -
 8
8 -
 9
9 -
 10
10 -
 11
11 -
 12
12 -
13
-
14
-
15
-
16
-
17
-
18
-
19
-
20
-
21
-
22
 |
 |