Miele KF 1911 Vi Operating and Installation manual - Page 59
Installing the appliance 59, Before you begin 59
 |
View all Miele KF 1911 Vi manuals
Add to My Manuals
Save this manual to your list of manuals |
Page 59 highlights
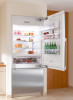
Installing the appliance Before you begin Read these instructions completely and carefully. Have the appliance installed by a qualified technician, according to the enclosed installation instructions. To reduce the risk of injury or damage to the product, two people should be used for installation. These installation instructions are intended for use by qualified installers. In addition to these instructions, the appliance must be installed in accordance with all local codes. In the absence of a local code, the following should be used: - In the USA, the National Electric Code, ANSI/NFPA 70 - latest edition/State and Municipal codes and/or local codes. - In Canada, the Canadian Electric code C22.1 - latest edition/Provincial and Municipal codes and/or local codes. Tools needed for installation - Cordless screwdriver - Torx screwdriver - Hammer drill - Wood drills in different sizes - Hammer - Rachet (5/16" / 8 mm) - Adhesive tape - Multi-grip pliers - Level - Tape measure - Square When fastening the cabinet to the wall behind it (see "Installing the appliance") use: - suitable plugs/screws depending on the type of wall. - several mounting brackets, if required. Other - Stepladder - Dolly, hand truck - Wooden beam (cross section min. 3" x 4" [75 mm x 100 mm] as an alternative tilt protection, length depends on the width of the installation cavity) - Wood screws in different sizes Optional accessories - "Merging Kit" for side-by-side installation - Front panel gap kit - RemoteVision module for wireless monitoring 59
-
 1
1 -
2
-
3
-
4
-
5
-
6
-
7
-
8
-
9
-
10
-
11
-
12
-
13
-
14
-
15
-
16
-
17
-
18
-
19
-
20
-
21
-
22
-
23
-
24
-
25
-
26
-
27
-
28
-
29
-
30
-
31
-
32
-
33
-
34
-
35
-
36
-
37
-
38
-
39
-
40
-
41
-
42
-
43
-
44
-
45
-
46
-
47
-
48
-
49
-
50
-
51
-
52
-
53
-
 54
54 -
 55
55 -
 56
56 -
 57
57 -
 58
58 -
 59
59 -
 60
60 -
 61
61 -
 62
62 -
 63
63 -
 64
64 -
65
-
66
-
67
-
68
-
69
-
70
-
71
-
72
-
73
-
74
-
75
-
76
-
77
-
78
-
79
-
80
-
81
-
82
-
83
-
84
 |
 |
