NEC MD322C8 Users Manual - Page 13
Flexible Arm Installation, Remove Monitor Stand for Mounting, Mount Flexible arm, S.1
 |
View all NEC MD322C8 manuals
Add to My Manuals
Save this manual to your list of manuals |
Page 13 highlights
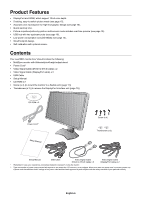
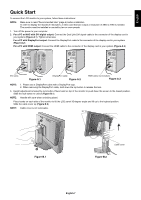
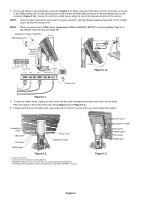
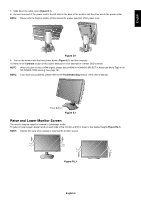
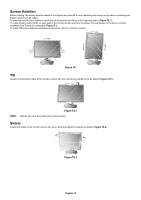
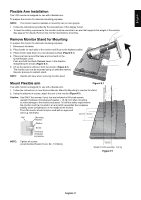
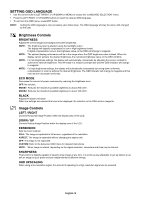
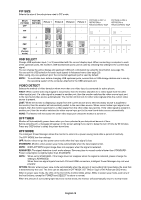
English Flexible Arm Installation This LCD monitor is designed for use with a flexible arm. To prepare the monitor for alternate mounting purposes: NOTE: The monitor must be installed or moved by two or more people. • Follow the instructions provided by the manufacturer of the display mount. • To meet the safety requirements, the monitor must be mounted to an arm that supports the weight of the monitor. See page 27 for details. Remove the monitor stand before mounting. Remove Monitor Stand for Mounting To prepare the monitor for alternate mounting purposes: 1. Disconnect all cables. 2. Place hands on each side of the monitor and lift up to the highest position. 3. Place monitor face down on a non-abrasive surface (Figure S.1). 4. Place one hand around the base and one hand on the Quick Release Lever. Push and hold the Quick Release Lever in the direction indicated by the arrows (Figure S.1). 5. Lift up the stand to unhook it from the monitor (Figure S.1). The monitor can now be mounted using an alternate method. Reverse process to reattach stand. NOTE: Handle with care when removing monitor stand. Mount Flexible arm Figure S.1 This LCD monitor is designed for use with a flexible arm. 1. Follow the instructions on how Remove Monitor Stand for Mounting to remove the stand. 2. Using the attached 4 screws, attach the arm to the monitor (Figure F.1). Caution: Use ONLY the screws (4 pcs) that are included or M4 sized screws (Length: thickness of bracket and washer + 10-12 mm) when mounting to avoid damage to the monitor and stand. To fulfil the safety requirements the monitor must be mounted to an arm which guaranties the necessary stability under consideration of the weight of the monitor. The LCD monitor should only be used with an approved arm (e.g. GS mark). 200 mm 100 mm Unit Mounting Bracket Washer 10-12 mm Screw Thickness of bracket and washer NOTE: Tighten all screws. (recommended Fasten Force: 98 - 137N•cm) 100 mm Weight of LCD assembly: 14.2 kg Figure F.1 English-11
-
 1
1 -
2
-
3
-
4
-
5
-
6
-
7
-
 8
8 -
 9
9 -
 10
10 -
 11
11 -
 12
12 -
 13
13 -
 14
14 -
 15
15 -
 16
16 -
 17
17 -
 18
18 -
19
-
20
-
21
-
22
-
23
-
24
-
25
-
26
-
27
-
28
-
29
-
30
-
31
-
32
-
33
-
34
-
35
-
36
-
37
-
38
 |
 |
