NEC MD322C8 Users Manual - Page 14
Detaching the DisplayPort interface unit, G.1
 |
View all NEC MD322C8 manuals
Add to My Manuals
Save this manual to your list of manuals |
Page 14 highlights
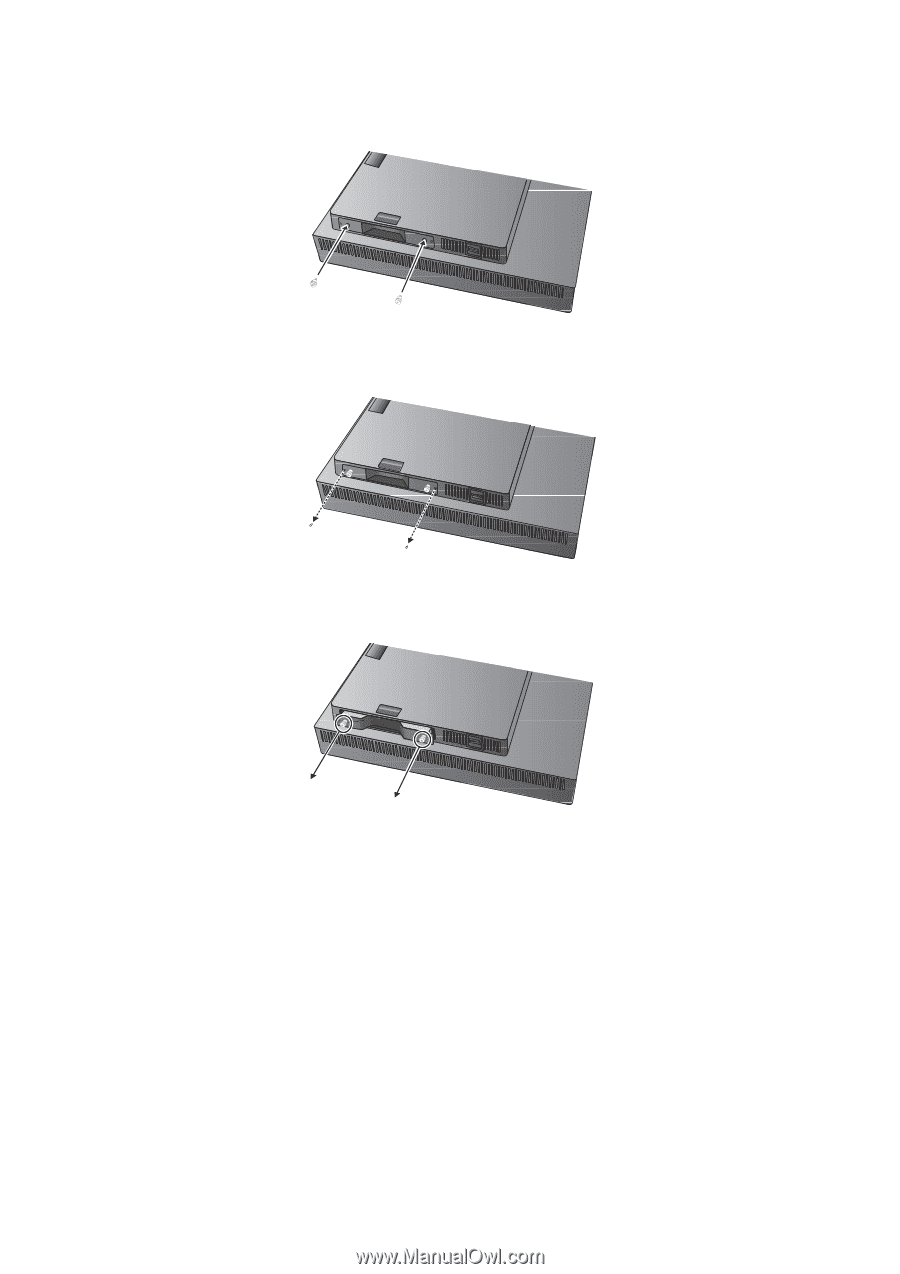
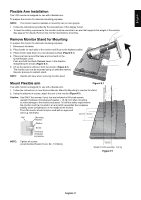
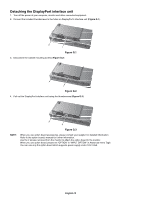
Detaching the DisplayPort interface unit 1. Turn off the power of your computer, monitor and other connected equipment. 2. Connect the included thumbscrews to the holes on DisplayPort's interface unit (Figure G.1). Figure G.1 3. Disconnect the outside mounting screws (Figure G.2). Figure G.2 4. Pull out the DisplayPort interface unit using the thumbscrews (Figure G.3). Figure G.3 NOTE: When you use option board accessories, please contact your supplier for detailed information. Refer to the option board's manual for further information. Use the 2 screws removed from the monitor to attach the option board to the monitor. When you use option board, please set "OPTION" in "INPUT OPTION" in Advanced menu Tag9. You can use only the option board which supports power supply under 16V/1.25A. English-12
-
 1
1 -
2
-
3
-
4
-
5
-
6
-
7
-
8
-
 9
9 -
 10
10 -
 11
11 -
 12
12 -
 13
13 -
 14
14 -
 15
15 -
 16
16 -
 17
17 -
 18
18 -
 19
19 -
20
-
21
-
22
-
23
-
24
-
25
-
26
-
27
-
28
-
29
-
30
-
31
-
32
-
33
-
34
-
35
-
36
-
37
-
38
 |
 |