Nady MHT-16 Manual - Page 13
Operating the Transmitter
 |
View all Nady MHT-16 manuals
Add to My Manuals
Save this manual to your list of manuals |
Page 13 highlights
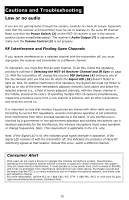
The transmitters (LK-16 and WH-16) have a fixed input level. The Audio Level is factory set to the optimal setting for normal operation. The audio levels should be obtained via the receiver volume control only. (See Connecting Audio Output section on page 11). Programming The Transmitter to the Selected Channel Before beginning operation, the transmitter must be synchronized with the selected frequency from the receiver using the IR Receptor/ Sensor Window (22, 31, 46 or 56) on the transmitter and the IR Sync Window (1) on the receiver (see Selecting the MGT-16 Receiver Channel and IR Sync on page 10). After first turning the transmitter on (or off and then on again if already on), begin programming by holding the transmitter's IR Receptor/ Sensor Window about 6-12" from the receiver's IR Synch Window. Press the IR Sync Button (14) on the receiver once to begin the IR sync download of the selected frequency to the transmitter. Upon successful data transfer (usually in less than two seconds) the transmitter will transmit a radio signal on the same channel (frequency) as the receiver. The Signal LED (12) on the receiver will light up, indicating that the link is completed. If all the necessary steps noted above are not taken during the 10 seconds of active data transfer, the receiver and the transmitter units will not link and the transmitter's previously programmed channel remains unchanged. Operating the Transmitter (MT-16A/R, MH-16, LK-16, or WH-16) During normal operation with the unit powered on, the MT-16A/R transmitter should be fully inserted into the instrument (guitar, bass, etc.), or the MH-16 attached to the sax, or th LK-16 attached to the hard-wired mic or the WH-16 placed on the head. When ready to play, slide the Power Switch (17, 35, 40, or 48) to ON position in the direction of the arrow. The receiver Signal LED (10) should light up if system is properly synchronized. Adjust the volume on the receiver (see Connecting Audio Output on page 11) for unity gain (one-to- one) with a hardwired cord. Or, (MT-16A/R, MH-16 only) select up to an added 4-5dB boost by adjusting the receiver volume to maximum for normal use with guitars and bass guitars. A listening test prior to use will determine which receiver volume and transmitter input pad settings are best for your application. To mute/un-mute (attenuate) the audio during use, set the receiver power switch to the second (Mute) position. Or, just turn off the transmitter with the power switch. The signal LED will turn off and the audio will be muted (Off). When ready to play again, slide the receiver's power switch to the third (On) position. Or, just turn on the transmitter. When programming is finished, close the battery compartment door, ensuring that it latches. The transmitter is now ready for use. Note: Manually matching the transmitter frequency without the receiver is not possible. For proper operation, the transmitter must have the same channel as selected on the receiver. Only one transmitter can be IR synced and work with one receiver, but one transmitter can work with many receivers. 13
-
 1
1 -
2
-
3
-
4
-
5
-
6
-
7
-
 8
8 -
 9
9 -
 10
10 -
 11
11 -
 12
12 -
 13
13 -
 14
14 -
 15
15 -
 16
16 -
 17
17 -
 18
18 -
19
-
20
 |
 |
