Netgear PS111W PS111W Installation Guide - Page 10
Install and Set Up, The FirstGear Print Server Program is now installed on your PC. - setup
 |
UPC - 606449023459
View all Netgear PS111W manuals
Add to My Manuals
Save this manual to your list of manuals |
Page 10 highlights
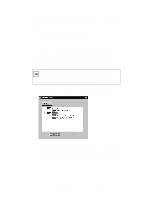
5 Install and Set Up If you are using Windows 95, Windows 98, or Windows NT, this section provides you with information about how to set up each Windows PC so that it can recognize the print server. Before proceeding with these instructions, make sure you have assigned a name to your workgroup on your PC. Note: Installation and setup of the NETGEAR software is required on each PC needing access to the printers that will be attached to the print server. Install the FirstGear for Print Server: Windows User FirstGear, a software program used with NETGEAR products for quick and easy installation, is provided on the CD-ROM included in your package contents. To install FirstGear on your PC: 1. Turn the power on to your PC. 2. Insert the NETGEAR Resource CD-ROM. 3. The installation process will start with the display of the NETGEAR window. If it does not, click on Start > Run > and type in "Install.exe" at the prompt (for example, "D:Install.exe") to start the installation process. 4. Click on "Next" when the FirstGear window opens. 5. Choose "User PC Installation," and click on "Next." Note: NETGEAR strongly recommends that you exit all Windows programs before running the Setup program. 6. Click on "Next" when the "NETGEAR Print Server Software Installation" window opens. 7. Click on "Next" to install the NETGEAR Print Server program in the Program Files folder. 8. Click on "Next" to title the program folder "FirstGear for Print Server" (the default name). You may also type in a unique name for the print server folder. Verify that the information on the screen is correct. 9. Click on "Finish" when the "Setup Complete" window opens. The FirstGear Print Server Program is now installed on your PC. Model PS104/PS105/PS110 Print Server Installation Guide
-
 1
1 -
2
-
3
-
4
-
 5
5 -
 6
6 -
 7
7 -
 8
8 -
 9
9 -
 10
10 -
 11
11 -
 12
12 -
 13
13 -
 14
14 -
 15
15 -
16
-
17
 |
 |
