Netgear PS111W PS111W Installation Guide - Page 9
Using the BNC Network Port (Model PS105), 4. Verify Power - problems
 |
UPC - 606449023459
View all Netgear PS111W manuals
Add to My Manuals
Save this manual to your list of manuals |
Page 9 highlights
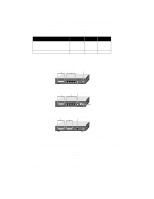
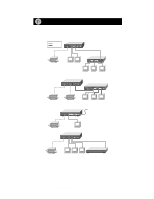
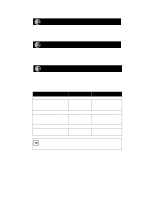
Using the BNC Network Port (Model PS105) The BNC-T connector included in the package contents must be used with thin coaxial cable for a 10BASE2 connection to other network devices that have a BNC port. To terminate the connection on the last device in the network segment, you must use the BNC terminator (also included in the package contents). Ethernet specifications limit the segment length of coaxial cable to 185 m, the maximum distance between nodes to 0.5 m, and the maximum number of nodes per segment to 30. Make sure the cable meets the specifications as outlined in Installation and Reference for the Model PS104/PS105/PS110 Print Server on the PS100 Series Print Server Resource CD. Verify Power Connect the power adapter first to the power receptacle on the rear panel of the print server and then to the power outlet on the wall. When power has been applied to the print server: • The green Pwr (power) LED on the front panel is on. • On the Model PS104 and Model PS105 print servers, the green Link/Rx LED on each connected network port is on. • On the Model PS110 Print Server, the Link LED on the connected network port is on. • The green Link/Act LED on the connected PRINTER, PRINTER 1, or PRINTER 2 port is on. If you find any problems, refer to "Troubleshooting Information." Make sure the network interface cards installed in the workstations are in working condition and the software driver has been installed on the cards. If required, verify the integrity of the print server by resetting it. Turn power to the print server off and then back on. If the problem continues and you have completed all the preceding diagnoses, contact NETGEAR Customer Support. For the telephone number of the representative in your area, see the Support Information Card that is included in your package contents. Model PS104/PS105/PS110 Print Server Installation Guide
-
 1
1 -
2
-
3
-
 4
4 -
 5
5 -
 6
6 -
 7
7 -
 8
8 -
 9
9 -
 10
10 -
 11
11 -
 12
12 -
 13
13 -
 14
14 -
15
-
16
-
17
 |
 |
