Netgear PS111W PS111W Installation Guide - Page 11
Setting Up Your PC to Recognize the Print Server - windows 7
 |
UPC - 606449023459
View all Netgear PS111W manuals
Add to My Manuals
Save this manual to your list of manuals |
Page 11 highlights
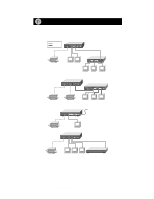
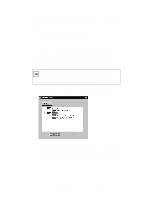
Setting Up Your PC to Recognize the Print Server You must set up each PC that will print to the print server. Before proceeding, verify that: • The print cable is connected to the printer port. • The AC adapter is plugged into the wall socket. • The Ethernet cable is plugged into the LAN. To set up each PC: 1. Double-click on the desktop icon you named in step 8 of the previous section. 2. Click on "Setup." 3. Click on "OK" after checking that the print server and printer connected to it are powered on and that the cables are properly connected. Note: If the cables are not properly connected, your PC screen will appear empty when the "Printer Select" window appears. If this is the case, check on the cable connections and hit the "Refresh" button, which will initiate the PC browse again for a port. 4. Click on the printer port you want to use with the print server, and click on "Add." 5. Click on "No" when asked if there is an Epson Stylus COLOR printer attached to the port, and continue on to step 6. If you do have an Epson Stylus COLOR printer (or plan to install one), click on "Yes." You must now disable the Epson printer. To disable, start the Epson Spool Manager from the Program Files menu. Select "Queue Setup," click on "Use Print Manager For This Port," and click on "OK" to exit. Model PS104/PS105/PS110 Print Server Installation Guide
-
 1
1 -
2
-
3
-
4
-
5
-
 6
6 -
 7
7 -
 8
8 -
 9
9 -
 10
10 -
 11
11 -
 12
12 -
 13
13 -
 14
14 -
 15
15 -
 16
16 -
17
 |
 |
