Netgear PS111W PS111W Installation Guide - Page 13
Complete the Setup Process (Windows 95/98 and NT), Troubleshooting
 |
UPC - 606449023459
View all Netgear PS111W manuals
Add to My Manuals
Save this manual to your list of manuals |
Page 13 highlights
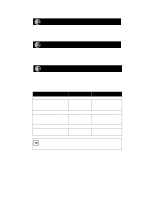
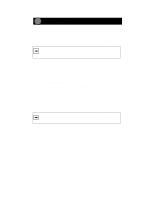
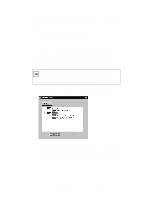
Complete the Setup Process (Windows 95/98 and NT) 1. Select "Yes" when asked to print a test page, and click on "Finish." 2. Click on "End" in the "Add Port" screen to complete the setup process. You are now ready to use the printer attached to your print server. Troubleshooting Problem When using the FirstGear Setup Program to browse the network from the network administrator's PC, the print server cannot be seen. The print server is not listed when you run the FirstGear For Print Server Setup program. You do not know what network protocols are installed on your PC. When printing using some software applications (for example, PowerPoint), it takes an extremely long time and the printout is incorrect. Solution Because either a hardware or software problem could prevent you from seeing the print server from the managing station, make sure that: • There is a proper link established between the print server and the hub or workstation. If the LINK LED is on, the link is good. • You use proper cables. With 10BASE-T connections, you can use Category 3, 4, or 5 cables. With 100BASE-TX connections, you can use only Category 5 cables. With 10BASE-2 connections through the BNC port on the Model PS105, make sure the cable meets the specifications as outlined in Installation and Reference for the Model PS104/ PS105/PS110 Print Server on the PS100 Series Print Server Resource CD. • The NetBEUI protocol is installed in the PC. By default, the FirstGear Setup Program uses the NetBEUI protocol to search for print servers connected on the same network as the network administrator's PC. Click on the "Protocol" button on the main screen to make sure that NetBEUI is selected. • Check the connections to the print server, and ensure that it is ON. • If your LAN has TCP/IP ONLY, and does not have a DHCP server, the print server will not be listed. You must use the IPSetup program to assign an IP address to the print server. • The IPSetup program is installed with the ADMIN installation. To check or change your network protocols: • Navigate to the Network Properties screen by choosing Start>Settings>Control Panel>Network. The "Configuration" tab of the Network Properties screen will appear. • Protocols that are installed are listed. • To add a protocol, select Add>Protocol>Microsoft and then select the chosen protocol. • For TCP/IP, the Properties button allows you to set the IP address of your PC. The printer is configured to start printing after the first page is spooled. To change this setting: • Double-click on "My Computer," double-click on "Control Panel," double-click on "Printers," and click on your printer. With your printer highlighted, click the right mouse button and click on "Properties." Click on the "Details" tab and then click on "Spool Settings." When the "Details" window opens, choose "Start printing after last page is spooled" and click on "OK." Model PS104/PS105/PS110 Print Server Installation Guide
-
 1
1 -
2
-
3
-
4
-
5
-
6
-
7
-
 8
8 -
 9
9 -
 10
10 -
 11
11 -
 12
12 -
 13
13 -
 14
14 -
 15
15 -
 16
16 -
 17
17
 |
 |
