Netgear R6220 User Manual - Page 118
Wireless, Region, Enable SSID Broadcast, Name SSID, Channel, Apply, In some regions
 |
View all Netgear R6220 manuals
Add to My Manuals
Save this manual to your list of manuals |
Page 118 highlights
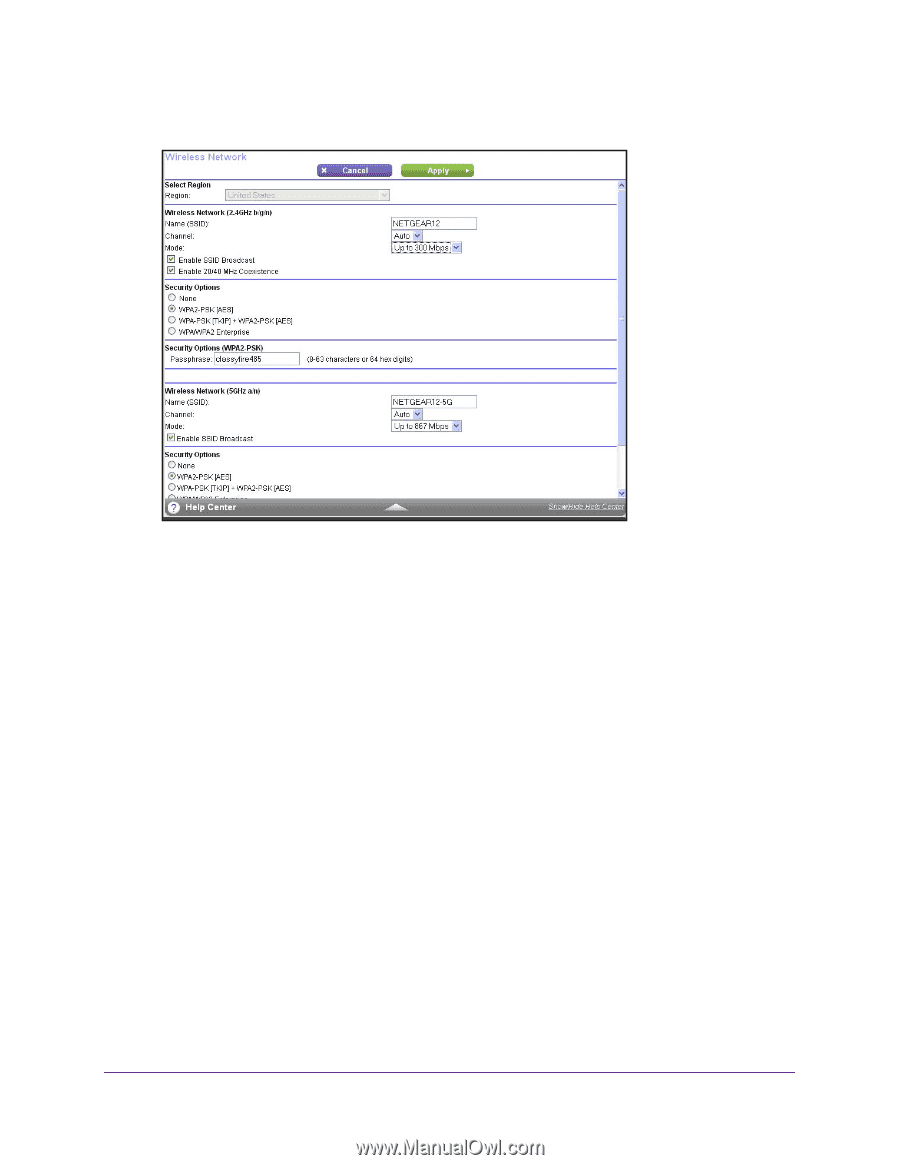
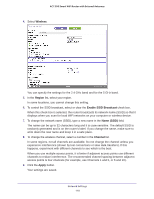
AC1200 Smart WiFi Router with External Antennas 4. Select Wireless. You can specify the settings for the 2.4 GHz band and for the 5 GHz band. 5. In the Region list, select your region. In some locations, you cannot change this setting. 6. To control the SSID broadcast, select or clear the Enable SSID Broadcast check box. When this check box is selected, the router broadcasts its network name (SSID) so that it displays when you scan for local WiFi networks on your computer or wireless device. 7. To change the network name (SSID), type a new name in the Name (SSID) field. The name can be up to 32 characters long and it is case-sensitive. The default SSID is randomly generated and is on the router's label. If you change the name, make sure to write down the new name and keep it in a safe place. 8. To change the wireless channel, select a number in the Channel list. In some regions, not all channels are available. Do not change the channel unless you experience interference (shown by lost connections or slow data transfers). If this happens, experiment with different channels to see which is the best. When you use multiple access points, it is better if adjacent access points use different channels to reduce interference. The recommended channel spacing between adjacent access points is four channels (for example, use Channels 1 and 5, or 6 and 10). 9. Click the Apply button. Your settings are saved. Network Settings 118
-
 1
1 -
2
-
3
-
4
-
5
-
6
-
7
-
8
-
9
-
10
-
11
-
12
-
13
-
14
-
15
-
16
-
17
-
18
-
19
-
20
-
21
-
22
-
23
-
24
-
25
-
26
-
27
-
28
-
29
-
30
-
31
-
32
-
33
-
34
-
35
-
36
-
37
-
38
-
39
-
40
-
41
-
42
-
43
-
44
-
45
-
46
-
47
-
48
-
49
-
50
-
51
-
52
-
53
-
54
-
55
-
56
-
57
-
58
-
59
-
60
-
61
-
62
-
63
-
64
-
65
-
66
-
67
-
68
-
69
-
70
-
71
-
72
-
73
-
74
-
75
-
76
-
77
-
78
-
79
-
80
-
81
-
82
-
83
-
84
-
85
-
86
-
87
-
88
-
89
-
90
-
91
-
92
-
93
-
94
-
95
-
96
-
97
-
98
-
99
-
100
-
101
-
102
-
103
-
104
-
105
-
106
-
107
-
108
-
109
-
110
-
111
-
112
-
 113
113 -
 114
114 -
 115
115 -
 116
116 -
 117
117 -
 118
118 -
 119
119 -
 120
120 -
 121
121 -
 122
122 -
 123
123 -
124
-
125
-
126
-
127
-
128
-
129
-
130
-
131
-
132
-
133
-
134
-
135
-
136
-
137
-
138
-
139
-
140
-
141
-
142
-
143
-
144
-
145
-
146
-
147
-
148
-
149
-
150
-
151
-
152
-
153
-
154
-
155
-
156
-
157
-
158
-
159
-
160
 |
 |