Netgear RN528X00 Hardware Manual - Page 156
Netgear Eda 500
 |
View all Netgear RN528X00 manuals
Add to My Manuals
Save this manual to your list of manuals |
Page 156 highlights
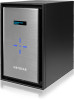
NETGEAR EDA 500 20 This chapter provides an overview of the physical features of the EDA 500 and includes the following sections: • Front and Side Panels on page 157 • Drive Bays on page 157 • Rear Panel on page 158 • Status Information on page 159 • Power On and Shut Down on page 160 Note The EDA 500 disk trays are slightly different from the standard trays. Use only EDA 500 disk trays with the EDA 500. For more information about the EDA 500 disk trays, see EDA 500 Disk Tray on page 164. A ReadyNAS cannot boot using the disks in an EDA 500. All disks in a RAID volume must be either in a ReadyNAS or in an EDA 500. A RAID volume cannot combine disks in a ReadyNAS with disks in an EDA 500. You can add an EDA 500 to a ReadyNAS while the ReadyNAS is running, but you cannot remove the EDA while the ReadyNAS is running. You can add and remove disks while an EDA 500 is in operation (hot swap). If an added disk has data on it, the data shows as an inactive volume. You need to destroy inactive volumes, which destroys all data in the volume, and create new volumes, before the space is available for use by the ReadyNAS. 156
-
 1
1 -
2
-
3
-
4
-
5
-
6
-
7
-
8
-
9
-
10
-
11
-
12
-
13
-
14
-
15
-
16
-
17
-
18
-
19
-
20
-
21
-
22
-
23
-
24
-
25
-
26
-
27
-
28
-
29
-
30
-
31
-
32
-
33
-
34
-
35
-
36
-
37
-
38
-
39
-
40
-
41
-
42
-
43
-
44
-
45
-
46
-
47
-
48
-
49
-
50
-
51
-
52
-
53
-
54
-
55
-
56
-
57
-
58
-
59
-
60
-
61
-
62
-
63
-
64
-
65
-
66
-
67
-
68
-
69
-
70
-
71
-
72
-
73
-
74
-
75
-
76
-
77
-
78
-
79
-
80
-
81
-
82
-
83
-
84
-
85
-
86
-
87
-
88
-
89
-
90
-
91
-
92
-
93
-
94
-
95
-
96
-
97
-
98
-
99
-
100
-
101
-
102
-
103
-
104
-
105
-
106
-
107
-
108
-
109
-
110
-
111
-
112
-
113
-
114
-
115
-
116
-
117
-
118
-
119
-
120
-
121
-
122
-
123
-
124
-
125
-
126
-
127
-
128
-
129
-
130
-
131
-
132
-
133
-
134
-
135
-
136
-
137
-
138
-
139
-
140
-
141
-
142
-
143
-
144
-
145
-
146
-
147
-
148
-
149
-
150
-
 151
151 -
 152
152 -
 153
153 -
 154
154 -
 155
155 -
 156
156 -
 157
157 -
 158
158 -
 159
159 -
 160
160 -
 161
161 -
162
-
163
-
164
-
165
-
166
-
167
-
168
-
169
-
170
-
171
-
172
-
173
-
174
-
175
-
176
-
177
-
178
-
179
-
180
-
181
-
182
-
183
-
184
-
185
-
186
-
187
-
188
-
189
-
190
-
191
-
192
-
193
-
194
-
195
-
196
-
197
-
198
-
199
-
200
-
201
-
202
-
203
-
204
-
205
-
206
-
207
-
208
-
209
-
210
-
211
-
212
-
213
 |
 |
