Netgear XE104 XE104 User Guide - Page 23
Set Your Network Password, Install, Finish
 |
UPC - 606449041217
View all Netgear XE104 manuals
Add to My Manuals
Save this manual to your list of manuals |
Page 23 highlights
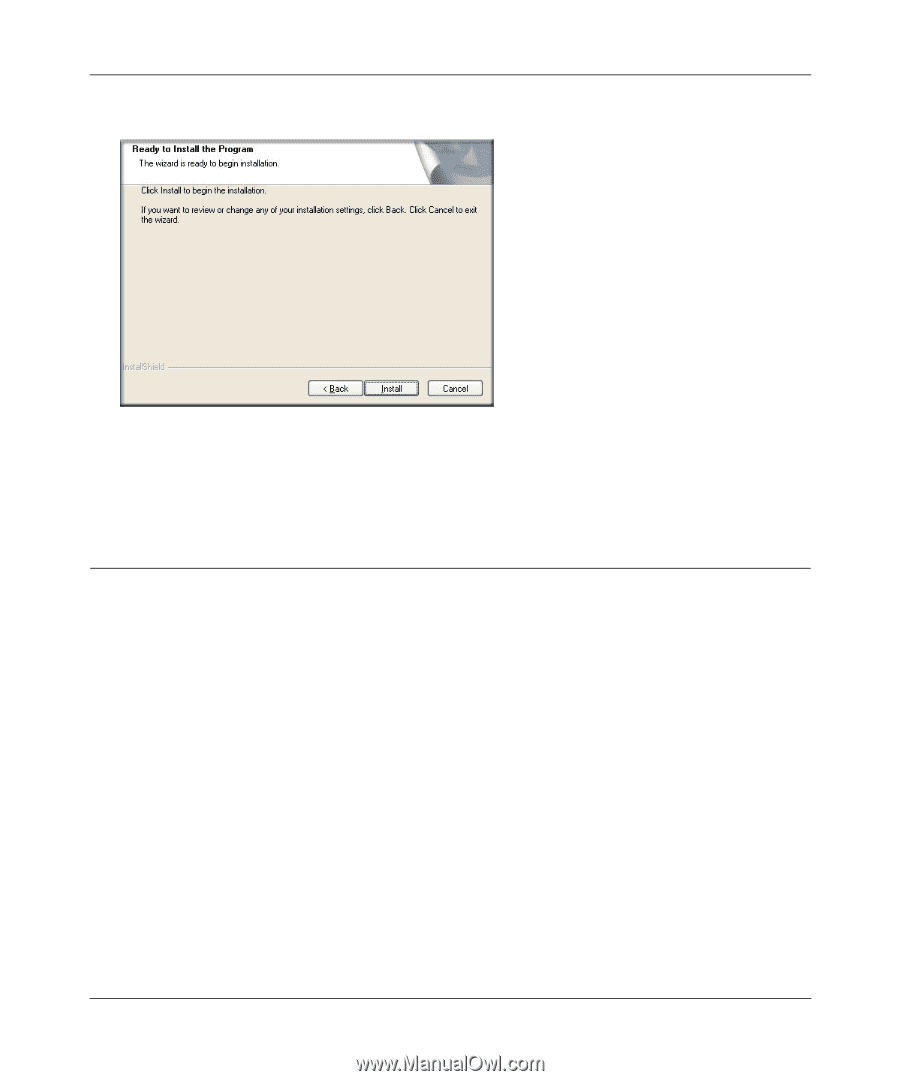
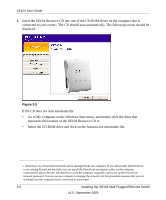
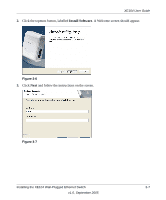
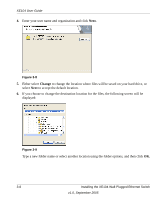
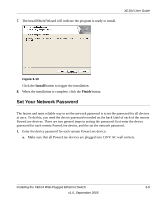
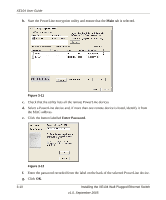
XE104 User Guide 7. The InstallShield Wizard will indicate the program is ready to install. Figure 3-10 Click the Install button to trigger the installation. 8. When the installation is complete, click the Finish button. Set Your Network Password The fastest and most reliable way to set the network password is to set the password for all devices at once. To do this, you need the device password recorded on the back label of each of the remote PowerLine devices. There are two general steps to setting the password: first enter the device password for each remote PowerLine device, and the set the network password. 1. Enter the device password for each remote PowerLine device: a. Make sure that all PowerLine devices are plugged into 110 V AC wall sockets. Installing the XE104 Wall-Plugged Ethernet Switch 3-9 v1.0, September 2005
-
 1
1 -
2
-
3
-
4
-
5
-
6
-
7
-
8
-
9
-
10
-
11
-
12
-
13
-
14
-
15
-
16
-
17
-
 18
18 -
 19
19 -
 20
20 -
 21
21 -
 22
22 -
 23
23 -
 24
24 -
 25
25 -
 26
26 -
 27
27 -
 28
28
 |
 |