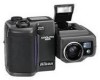
Nikon 25047 User Manual
Nikon 25047 - Coolpix 995 Digital Camera Manual
 |
UPC - 018208250479
View all Nikon 25047 manuals
Add to My Manuals
Save this manual to your list of manuals |
Nikon 25047 manual content summary:
- Nikon 25047 | User Manual - Page 1
The Nikon Guide to Digital Photography with the DIGITAL CAMERA E - Nikon 25047 | User Manual - Page 2
The symbols listed below are used in this guide and in other documentation to indicate warnings and your Nikon product. Warnings To prevent injury, observe the following warnings when using your Nikon battery, take the equipment to a Nikonauthorized service center for inspection. Do not use in - Nikon 25047 | User Manual - Page 3
the camera. 4 CD-ROMs The CD-ROMs on which the software and manuals are distributed should not be played back on audio CD equipment. Playing CD- following precautions to ensure that you continue to get the most from your Nikon product. Keep dry This product is not waterproof, and may malfunction if - Nikon 25047 | User Manual - Page 4
battery tends to decrease. When taking pictures outside in cold weather, keep a warm spare battery on hand. Should the and used in accordance with the instructions, may cause harmful interference to radio that are not expressly approved by Nikon Corporation may void the user's authority to - Nikon 25047 | User Manual - Page 5
Systems Inc. Zip is a registered trademark of Iomega Corporation in the U.S. and other countries. All other trade names mentioned in this manual or the other documentation provided with your Nikon product are trademarks or registered trademarks of their respective holders. 9 Before Using the Camera - Nikon 25047 | User Manual - Page 6
representative. http://www.nikon-image.com/eng/ 10 About This Manual This manual is organized in a progressive fashion from basic operations to more advanced operations so you get to know the camera better and better as you operate it following the instructions. Before Using the Camera Preparation - Nikon 25047 | User Manual - Page 7
10 About This Manual 11 Nomenclature 14-17 Quick Guide 18-21 Menu Guide: Shooting Mode 22-23 Menu Guide: Shooting Mode 24-25 Menu Guide: ˘ Playback Operating Conditions 164 Caring for Your Camera 165 Troubleshooting 166-167 Error Messages 168-171 Specifications 172-175 Index ...176- - Nikon 25047 | User Manual - Page 8
connector 16 USB connector Speedlight up Flash sync sensor Photocell 17 Speedlight lock-release lever p. 50 18 Built-in Speedlight p. 50 19 Focus mode/Manual focus/Delete button p. 61/81/77 20 Flash mode/Sensitivity/Thumbnail button p. 69/72/55 21 Image quality/Image size button p. 58/59 22 - Nikon 25047 | User Manual - Page 9
11 18 19 factor p. 63 12 20 5 Clock*2 p. 33 6 Focus distance when in 13 21 Manual focus p. 81 7 Flash mode p. 69 8 Current Folder name*3 p. 122 22 23 24 25 26 27 displayed when folder name is set to NIKON. *4 Not displayed when battery power is sufficient. 17 Before Using the Camera - Nikon 25047 | User Manual - Page 10
This section will rapidly guide you through the first steps, from setting up the camera to taking your first picture. For fully detailed descriptions of each operation, please see the - Nikon 25047 | User Manual - Page 11
Before Using the Camera Quick Guide-continued 5 Press the Shutter release button lightly to focus on the subject by using autofocus. (p. 48). In-focus Out-of-focus Green LED lights. Green - Nikon 25047 | User Manual - Page 12
Menu Guide: Shooting Mode Shooting Menu 1 Press MENU button to select. Press the Multi ) or White Balance Bracketing (p. 115) AF Area Mode Auto-Focus Mode Focus Confirmation Distance Units Auto/Manual/Off Continuous AF/Single AF MF/On/Off m/ft Auto Off High Normal Low Off On WB Bracketing - Nikon 25047 | User Manual - Page 13
Menu Guide: Shooting Mode SET-UP 1 () Press MENU button and Multi selector to Turn Digital Tele and Fixed Aperture on or off, set start-up position (p. 132) Options New/Rename/Delete NIKON (Folder name) Display Mode Brightness Hue Memorize Func. 1 Func. 2 Monitor On/Review Only/Preview Only/ - Nikon 25047 | User Manual - Page 14
Menu Guide: Playback Mode Playback Menu Press MENU button to select. Press Protect selected images using thumbnail display (p. 142) Selected Images All Images Reset Trns/Print Options All Folders NIKON (Folder name) New/Rename/ Delete Start Frame Intvl 2S/3S/5S/10S (Select image and set - Nikon 25047 | User Manual - Page 15
Card 7. USB Cable for connection to computer. 8. Lens cap 9. Nikon View 4 CD-ROM (contains Nikon View 4 and bundled software) 10. Instruction manual for COOLPIX995 11. CD-ROM instruction manual for Nikon View 4 12. "Open Me First!" Envelope - your path to After Sales Support and Service. 28 29 - Nikon 25047 | User Manual - Page 16
Li-ion Rechargeable Battery is not fully charged at shipment. We recommend that you charge the battery before first use. Please see the instruction manual supplied with the charger for details. Precautions on battery use and handling • Be sure to follow the warnings and cautions in "For Your - Nikon 25047 | User Manual - Page 17
Preparation Selecting a Language The language in which menus and messages are displayed can be selected using the Language sub-menu. 1 Turn the Mode dial to ˘. • The Language can also be set using the SET-UP menu in the mode. Shooting 2 Press the MENU button so the Playback menu is displayed. • - Nikon 25047 | User Manual - Page 18
Setting Date/Time The date and time for your country or location should be set before use. 1 Set the Mode dial to the SET-UP menu. and press the MENU button to display 4 Set the date display order. • Press ≤/≥ on the Multi selector to change the date display order as followings. Preparation 2 - Nikon 25047 | User Manual - Page 19
Inserting CF Memory Card The COOLPIX995 uses a CompactFlash™ (CF) memory card to store images and movies. Use a Nikon CF memory cards or other recommended memory card. See p. 163 and the instruction manual of the CF memory card for notes on using the card. Inserting the CF Memory Card 1 Turn the - Nikon 25047 | User Manual - Page 20
Preparation Formatting CF Memory Cards CF memory cards must be formatted before being used with the COOLPIX995. Note that the CF memory card supplied with your camera has already been formatted. Note: Formatting CF memory cards Note that when a CF memory card is formatted, the entire contents of - Nikon 25047 | User Manual - Page 21
Strap and Lens Cap Attaching strap MODE M-FOCUS ISO SIZE • Attach the strap as illustrated. Lens cap MODE M-FOCUS ISO SIZE • Press the latch on the lens cap to attach/detach it. • Since the lens cap can easily be misplaced, we recommend attaching it to the strap with the supplied cord. 40 Useful - Nikon 25047 | User Manual - Page 22
Holding the Camera To reduce blurring caused by camera shake, hold the camera steadily in both hands and press the Shutter release button slowly and gently. Photographs can be framed in the Monitor or the Viewfinder. Check point The lens section of this camera rotates so the subject can be seen - Nikon 25047 | User Manual - Page 23
), the camera controls the exposure and other settings for simple, easy operation. • In " " (Manual mode), camera settings such as exposure, white balance, image adjustment and sharpening are under full manual control. ˘: Playback mode The Playback mode is for reviewing and managing your pictures - Nikon 25047 | User Manual - Page 24
Basic Operation (Auto Mode) 1 Set the camera to Auto Mode (Set the Mode dial to ). • The camera beeps once when the power is turned on and standby operation starts. After a short pause, the camera is ready and the Viewfinder image is displayed on the Monitor. Control panel Monitor • Individual - Nikon 25047 | User Manual - Page 25
Basic Operation (Auto Mode)-continued 3 Lightly press the Shutter release button and confirm the focus. In-focus Out-of-focus Green LED lights. Bright subject Green LED flashes rapidly. Dark subject Confirm LED No LED indication Red LED flashes rapidly. Note: Continuous AF When the Monitor - Nikon 25047 | User Manual - Page 26
Basic Operation (Auto Mode)-continued Built-in Speedlight Use the built-in Speedlight if there is insufficient light to illuminate the subject. This condition is indicated by the Red LED flashing rapidly when the Shutter release button is half-pressed. To use the Speedlight Å Slide the Speedlight - Nikon 25047 | User Manual - Page 27
lights steadily for the final 1 second. (The remaining time is visible as a count-down on the Monitor.) In Shooting mode, Self-timer operation using Manual focus (p. 81) is possible. • To cancel Self-timer after activation of the timer, pause, then press the Focus mode button so V disappears or else - Nikon 25047 | User Manual - Page 28
Simple Playback Operations Set the Mode dial to ˘ to set the camera to Playback mode. In Playback mode, recorded images are visible on the Monitor. Multiple reduced size images can be viewed at once (Thumbnail Playback) or reviewed for deletion. Full-Frame Playback (See p. 74) 1 Set the Mode dial to - Nikon 25047 | User Manual - Page 29
• Setting the Exposure mode • Setting the Exposure Compensation Value • Adjusting Sensitivity • Playback • Deleting Photographs Detailed Operation • For details of operation, refer to the CD-ROM instruction manual for Nikon View 4. • To connect the COOLPIX995 to a computer, see p. 156. 56 57 - Nikon 25047 | User Manual - Page 30
Setting Image Quality and Size Shooting Mode In both or mode, one of the most important options for your pictures is the combination of Image quality setting (image compression ratio) and Image size setting that you select. There are four available Image quality settings and six Image size settings. - Nikon 25047 | User Manual - Page 31
turn by repeated presses of the Focus mode button. In mode, rotating the Command dial while pressing the Focus mode button initiates Manual focus and alters the manual focus distance (p. 81) Press the Focus mode button repeatedly until the indication for the desired Focus mode or Self-timer is shown - Nikon 25047 | User Manual - Page 32
AF areas in the Monitor are used when focusing. Normally, AUTO mode, where the camera automatically focuses using all five AF areas, is activated. In MANUAL mode, you can select just one of the AF areas, and when Autofocus is Off, only the center AF area is activated (p. 111). 62 Digital - Nikon 25047 | User Manual - Page 33
subjects are in sharp focus when shooting landscapes, or whether the background is to be blurred as in a portrait. Manual  Shutter speed and aperture are set manually. Suitable when you want full control over exposure, to create your own unique photographic effects. P: Programmed Auto The camera - Nikon 25047 | User Manual - Page 34
speed (8 sec. - 1/2000 sec. in 1 EV steps, plus long time exposure "BULB" up to 60 sec.) and aperture (lens' minimum to maximum in 1/3 steps) manually. 1 Set the Exposure mode to Â, then take your finger off the MODE button. The aperture and shutter speed are displayed alternately in the Control - Nikon 25047 | User Manual - Page 35
Setting the Exposure mode-continued Shooting Mode Check point If the shutter speed is displayed in red when 1/2000 sec. shutter speed is selected, stop-down aperture while confirming exposure on the Exposure meter in the Monitor. Exposure status Correct exposure Control panel Monitor 1 EV under - Nikon 25047 | User Manual - Page 36
Setting the Flash Mode-continued Shooting Mode Setting Indication Characteristics AUTO flash ⁄ Speedlight automatically fires when the subject is dark and the built-in Speedlight is released. Speedlight does not fire if the subject is adequately illuminated even when the built-in Speedlight is - Nikon 25047 | User Manual - Page 37
to film ISO 100. The camera will automatically increase sensitivity in low levels of ambient lighting if set to AUTO. The sensitivity can be increased manually from the standard value to allow faster shutter speeds in low light. Set the Mode dial to , then rotate the Command dial while pressing the - Nikon 25047 | User Manual - Page 38
Playback Playback Mode ˘ Playback Playback mode is used for reviewing pictures that are saved on the CF memory card, starting with the most recent first. 1 Set the Mode dial to ˘. • After a short pause, the most recent photograph is displayed in full-frame with information such as the folder - Nikon 25047 | User Manual - Page 39
Playback-continued Playback Mode ˘ Thumbnail Playback Up to nine Thumbnail images can be displayed on the Monitor. The Thumbnail images can be viewed a page at a time and it is possible at any time to select one Thumbnail for Full-frame playback or deleting. 1 Set the Mode dial to ˘. 2 Press the - Nikon 25047 | User Manual - Page 40
Deleting photographs-continued Playback Mode ˘ Deleting Individual Photographs in Thumbnail Playback 1 Highlight the image to be deleted using the Multi selector. The selected image is marked with a yellow highlight. 2 To delete the currently selected Thumbnail, press the D button. 3 Press ≤/≥ on - Nikon 25047 | User Manual - Page 41
-Weighted or Spot Metering modes are most suited for this purpose. For setting metering, see page 97. • When shooting with the Autofocus lock, we recommend manually setting the focus target area (p. 111) to the center (in mode). 80 • The shooting distance can be set in 49 steps from 0.02 m (0.06 ft - Nikon 25047 | User Manual - Page 42
Situations Where Autofocus May not Work as Expected Shooting Mode Autofocus does not perform well under the conditions listed below. You can Autofocus as detailed below. 1. No subject detail for Autofocus system. • Very dark subjects. • Scenes with a pronounced difference in brightness (such as a - Nikon 25047 | User Manual - Page 43
Recording Movie/Movie Playback-continued Operation in Movie Playback mode When the first frame is displayed as a still image Start movie After completing the playback, the final frame is displayed for one second, and then returns to the still image of the first frame. While movie is in progress - Nikon 25047 | User Manual - Page 44
Quick Review Mode/Full-Screen Review Mode Shooting Mode Quick review mode/Full-screen review mode is set by pressing the QUICK review button in Shooting mode . These two review modes enable you to quickly review and confirm the image without having to turn the Mode dial from to ˘. • The - Nikon 25047 | User Manual - Page 45
of the image information displayed are as follows. 1. Basic display screen Display 100 Nikon 0025.JPG 25/40 2001. 07. 25 12:00 VGA FINE Description Folder Focal length Focus mode (distance setting information when in Manual focus) 88 3. Detailed information display 2 Display SPEEDLIGHT - Nikon 25047 | User Manual - Page 46
SB-22s and SB-22. Please contact an authorized Nikon dealer or service center about using other Nikon Speedlights. • In Macro close-up mode, it is Unit SK-E900 and optional Speedlights, please refer to the instruction manuals supplied with each accessory. Check point With the Speedlight Opt. - Nikon 25047 | User Manual - Page 47
Setting Shooting Menus Shooting Mode In Shooting mode, the Shooting menu provides access to a range of camera setting adjustments, such as the White balance, Saturation control and Noise reduction. The Shooting menu contains two pages of advanced shooting options: SHOOTING MENU 1 A WHITE - Nikon 25047 | User Manual - Page 48
. This is known as White Balance. The White Balance may be preset to one of a number of fixed values and can also be measured manually. A Auto White balance is measured and adjusted automatically. White Bal Preset White balance is measured and adjusted using the color temperature measurement for - Nikon 25047 | User Manual - Page 49
Balance - In certain lighting, you may find that you can obtain a more accurate color balance by measuring the color temperature of the light manually. The Preset White Balance function allows you to photograph a neutral object (usually a piece of gray card) from which the camera calculates the - Nikon 25047 | User Manual - Page 50
the exposure on a small OPTIONS > AF Area Mode (p. 111) area within the frame without in Shooting Mode is set to Auto or changing the composition Manual. since the metering area shifts Auto: Automatically shifts the Spot with the AF Area. Metering area to one of five Spot AF Area focus areas - Nikon 25047 | User Manual - Page 51
Setting Shooting Menus-continued Shooting Mode * The shooting speed varies with the memory available in the camera. • Once shooting has commenced, the Autofocus mode, exposure value and white balance settings in the Continuous, Multi-shot 16, VGA Sequence and Ultra HS modes are fixed at their - Nikon 25047 | User Manual - Page 52
Setting Shooting Menus-continued Shooting Mode BEST SHOT SELECTOR The Best Shot Selector function is most effective in situations where inadvertent camera movement may affect the outcome of the photograph, such as the following: • The camera is zoomed in or you are using an optional teleconverter - Nikon 25047 | User Manual - Page 53
Setting Shooting Menus-continued Shooting Mode IMAGE ADJUSTMENT When you take a photograph, the camera automatically compensates for optical brightness and contrast before recording the photograph on the CF memory card. The Image Adjustment menu gives you control over this image compensation. - Nikon 25047 | User Manual - Page 54
To obtain high-quality images, use of a film scanner such as the Nikon COOLSCAN is recommended. Notes: Lens setting • The built-in Speedlight does not is displayed on the Control panel and Monitor. • Refer to the instruction manual for the optional lens converter or Slide Copy Adapter for details. • - Nikon 25047 | User Manual - Page 55
Setting Shooting Menus-continued Shooting Mode USER SETTING The camera can "memorize" up to three combinations of settings, including White Balance, Metering, Continuous, Best Shot Selector, Image Adjustment, Saturation Control, Lens and Image Sharpening. These settings can be recalled as desired, - Nikon 25047 | User Manual - Page 56
the center AF Area is used for focusing. This is useful in Autofocus Lock/Auto Exposure Lock operation (p. 80). Note: AF Area selection Auto and Manual settings can only be selected when the Monitor is turned on. AF Area Mode is automatically set to Off when the Monitor is off or - Nikon 25047 | User Manual - Page 57
on the Monitor. - Distance Units - You can change the distance used on the Control panel and on the Monitor in Manual Focus mode. m meters ft feet Menus MF In MF (Manual Focus) mode, the outline of the in-focus area of the image is emphasized in the Monitor as an aid to - Nikon 25047 | User Manual - Page 58
Setting Shooting Menus-continued Shooting Mode IMAGE SHARPENING The camera can emphasize the details and borders of objects, making the picture appear sharper and bolder. Auto High Normal Low Off The camera automatically sets the sharpness. Sets the Sharpness to high. Sets the Standard sharpness - Nikon 25047 | User Manual - Page 59
Setting Shooting Menus-continued Shooting Mode Check point To perform Auto Bracketing or White Balance Bracketing in Continuous or VGA Sequence mode (p. 99), hold down the Shutter release button fully. A selected number of consecutive shots are taken (up to three shots with FULL, 3 : 2 and Fine mode - Nikon 25047 | User Manual - Page 60
-tuned values are also reset. *2 Only the settings in the selected User Setting number is reset. Shooting SET-UP items Folders NIKON Monitor Options: Display Mode On Brightness 3 Hue 6 Shutter Sound On Controls Memorize Func.1, 2 Cleared* Not cleared Speedlight Options Variable Power - Nikon 25047 | User Manual - Page 61
Setting Shooting SET-UP Menus Shooting Mode The SET-UP menu allows you to select various settings for basic camera setup before shooting, such as Monitor, Zoom and Speedlight options, etc. Displaying the SET-UP Menu In mode Set the Mode dial to and press the MENU button to display the SET-UP - Nikon 25047 | User Manual - Page 62
. Renames a folder. Deletes a folder. [New] Creates a new folder on the CF memory card. 1 Select "New" in the Options menu and press > on the Multi selector. "NIKON" is displayed first. 3 Press the MENU button to complete the setting. • Folder name is shown on the Monitor when a folder other than - Nikon 25047 | User Manual - Page 63
the MENU button to complete the setting. Notes: Deleting folders • The NIKON folder cannot be deleted. • If the selected folder contains hidden or Folder name shown in the Monitor (no folder name is displayed when NIKON folder is selected). 124 Monitor Options Use the Monitor Options sub-menu - Nikon 25047 | User Manual - Page 64
release button is fully depressed and the shutter is Beeps once to confirm released. • Completion of the following settings and preparations: Lens, Manual Focus, CF Card Format, Delete, Protect, Hide Image, Print Set, Auto Transfer and Shutter Sound On. Beeps twice to warn • Image cannot - Nikon 25047 | User Manual - Page 65
sequential number is reset to the next number. Image file numbers and folder numbers Four-digit numbers are assigned to image files recorded with the Nikon COOLPIX995, and file names from DSCN0001.JPG to DSCN9999.JPG are assigned to the files. Three-digit numbers are assigned to the folders in - Nikon 25047 | User Manual - Page 66
to these buttons in mode. Mode Assigns Exposure mode operation. FUNC. 1 default. Assigns Focus mode (including Self-timer and Manual focus) operation. Assigns Flash mode and ISO sensitivity operation. White Balance Assigns White Balance operation. Assigns Exposure Compensation operation. FUNC - Nikon 25047 | User Manual - Page 67
The start-up time is shortest for the telephoto Zoom setting. - Fixed Aperture - Off Aperture varies with zooming. In Aperture-Priority Auto or Manual Exposure mode, the camera memorizes aperture when zooming On begins and the aperture value remains fixed throughout zooming. Note that with the - Nikon 25047 | User Manual - Page 68
Setting Shooting SET-UP Menus-continued Shooting Mode Note: Activating an optional Speedlight When you are using an optional Speedlight, be sure to raise the built-in Speedlight to ensure that the flash sync sensor is available. - Shot Confirm Lamp - With the Shot Confirm Lamp setting On, the Red- - Nikon 25047 | User Manual - Page 69
), select a folder for playback (Folders), show the pictures in a sequence as a slide show (Slide Show) and prepare photographs for printing (Print Set). The Nikon View 4 software (which allows you to copy images from your camera or CompactFlash™ card to a computer) can be set to transfer an image - Nikon 25047 | User Manual - Page 70
Playback Menus-continued Playback Mode ˘ Playback Menu Delete Saved photographs, the settings of Auto Transfer and Print-order files can be deleted. With the Delete option in the Playback menu, it is possible to delete either selected photographs from the thumbnail pages or alternatively all the - Nikon 25047 | User Manual - Page 71
folder. • For Folders Options, see page 122. • Select a folder to be played back from All Folders, NIKON or from a newly created folder. • The All Folders option enables you to view images in all folders without having to select individual folders. Playback of - Nikon 25047 | User Manual - Page 72
Playback Menus-continued Playback Mode ˘ Protect The Protect option can be used to prevent recorded images in the CF memory card from being deleted. - Protecting selected images - 1 2 3 1 Press on the Multi selector to highlight a desired Thumbnail. 2 Press ≤/≥ to select an image to be - Nikon 25047 | User Manual - Page 73
) allows images to be marked for printing at a Lab, Print Shop or on a desktop Printer that can read the DPOF information. As well as the instruction to print the image, the DPOF system also allows the number of prints to be specified and whether or not the image date and/or - Nikon 25047 | User Manual - Page 74
Playback Menus-continued Playback Mode ˘ Auto Transfer The Auto Transfer setting controls whether or not the Nikon View 4 software will automatically copy selected images to a computer when the camera is connected by the USB cable. Selected Photos Only selected images will be - Nikon 25047 | User Manual - Page 75
Playback SET-UP Menus Playback Mode ˘ In the Playback SET-UP menu, you can make changes to basic camera settings and perform tasks such as formatting memory cards. Displaying the Playback SET-UP Menu 1 In Playback ˘ mode, press the MENU button to display the Playback menu and press < on the Multi - Nikon 25047 | User Manual - Page 76
allows the date and time to be set to your local time zone. • For information on Setting Date/Time, see p. 34. Video Mode The COOLPIX995 supports the two principal worldwide TV standards. You can choose either the NTSC or PAL standard for video output. NTSC PAL Selects the NTSC standard (Japan - Nikon 25047 | User Manual - Page 77
Playback SET-UP Menus-continued Playback Mode ˘ Language The camera menus and messages can be viewed in one of a number of languages. D German E English F French J Japanese S Spanish • For information on Selecting a Language, see p. 32. Connections This chapter provides information on connecting - Nikon 25047 | User Manual - Page 78
plug, make sure that the Mode dial is set to . • Use only the Nikon Accessory EH-21 AC adapter/battery charger. • The camera and the AC adapter may off automatically and the video output will continue until the camera is turned off manually. • The Video Mode item in the SET-UP menu (p. 135) offers - Nikon 25047 | User Manual - Page 79
simple by being able to view the images in a variety of sizes, rotate them and rename them prior to copying. • Before using Nikon View 4, read the provided "Nikon View 4 Guide". • If transferring a large number of images, the use of the AC adapter (optional) is recommended to prevent the camera from - Nikon 25047 | User Manual - Page 80
Nikon View 4 on your computer screen). Failure to observe this precaution might result in unexpected problems . Note that Windows®95 and Windows®NT do not support USB. With Macintosh OS 8.6 or OS 9, the are covered in the instruction manual for the computer or operating system. 2 Nikon View 4 will by - Nikon 25047 | User Manual - Page 81
read to the computer and is not available when connecting the camera by USB. However, Nikon View 4 can copy this information into a special part of the image file called the IPTC on optional accessories and advice on troubleshooting, and lists the specifications of the camera. 161 Miscellaneous - Nikon 25047 | User Manual - Page 82
Adapter AS-E900 This bracket unit is used to attach an optional Nikon Speedlight to the COOLPIX995 for multiple-flash photography. The amount of light which has adequate storage for your needs. Usable CF memory cards Nikon EC-CF series CompactFlash™ cards have been rigorously tested and certified - Nikon 25047 | User Manual - Page 83
) CD-ROM Drive Required for installation Interface USB interface (built-in only)*3 *1 Only for pre-install model. *2 Refer to the software instruction manuals for the required memory when used in combination with other software. *3 Camera may not function correctly when connected to a USB hub - Nikon 25047 | User Manual - Page 84
Troubleshooting If the COOLPIX995 is not operating properly, check the following items. If the problem persists, contact the retailer where you bought this camera or an authorized Nikon dealer or service center. Problem (refer to TV instruction manual). Cannot transmit data to •The camera is - Nikon 25047 | User Manual - Page 85
possible solutions before ordering repairs or requesting service under Warranty. Monitor Control panel Problem • CF memory card is not inserted no dirt or foreign matter in the connector. Contact authorized Nikon dealer or service center. • Folder may contain photos taken with camera other - Nikon 25047 | User Manual - Page 86
Error Messages-continued Monitor Control panel Problem • Overflow of the image number has occurred. • CF memory card has format incompatible with on again, or reinstall battery. 30 If the error message persists, contact an authorized Nikon dealer or service center. Miscellaneous 170 171 - Nikon 25047 | User Manual - Page 87
Balance, 5-mode Manual, Preset; White Balance Bracketing available 10 sec. or 3 sec. duration Guide number: 10 /32 (ISO 100, m/ft.) Sync method: automatic sync control Flash mode: 4 modes; Auto Flash, Anytime Flash, Slow Sync, Red-Eye Reduction Sync terminal connects to external Nikon - Nikon 25047 | User Manual - Page 88
Charger, USB Cable, Video cable, CompactFlash™ (CF) Memory Card, Strap, Lens cap, Instruction manual, Nikon View 4 CD-ROM (contains Nikon View 4 and bundled software), CD-ROM instruction manual for Nikon View 4, "Open Me First!" Envelope All specifications apply when a fully charged battery is - Nikon 25047 | User Manual - Page 89
Index 3 : 2 size P. 59, 60 Shooting mode P. 44, 45 Shooting mode P. 44 ˘ Playback mode P. 44 A AF/AE Lock P. 80 Anytime Flash P. 70 Aperture-Priority Exposure mode P. 66, 110 Auto (White Balance P. 95 Auto Bracketing P. 115 Auto Flash mode P. 70 Autofocus mode P. 61 Auto-Focus Mode P. - Nikon 25047 | User Manual - Page 90
Index-continued L Language p. 32, 135, 152 Lens converter P. 106 Long time exposure P. 68 M Macro Close-up mode P. 61 Manual Exposure mode P. 67, 110 Manual Focus P. 81 Matrix Metering P. 97 Metering method P. 97 Multi-shot 16 P. 99 Monitor button P. 16, 46 Monitor Options P. 125, 150 - Nikon 25047 | User Manual - Page 91
No reproduction in any form of this manual, in whole or in part (except for brief quotation in critical articles or reviews), may be made without written authorisation from NIKON CORPORATION. K NIKON CORPORATION FUJI BLDG., 2-3, MARUNOUCHI 3-CHOME, CHIYODA-KU, TOKYO 100-8331, JAPAN Printed in
-
 1
1 -
 2
2 -
 3
3 -
 4
4 -
 5
5 -
 6
6 -
 7
7 -
8
-
9
-
10
-
11
-
12
-
13
-
14
-
15
-
16
-
17
-
18
-
19
-
20
-
21
-
22
-
23
-
24
-
25
-
26
-
27
-
28
-
29
-
30
-
31
-
32
-
33
-
34
-
35
-
36
-
37
-
38
-
39
-
40
-
41
-
42
-
43
-
44
-
45
-
46
-
47
-
48
-
49
-
50
-
51
-
52
-
53
-
54
-
55
-
56
-
57
-
58
-
59
-
60
-
61
-
62
-
63
-
64
-
65
-
66
-
67
-
68
-
69
-
70
-
71
-
72
-
73
-
74
-
75
-
76
-
77
-
78
-
79
-
80
-
81
-
82
-
83
-
84
-
85
-
86
-
87
-
88
-
89
-
90
-
91
 |
 |
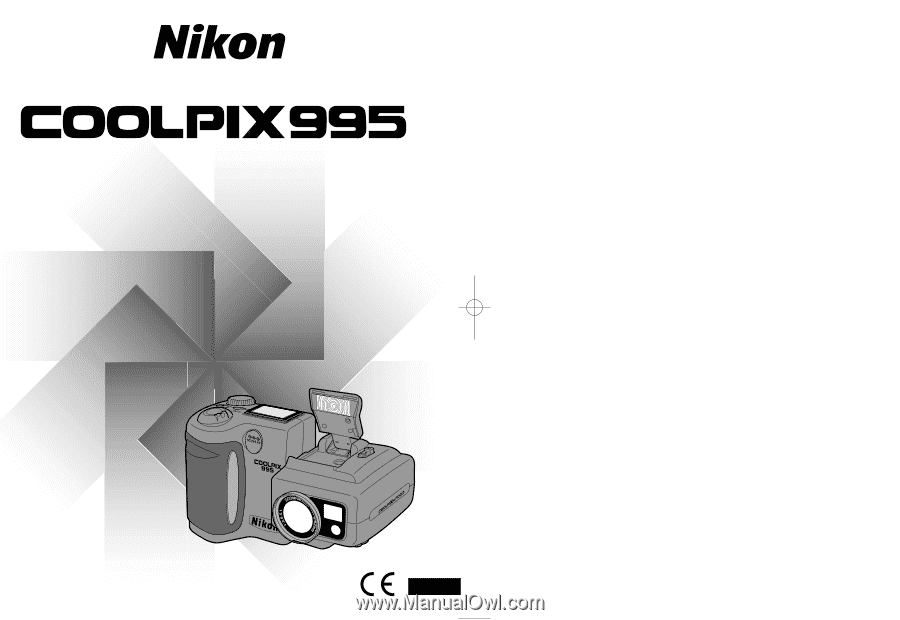
The Nikon Guide to Digital Photography
with the
E
DIGITAL CAMERA