Nikon 25552 User Manual
Nikon 25552 - Coolpix S7c Digital Camera Manual
 |
UPC - 018208255528
View all Nikon 25552 manuals
Add to My Manuals
Save this manual to your list of manuals |
Nikon 25552 manual content summary:
- Nikon 25552 | User Manual - Page 1
En The Nikon Guide to Digital Photography with the DIGITAL CAMERA - Nikon 25552 | User Manual - Page 2
logo are trademarks of Eastman Kodak Company. D-Lighting technology is provided by o Apical Limited. All other trade names mentioned in this manual or the other documentation provided with your Nikon product are trademarks or registered trademarks of their respective holders. Apple Public Source - Nikon 25552 | User Manual - Page 3
Introduction First Steps Basic Photography and Playback: Auto Mode Shooting Suited for the Scene - Highsensitivity Shooting Mode, Scene Mode Anti-shake Mode One-Touch Portrait Mode More on Playback Movies Voice Recordings Connecting to Televisions, Computers, and Printers Shooting, Playback, and - Nikon 25552 | User Manual - Page 4
in their entirety before using this equipment. Keep these safety instructions where all those who use the product will read them. The a fall or other accident, take the product to a Nikon-authorized service representative for inspection after unplugging the product and/or removing the battery. ii - Nikon 25552 | User Manual - Page 5
under heavy objects, or expose it to heat or flame. Should the insulation be damaged and the wires become exposed, take it to a Nikon-authorized service representative for inspection. Failure to observe these precautions could result in fire or electric shock. iii - Nikon 25552 | User Manual - Page 6
Introduction For Your Safety • Do not handle the plug or battery charger with wet hands. Failure to observe this precaution could result in electric shock. Use appropriate cables When connecting cables to the input and output jacks, use only the cables provided or sold by Nikon for the purpose, to - Nikon 25552 | User Manual - Page 7
for use in other countries. Users who are unsure as to the original country of sale should consult with their local Nikon service center or Nikon-authorized service representative. This restriction applies to wireless operation only and not to any other use of the product. Notice for customers in - Nikon 25552 | User Manual - Page 8
Statement The available scientific evidence does not show that any health problems are associated with using low power wireless devices. There is no energy and, if not installed and used in accordance with the instructions, may cause harmful interference to radio communications. However, there is - Nikon 25552 | User Manual - Page 9
Introduction Notices CAUTIONS Modifications The FCC requires the user to be notified that any changes or modifications made to this device that are not expressly approved by Nikon Corporation may void the user's authority to operate the equipment. Interface Cables Use the interface cables sold or - Nikon 25552 | User Manual - Page 10
Introduction Table of Contents Introduction ...ii For Your Safety ii WARNINGS ii Notices...v About This Manual 1 Information and Precautions 2 Parts of the Camera 6 Attaching the Camera Strap 6 The Monitor...8 Shooting ...8 Playback ...9 Basic Operations 10 The o (shooting/playback) Button - Nikon 25552 | User Manual - Page 11
Introduction Table of Contents Basic Photography and Playback: Auto Mode 24 Step 1 Turn the Camera On and Select L (Auto) Mode 24 Indicators Displayed in L (Auto) Mode 25 Step 2 Frame a Picture 26 Using the Zoom 26 Electronic VR 27 Step 3 Focus and Shoot 28 Step 4 Viewing and Deleting - Nikon 25552 | User Manual - Page 12
Introduction Table of Contents More on Playback 52 Viewing Multiple Pictures: Thumbnail Playback 52 Taking a Closer Look: Playback Zoom 53 Editing Pictures 54 Creating a Cropped Copy: Crop 55 Enhancing Brightness and Contrast: D-Lighting 56 Compensating Blurred Images: Electronic VR 57 H - Nikon 25552 | User Manual - Page 13
Introduction Table of Contents Connecting to a ImageLink-compatible Printer 95 Removing the Dock Insert 95 Shooting, Playback, and Setup Menus 96 Shooting Options: The Shooting Menu 96 Displaying the Shooting Menu and High-sensitivity Menu 97 Z Image Mode 97 d White Balance 99 I Exp 101 q - Nikon 25552 | User Manual - Page 14
Optional Accessories 159 Approved Memory Cards 159 Image File and Folder Names 160 Caring for the Camera 162 Cleaning 164 Storage ...164 Error Messages 165 Troubleshooting 171 Supported Standards 177 Specifications 178 Index...182 xii - Nikon 25552 | User Manual - Page 15
, informa- k tion that should be read before using the camera. This icon indicates that more c information is available elsewhere in this manual or in the Quick Start Guide. Notations • A Secure Digital (SD) memory card is referred to as a "memory card." • The setting at the time of purchase is - Nikon 25552 | User Manual - Page 16
www.nikonusa.com/ • For users in Europe and Africa: http://www.europe-nikon.com/support/ • For users in Asia, Oceania, and the Middle East: http://www.nikon- While every effort has been made to ensure that the information in these manuals is accu- rate and complete, we would appreciate it were you to - Nikon 25552 | User Manual - Page 17
Introduction Information and Precautions Notice Concerning Prohibition of Copying or Reproduction Note that simply being in possession of material that has been digitally copied or reproduced by means of a scanner, digital camera or other device may be punishable by law. • Items prohibited by law - Nikon 25552 | User Manual - Page 18
theft of the product. Precautions and Limitations when Using the COOLPIX CONNECT Service • Connection to a public wireless LAN for the COOLPIX CONNECT service (hereinafter referred to as Service) is not guaranteed or supported outside the United States. Nikon is not responsible for any direct or - Nikon 25552 | User Manual - Page 19
foregoing, or any other terms and conditions that Nikon may require in connection with your use of the Service. • This Service is subject to change, suspension, or termination without notice. • Be sure to read Nikon's " URL and follow the link : http://www.europe-nikon.com/support/ 5 - Nikon 25552 | User Manual - Page 20
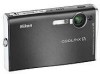
Introduction Parts of the Camera Zoom control (c 26) See also: • t (wide): c 26 • v (tele): c 26 • j (thumbnail playback): c 52 • k (playback zoom): c 53 • l (help): c 13 Shutter-release button (c 28) Power-on lamp (c 24) m (one-touch portrait) button (c 50) u (D-Lighting) button (c 56) Power - Nikon 25552 | User Manual - Page 21
Parts of the Camera Introduction Rotary multi selector (c 12) H (self-timer) (c 34) F (macro close-up mode) (c 35) J (flash mode) (c 32) d (apply selection) button (c 12) • F anti-shake mode (c 49)/ electronic vibration reduction (c 57) • g (transfer picture) button (c 83, 85) Monitor (c 8) m - Nikon 25552 | User Manual - Page 22
Introduction The Monitor The following indicators may appear in the monitor during shooting and playback (actual display varies with current camera settings). Shooting 20 A 21 qwz 19 f g h i j l 18 C D B A 17 FEdehi 2 5 1G3 4 p 6 zABCD MF q g C I+1.0 E BM MO 7 w8 W9 10 10H 11 12 s - Nikon 25552 | User Manual - Page 23
160 3 Internal memory/memory card indicator 25 4 Battery level indicator 24 5 Volume indicator 59, 76 6 Voice memo recording guide...... 59 7 Voice memo playback guide....... 59 Current frame number/total 8 number of frames 30 Movie length 76 9 D-Lighting icon 56 10 Movie playback - Nikon 25552 | User Manual - Page 24
Introduction Basic Operations The o (shooting/playback) Button Press o once in shooting mode to enter fullframe playback; press again to switch back to shooting mode. If the camera is turned off, press o for about a second to turn the camera on in playback mode (c 30). The D (mode) Button Press D - Nikon 25552 | User Manual - Page 25
Introduction Basic Operations The m Button Press m to display the menu for the selected mode. Use the rotary multi selector to navigate the menus (c 12). • L Shooting menu (c 96) • K High-sensitivity menu (c 36) • n Scene menu (c 37) • F Anti-shake menu*1 (c 49) • m One-touch portrait menu*2 (c - Nikon 25552 | User Manual - Page 26
selector can be used in various ways, concrete descriptions such as "Press the rotary multi selector J" are included only in cases where necessary. • In the manual, the button indicating up, down, left, and right of the rotary multi selector is 12 shown as GHIJ. - Nikon 25552 | User Manual - Page 27
Introduction Basic Operations Help Displays Press the zoom control to v (l) to view a description of the currently selected menu option. Continuous Keep the shutter-release button pressed to take pictures continuously. Exit • Use the rotary multi selector to show the previous or next menu option. • - Nikon 25552 | User Manual - Page 28
First Steps First Steps The COOL-STATION and AC Adapter The COOL-STATION The supplied MV-15 COOL-STATION can be used to: • Charge the camera battery (when the camera is turned off) (c 18) • View pictures on a television (c 82) • Copy pictures to a computer (c 83) • Print pictures via direct USB - Nikon 25552 | User Manual - Page 29
First Steps The COOL-STATION and AC Adapter The AC Adapter The supplied EH-64 AC adapter can: • When the camera is turned on, power the camera from a power outlet. • When the camera is turned off, charge the battery in the camera (c 18). It can also be used to power the camera for playback, data - Nikon 25552 | User Manual - Page 30
First Steps Inserting the Battery The camera uses a rechargeable EN-EL8 lithium-ion battery (supplied). Charge the battery before first use or when the battery is running low (c 18). 1 Open the battery-chamber/memory card slot cover. 2 Insert the battery. Confirm that the positive (+) and negative - Nikon 25552 | User Manual - Page 31
First Steps Inserting the Battery Removing the Battery Turn the camera off before removing the battery. To eject the battery, open the battery-chamber/ memory card slot cover and slide the battery latch in the direction shown (1). The battery can then be removed by hand (2). • Note that the battery - Nikon 25552 | User Manual - Page 32
First Steps Charging the Battery Charge the battery before first use or when the battery is running low. 1 Connect the COOL-STATION and AC adapter, and plug the power cable into an outlet (c 15). The AC adapter power-on lamp will light. 2 Turn the camera off. If the power-on lamp is lit, press the - Nikon 25552 | User Manual - Page 33
First Steps Charging the Battery l Charging Without the COOL-STATION • Charging the battery is possible without using the COOL-STATION. Insert the battery into the camera, make sure that the camera is turned off, and connect the AC adapter to the multi connector of the camera directly (c 15). 2 4 - Nikon 25552 | User Manual - Page 34
First Steps Setting Display Language, Date, and Time A language-selection dialog is displayed the first time the camera is turned on. 1 Press the power switch to turn on the camera. The power-on lamp (green) will light and the monitor will turn on. 2 Use the rotary multi selector to choose the - Nikon 25552 | User Manual - Page 35
First Steps Setting Display Language, Date, and Time 6 Edit the day ([D]) (order of the day, month, and year may differ in some areas) and press d. Date D M Y 01 09 2006 00 00 7 Edit the month ([M]) and press d. Date D M Y 10 09 2006 00 00 8 Repeat steps 6 and 7 to edit the year - Nikon 25552 | User Manual - Page 36
First Steps Inserting Memory Cards Pictures are stored in the camera's internal memory (14 MB) or on removable Secure Digital (SD) memory cards (available separately) (c 159). If a memory card is inserted in the camera, pictures are automatically stored on the memory card and only pictures recorded - Nikon 25552 | User Manual - Page 37
First Steps Inserting Memory Cards Removing Memory Cards Before removing memory cards, turn the camera off and confirm that the power-on and indi- cator lamps are off. Open the battery-chamber/ memory card slot cover and press the card in (1) to partially eject the card (2). The card can then be - Nikon 25552 | User Manual - Page 38
Basic Photography and Playback: Auto Mode Step 1 Turn the Camera On and Select L (Auto) Mode This section describes how to take pictures in L (auto) mode, an automatic, "point-and-shoot" mode recommended for first-time users of digital cameras. 1 Press the power switch. The power-on lamp will light - Nikon 25552 | User Manual - Page 39
Step 1 Turn the Camera On and Select L (Auto) Mode Indicators Displayed in L (Auto) Mode Shooting mode M displayed in L (auto) mode Internal memory/memory card M Pictures will be recorded to internal memory. O Pictures will be recorded to memory card. M M 8 Image mode Choose from six - Nikon 25552 | User Manual - Page 40
Basic Photography and Playback: Auto Mode Step 2 Frame a Picture 1 Ready the camera. Hold the camera steadily in both hands, keeping your fingers and other objects away from the lens, flash, and self-timer lamp. When taking pictures in "tall" orientation, turn the camera so that the built-in flash - Nikon 25552 | User Manual - Page 41
Step 2 Frame a Picture Electronic VR Electronic VR (c 106) will be enabled in L (auto) M M mode according to shooting conditions and may be applied to blurred pictures when they are recorded (L is displayed in the monitor when shooting). Electronic VR can be set to [Off] in the [Electronic - Nikon 25552 | User Manual - Page 42
Basic Photography and Playback: Auto Mode Step 3 Focus and Shoot 1 Press the shutter-release button halfway. The camera focuses on the subject at the center of the frame. When the subject is in focus, the focus indicator (p) is green. When the camera is unable to focus, the focus indica- M M - Nikon 25552 | User Manual - Page 43
Basic Photography and Playback: Auto Mode Step 3 Focus and Shoot j During Recording While pictures are being recorded, the y (wait) icon will be displayed, and the O (recording to memory card) or M (recording to internal memory) icon will blink. Do not turn the camera off, eject the memory card, - Nikon 25552 | User Manual - Page 44
Basic Photography and Playback: Auto Mode Step 4 Viewing and Deleting Pictures Full-Frame Playback Press o. The last picture taken will be displayed. Use the rotary multi selector to view additional pictures. Rotate quickly to scroll rapidly to the desired picture. Pictures taken in "tall" - Nikon 25552 | User Manual - Page 45
Step 4 Viewing and Deleting Pictures Basic Photography and Playback: Auto Mode k Full-Frame Playback Mode The following options are available in full-frame playback mode. Option Playback zoom View thumbnails Press Description c Zoom control to v (k) Enlarge view of picture currently - Nikon 25552 | User Manual - Page 46
Using the Flash The flash has a range of 0.3-7.5 m (1 ft.-24 ft.) when the camera is zoomed out all the way. With maximum optical zoom applied, the range is 0.3-4 m (1 ft.-13 ft.). The following flash modes are available: z Auto (default for L (auto) mode) Flash fires automatically when lighting - Nikon 25552 | User Manual - Page 47
is pressed halfway. The illuminator has a maximum range of about 1.9 m/6 ft. 2 in. (t) to 1.1 m/3 ft. 6 in. (v). The AF-assist illuminator can be turned off manually (c 123), although in this case the camera may not focus when lighting is poor. k The Flash Lamp The flash lamp indicates flash status - Nikon 25552 | User Manual - Page 48
Taking Pictures with the Self-Timer The camera is equipped with a ten-second and three-second timer for selfportraits. When using the self-timer, mount the camera on a tripod (recommended) or rest it on a flat, level surface. 1 Press H (self-timer). The self-timer menu is displayed. Basic - Nikon 25552 | User Manual - Page 49
Basic Photography and Playback: Auto Mode Macro Close-up Mode Macro close-up mode is used for taking shots of pictures as close as 4 cm (1.6 in.). Note that the flash may be unable to light entire subject at distances of less than 30 cm (11.8 in.). 1 Press L (macro mode). The macro close-up menu is - Nikon 25552 | User Manual - Page 50
Shooting Suited for the Scene - High-sensitivity Shooting Mode, Scene Mode High-sensitivity Shooting Mode High-sensitivity shooting mode offers the following features: • A higher sensitivity is set and the shutter speed will be faster than in L (auto) mode. • Camera shake or blurred subjects will - Nikon 25552 | User Manual - Page 51
Shooting Suited for the Scene - High-sensitivity Shooting Mode, Scene Mode Assist Modes and Scene Modes The camera offers a choice of fifteen "scene" options. Camera settings are automatically optimized for the selected subject type. Portrait BE P DC IJGM NK OLF ZI Exit Assist Modes (Four - Nikon 25552 | User Manual - Page 52
framing assist menu is displayed. 4 Choose the appropriate composition and press d. 5 Position the subject in the fram- ing guide and take the picture. Framing guides are displayed if available. Scene menu Portrait Landscape Sports Night portrait Party/indoor Exit Assist modes Portrait B Portrait - Nikon 25552 | User Manual - Page 53
Modes Shooting Suited for the Scene - High-sensitivity Shooting Mode, Scene Mode B Portrait Camera focuses on subject in the center of the monitor. No guides are displayed in the monitor. N Portrait left Compose shot with subject in left half of frame. Camera focuses on subject inside the framing - Nikon 25552 | User Manual - Page 54
Assist Use this mode for vivid landscapes, cityscapes, and portraits featuring a landmark in the background. E Landscape Camera focuses at infinity. No guides are displayed in the monitor. S Scenic view Use to photograph distant skylines. Camera focuses at infinity. Match top of skyline with wavy - Nikon 25552 | User Manual - Page 55
Assist Use this mode for dynamic action shots that freeze the action in a single shot or record motion in a series of pictures. No framing guides are displayed. Assist Modes P Sports Pictures are taken continuously while the shutter-release button is pressed. When the image mode is E Normal(3072 - Nikon 25552 | User Manual - Page 56
Assist Modes D Night Portrait Assist QR Use this mode to achieve a natural balance between the main subject and background lighting in portraits taken at night. This mode offers the same assist options as portrait assist mode (c 39). • Electronic VR will be applied when shooting at slow shutter - Nikon 25552 | User Manual - Page 57
Shooting Suited for the Scene - High-sensitivity Shooting Mode, Scene Mode Scene Modes Taking Pictures in Scene Modes 1 Enter scene mode by pressing Scene D in shooting mode, selecting n (use the rotary multi selec- tor), and then pressing d. 2 Press m. 3 Choose a scene mode and press d. - Nikon 25552 | User Manual - Page 58
Scene Modes Features C Party/indoor Captures the effects of candlelight and other indoor background lighting. • Camera focuses on subject in center of frame. • Hold the camera steadily to prevent camera shake in dark places. • Electronic VR (c 106) will be applied when flash mode is set to fill - Nikon 25552 | User Manual - Page 59
Shooting Suited for the Scene - High-sensitivity Shooting Mode, Scene Mode Scene Modes G Night landscape QR Slow shutter speeds are used to produce stunning night landscapes. • Camera focuses at infinity. The AF indicator (c 28) always lights; however, focus may not be set for near subjects, - Nikon 25552 | User Manual - Page 60
Shooting Suited for the Scene - High-sensitivity Shooting Mode, Scene Mode Scene Modes K Fireworks show Q Slow shutter speeds are used to capture the expanding burst of light from a firework. • Camera focuses at infinity. The AF indicator (c 28) always lights; however, focus may not be set for - Nikon 25552 | User Manual - Page 61
F Panorama assist Scene Modes Shooting Suited for the Scene - High-sensitivity Shooting Mode, Scene Mode Use when taking a series of pictures that will later be joined to form a single panorama using PictureProject. C B1 H Off1 F Off1 u Auto 1 Other settings can be selected. Taking - Nikon 25552 | User Manual - Page 62
Scene Modes 4 Take the second picture. Compose the next picture so that it overlaps the first picture. Repeat until you have taken the necessary number of pictures to complete the scene. FG 5 Press the rotary multi selector J when FG shooting is completed. The camera returns to step 2. BM 7 BM 4 - Nikon 25552 | User Manual - Page 63
Anti-shake Mode Shooting in Anti-shake Mode Anti-shake mode offers the following features: • This mode reduces effects of camera shake or blurred subjects, and pro- duces clear images. • [Electronic VR] (c 106) and [BSS] (best shot selector) are enabled. Elec- tronic VR compensates blurred images. - Nikon 25552 | User Manual - Page 64
selected with the mode-selection menu. 1 Press m (one-touch portrait A mode). A yellow K guide is displayed. One-Touch Portrait Mode 2 Frame a picture using the K guide. A When the camera detects a face, the guide is dis- played with a double yellow border. When the camera detects more - Nikon 25552 | User Manual - Page 65
One-Touch Portrait Mode The One-Touch Portrait Menu Press m in one-touch portrait mode to display the one-touch portrait menu. In addition to image mode and exposure compensation, portrait effects (reducing vividness of skin tones, softening overall image) can be set. Z Image mode1 Choose an image - Nikon 25552 | User Manual - Page 66
More on Playback Viewing Multiple Pictures: Thumbnail Playback Press the zoom control to t (j) in full-frame playback (c 30) to display pictures in "contact sheets" of thumbnail images. The following operations can be performed while thumbnails are displayed: To Press Description c Choose - Nikon 25552 | User Manual - Page 67
full-frame playback (c 30) zooms the current picture in 3×, X3.0 with the center of the picture displayed in the moni- tor (Quick Playback Zoom). The guide in the lower right shows where the part of the picture is enlarged. The part of the picture displayed is changed by pressing the rotary - Nikon 25552 | User Manual - Page 68
Editing Pictures Use the COOLPIX S7c to edit pictures in-camera and store them as separate files (c 160). The editing features described below are available. Editing function Crop D-Lighting Electronic VR Small picture Description Enlarge the image or refine the composition and create a copy - Nikon 25552 | User Manual - Page 69
Editing Pictures Creating a Cropped Copy: Crop This function is only available when N:u is displayed in the monitor with playback zoom (c 53) enabled. Cropped copies are stored as separate files. 1 Press the zoom control to v (k) to zoom in on the image. 2 Refine copy composition. X4.0 Press the - Nikon 25552 | User Manual - Page 70
Editing Pictures Enhancing Brightness and Contrast: D-Lighting D-Lighting can be used to create copies with enhanced brightness and contrast, brightening dark portions of a picture. Enhanced copies are stored as separate files. 1 Display the desired picture in full-frame (c 30) or thumbnail (c 52) - Nikon 25552 | User Manual - Page 71
Editing Pictures Compensating Blurred Images: Electronic VR Vibration reduction is used to create a new image by compensating the blurred image. Created copies are stored as separated files. 1 Choose the desired image in full-frame playback (c 30). When the X indicator is displayed, vibration - Nikon 25552 | User Manual - Page 72
Editing Pictures H Resizing Pictures: Small Picture Create a small copy of the current picture. Small copies are stored as JPEG files with a compression ratio of 1:16. The following sizes are available. I 640×480 J 320×240 K 160×120 Suited to television playback. Suited to display on web pages. - Nikon 25552 | User Manual - Page 73
Voice Memos: Recording and Playback Use the camera's built-in microphone to record voice memos for pictures marked with N:O in full-frame playback (c 30). Recording Voice Memos A voice memo will be recorded while the y M shutter-release button is held down. Recording ends after about 20 - Nikon 25552 | User Manual - Page 74
Viewing Pictures by Date Pictures taken on a specific date can be selected for viewing, deletion, printing, protection, and transfer. The date can be selected from a calendar or a list. Selecting a Date in Calendar Mode 1 Enter calendar mode by pressing D in playback mode, selecting J (use the - Nikon 25552 | User Manual - Page 75
Viewing Pictures by Date Selecting a Date in List-by-Date Mode 1 Enter list-by-date mode by pressing D, selecting L (use the rotary multi selector) in playback mode, and then pressing d. Dates for which pictures exist will be listed. 2 Choose date and press d. Camera lists up to 30 dates. If - Nikon 25552 | User Manual - Page 76
Viewing Pictures by Date Using Calendar Mode and List-by-Date Mode To Press Description c Select date Use the rotary multi selector to select a date. - Select month (calendar mode only) x Press to t (j) to view previous month, press to v (k) to view following month. - Switch to fullframe - Nikon 25552 | User Manual - Page 77
Viewing Pictures by Date The following operations are available when in full-frame playback: To Press Description c View other pictures Use the rotary multi selector to choose and view other pictures. 30 Zoom in Switch to calendar/list-by-date mode playback v (k) A maximum of 10× zoom in - Nikon 25552 | User Manual - Page 78
Viewing Pictures by Date Calendar Mode and List-by-Date Mode Menus Press m in either mode to display the following menus for only the pictures taken on the specified date. Print set c 93 Slide show c 110 Delete c 111 Protect c 111 Transfer marking c 112 Rotate image* c 112 Small - Nikon 25552 | User Manual - Page 79
Pictmotion by muvee Pictmotion* creates slide show movies with custom transitions and background music. It is only available when a memory card is inserted in the camera. * Pictmotion is powered by muvee Technologies. Creating a Pictmotion Movie This section describes the easiest way to create a - Nikon 25552 | User Manual - Page 80
Pictmotion by muvee Creating a Custom Pictmotion Movie 1 Use the rotary multi selector to choose [Confirm] in the picture selection menu (c 65, step 3) and press d. The check box is selected (y). Picture selection All images Choose date Confirm More on Playback 2 Choose [All images] or [Choose - Nikon 25552 | User Manual - Page 81
by muvee j Notes on Pictmotion • Pictmotion supports both still pictures and movie files; note, three-minute custom sound tracks to a memory card inserted in the camera; see the PictureProject Reference Manual (on CD) for details. • Pictmotion movies can also be transferred to a computer using the - Nikon 25552 | User Manual - Page 82
Pictmotion by muvee Other Options for Pictmotion Movies Pressing m in the Pictmotion screen (c 65, step 2) displays the Pictmotion settings menu, while pressing it in the save confirmation dialog (c 65, step 4) displays the change settings menu. The following options are available. Pictmotion - Nikon 25552 | User Manual - Page 83
Viewing Pictmotion Movies 1 Enter Pictmotion playback mode by pressing D in playback mode, selecting P (use the rotary multi selector), and then pressing d. Pictmotion by muvee Pictmotion by muvee 2 Use the rotary multi selector to choose the desired Pictmotion movie and press d. 3 Choose [Play] - Nikon 25552 | User Manual - Page 84
Movies Recording Movies To shoot movies with sound recorded via the built-in microphone, select shooting mode and follow the steps below. 1 Enter movie mode by pressing Movie D in shooting mode, selecting S (use the rotary multi selec- tor), and then pressing d. Exposure count display shows - Nikon 25552 | User Manual - Page 85
The Movie Menu Press m in movie mode to display the movie menu. T Movie options Choose type of movie that will be recorded. Y Auto-focus mode Choose how camera focuses in movie mode. c Electronic VR Reduce effects of camera shake. c 72 c 75 c 75 Movies 71 - Nikon 25552 | User Manual - Page 86
The Movie Menu Selecting Movie Options The movie menu offers the options shown below. Option Description Maximum movie length/ frames* Internal memory (14 MB) Memory card (256 MB) Q TV movie 640A Movies are recorded at 30 frames per second. Each frame is 640 × 480 pixels in size. 12 sec. 3 - Nikon 25552 | User Manual - Page 87
The Movie Menu Time-Lapse Movies Record flowers opening or butterflies emerging from cocoons. Charge the battery before shooting begins. 1 Use the rotary multi selector to choose Movie [Movie options] and press d. Movie options S Auto-focus mode Electronic VR 2 Choose [Time-lapse movieA] - Nikon 25552 | User Manual - Page 88
The Movie Menu Stop-Motion Movies 1 Use the rotary multi selector to choose [Movie options] > [Stop-motion movie] and press d. Movie options Time-lapse movie Stop-motion movie Exit 2 Press m. The camera returns to shooting mode. 3 Press the shutter-release button to record the first frame. The - Nikon 25552 | User Manual - Page 89
The Movie Menu Auto-Focus Mode Choose how the camera focuses in movie mode. Option Z Single AF (default) a Full-time AF Description Camera focuses when shutter-release button is pressed halfway and locks at this position during shooting. Camera focuses continuously, even when shutter-release - Nikon 25552 | User Manual - Page 90
Movie Playback In full-frame playback (c 30), movies are recognized by the T icon. To play a movie, display it in full-frame playback and press d. 2006.10.10 15:31 E 100NIKON 0010.MOV M Use the zoom control to adjust playback volume. Press to t (j) to lower volume, or to v (k) to raise volume. - Nikon 25552 | User Manual - Page 91
Voice Recordings Making Voice Recordings Audio voice recordings can be recorded over the built-in microphone and played back over the built-in speaker. 1 Enter voice recording mode by pressing D in shooting mode, selecting O (use the rotary multi selector), and then pressing d. Voice recording - Nikon 25552 | User Manual - Page 92
j Voice Recordings • PictureProject cannot be used to transfer or play voice recordings. Select [Interface] > [Mass storage] for [USB], copy the files manually. • The copied files can be played back using QuickTime or any other WAV-compatible audio player. • Note that index points created with the - Nikon 25552 | User Manual - Page 93
Playing Voice Recordings 1 Enter audio playback mode by pressing D in playback mode, selecting q (use the rotary multi selector), and then pressing d. 2 Choose the desired file and press d. The selected file will be played back. Audio playback Select sound file 001 10.10.06 10:30 N 002 10.10.06 11: - Nikon 25552 | User Manual - Page 94
Playing Voice Recordings Operations During Playback Use the zoom control to adjust playback volume. Press to t (j) to lower volume, or to v (k) to raise volume. Rotate the rotary multi selector to advance or rewind the voice recording at twice the normal speed. Playback controls appear at the top - Nikon 25552 | User Manual - Page 95
Copying Voice Recordings Copy voice recordings between the internal memory and a memory card. This option is available only when a memory card is inserted. 1 Press m in the select sound file screen (c 79, step 2). 2 Use the rotary multi selector to choose the option and press d. MNO: Copy - Nikon 25552 | User Manual - Page 96
Connecting to Televisions, Computers, and Printers Connecting to Televisions, Computers, and Printers Connecting to a TV Connect the camera to a television using the A/V cable to play back pictures on the television. 1 Turn off the camera. 2 Connect the COOL-STATION to the TV using the supplied A/V - Nikon 25552 | User Manual - Page 97
on installing and using PictureProject, see the Quick Start Guide or the PictureProject Reference Manual (on CD). Confirming USB Option The following two ]. Choose [PTP]. Choose [Mass storage] or [PTP]. 1 This camera supports the USB options, [Mass storage] and [PTP] (default setting). Choose - Nikon 25552 | User Manual - Page 98
Connecting to Televisions, Computers, and Printers Connecting to a Computer Setting the USB Option Set the USB option in the setup menu (c 114) on the camera before connecting the camera to a computer or printer. 1 Display the setup menu by Set up pressing D, selecting Z (use the rotary multi - Nikon 25552 | User Manual - Page 99
Connecting to a Computer Transferring Pictures to a Computer 1 Start a computer to which PictureProject has been installed. 2 Turn off the camera. 3 Connect the COOL-STATION to the computer using the supplied USB cable. Connecting to Televisions, Computers, and Printers 4 Turn the camera on after - Nikon 25552 | User Manual - Page 100
Connecting to a Computer 6 Disconnect the camera once transfer is complete. If the USB option is set to [PTP] Turn the camera off and disconnect the USB cable. If the USB option is set to [Mass storage] Remove the camera from the system as described below before turning the camera off and - Nikon 25552 | User Manual - Page 101
Connecting to a Printer Users of PictBridge-compatible (c 177) printers can connect the camera directly to the printer and print pictures without using a computer. • To print pictures directly from the camera, configure the printer connected to the computer as a profile device for wireless transfer - Nikon 25552 | User Manual - Page 102
Connecting to a Printer Connecting the Camera and Printer 1 Set the USB option (c 84) to [PTP]. 2 Turn off the camera. USB PTP Mass storage Exit 3 Turn on the printer. Check printer settings. 4 Connect the COOL-STATION to the printer using the supplied USB cable. Connecting to Televisions, - Nikon 25552 | User Manual - Page 103
Connecting to Televisions, Computers, and Printers Connecting to a Printer Printing Pictures One at a Time After connecting the camera to the printer correctly (c 88), print pictures by following the procedure below. 1 Use the rotary multi selector to choose a picture and press d. The PictBridge - Nikon 25552 | User Manual - Page 104
Connecting to Televisions, Computers, and Printers Connecting to a Printer 6 Choose [Start print] and press d. PictBridge Start print Copies Paper size 7 Printing starts. Monitor display returns to that shown in step 1 when printing is complete. To cancel before all copies have been printed, - Nikon 25552 | User Manual - Page 105
Connecting to a Printer 3 Choose the desired paper size and press d. To specify paper size using printer settings, choose [Default] in the paper size menu and press d. Paper size Default 3.5 x 5 in. 4 Choose [Print selection], [Print all images] or [DPOF printing] and press d. Print menu Print - Nikon 25552 | User Manual - Page 106
paper size for the current printer), [3.5 × 5 in.], [5 × 7 in.], [Postcard], [100 × 150 mm], [4 × 6 in.], [8 × 10 in.], [Letter], [A3], and [A4]. Only sizes supported by the current printer will be displayed. To specify paper size using printer settings, choose [Default] in the paper size menu. 92 - Nikon 25552 | User Manual - Page 107
Creating a DPOF Print Order: Print Set The [Print set] option in the playback menu is used to create digital "print orders" for printing on DPOF-compatible devices (c 177). In addition to pictures themselves, shooting date and photo information (shutter speed, aperture, etc.) can also be printed. - Nikon 25552 | User Manual - Page 108
a DPOF-compatible printer (c 177). Use the [Date imprint] (c 121) option in the setup menu to print the date on pictures from a printer that does not support DPOF (position of the date is fixed). When the date option for both [Print set] and [Date imprint] is enabled, only the date from the - Nikon 25552 | User Manual - Page 109
attach it to the dock insert. Connecting to Televisions, Computers, and Printers 4 Print pictures. Follow the procedures described in the printer manual. Removing the Dock Insert Place your thumbs where indicated, press, and lift. j Note on Connecting to an ImageLink- compatible Printer The - Nikon 25552 | User Manual - Page 110
Shooting, Playback, and Setup Menus Shooting Options: The Shooting Menu The shooting menu and high-sensitivity menu contain the following options. Z Image mode Choose image size and quality. d White balance1 Match white balance to the light source. I Exp. +/- Adjust exposure for very bright or - Nikon 25552 | User Manual - Page 111
Shooting Options: The Shooting Menu Displaying the Shooting Menu and High-sensitivity Menu Enter L (auto) or high-sensitivity shooting mode by pressing D in shooting mode, selecting the L (auto) or K (high-sensitivity), and then pressing d. Press m to display the shooting menu or high-sensitivity - Nikon 25552 | User Manual - Page 112
Shooting Options: The Shooting Menu k Image Mode and the Number of Exposures Remaining The following table lists the number of pictures that can be stored in internal memory and on a 256 MB memory card, together with the size of still pictures. Note that the number of pictures that can be stored - Nikon 25552 | User Manual - Page 113
Shooting Options: The Shooting Menu d White Balance Adjust white balance based on the light source to give pictures the most realistic colors possible. Although the default setting, [Auto], can be used under most types of lighting, you can apply the white balance setting suited to a particular - Nikon 25552 | User Manual - Page 114
Shooting Options: The Shooting Menu f Preset White Balance Preset white balance is used with mixed lighting or to compensate for light sources with a strong color cast (for example, to make pictures taken under a lamp with a red shade look as though they had been taken under white light). 1 Place - Nikon 25552 | User Manual - Page 115
Shooting Options: The Shooting Menu I Exp. +/- Exposure compensation is used to alter exposure from the value selected by the camera. Choose from values between -2.0 EV and +2.0 EV in increments of 1/3 EV. Negative values produce darker pictures, positive values brighter pictures. The icon for the - Nikon 25552 | User Manual - Page 116
Shooting Options: The Shooting Menu q Continuous Capture a fleeting expression on a portrait subject, photograph a subject that is moving unpredictably, or capture motion in a series of pictures. Focus, exposure, and white balance are fixed at the values for the first picture in each series. - Nikon 25552 | User Manual - Page 117
Shooting Options: The Shooting Menu z Interval Timer Photography Pictures are taken automatically at specified intervals. Choose from intervals between 30 seconds and 60 minutes. To prevent the camera from turning off unexpectedly during recording, use a fully charged battery. 1 Use the rotary - Nikon 25552 | User Manual - Page 118
Shooting Options: The Shooting Menu A Best Shot Selector (BSS) BSS The "best shot selector" is recommended from situations in which inadvertent camera movement can result in blurred pictures, or when parts of the On Off Exposure BSS image are prone to under- or overexposure. At [On] and [ - Nikon 25552 | User Manual - Page 119
Shooting, Playback, and Setup Menus Shooting Options: The Shooting Menu W ISO Sensitivity Sensitivity is a measure of how quickly the camera reacts to light. The higher the sensitivity, the less light needed to make an exposure. Although a high ISO rating is suited for taking pictures of subjects - Nikon 25552 | User Manual - Page 120
Menu k AF Area Mode Use this option to determine where the camera focuses. AF area mode Center Manual Exit n Center Camera focuses on subject in center of frame. Center focus area is used. m Manual Press the rotary multi selector GHIJ to select from 99 focus areas in the frame. Pictures can be - Nikon 25552 | User Manual - Page 121
Shooting, Playback, and Setup Menus Shooting Options: The Shooting Menu Restrictions on Camera Settings Restrictions apply to the following settings in L (auto) mode: Flash mode Flash turns off at [Continuous] settings of [Continuous] or [Multi-shot 16], or when [BSS] is on. Applied setting is - Nikon 25552 | User Manual - Page 122
Playback Options: The Playback Menu The playback menu contains the following options. w Print set Select pictures to print and the number of copies for each. z Slide show View pictures stored in the internal memory or on a memory card in an automatic slide show. A Delete Delete all or selected - Nikon 25552 | User Manual - Page 123
Playback Options: The Playback Menu Selecting Multiple Pictures Follow the steps below to select multiple pictures for a print set (c 93), deletion (c 111), protection from deletion (c 111), transfer (c 112), rotate (c 112), copying between internal memory and the memory card (c 113), or for the - Nikon 25552 | User Manual - Page 124
Playback Options: The Playback Menu z Slide Show Play back pictures stored in the internal memory or on a memory card in an automated "slide show". Slide show Pause Start Frame intvl Loop Exit 1 Display the slide show menu; use the rotary multi selector to choose [Start] and press d. To change - Nikon 25552 | User Manual - Page 125
Playback Options: The Playback Menu A Delete The delete menu contains the options shown below. If no memory card is inserted in the camera, pictures in the internal memory will be deleted. If a memory card is inserted, pictures on the memory card will be deleted. Delete Erase selected images Erase - Nikon 25552 | User Manual - Page 126
Playback Options: The Playback Menu E Transfer Marking Change transfer marking (E) for existing pictures. When the camera is connected to a computer with PictureProject installed via the supplied USB cable, pressing d transfers only the pictures marked with a E icon (c 85, 155). At the default - Nikon 25552 | User Manual - Page 127
Playback Options: The Playback Menu L Copy Copy Copy pictures between the internal memory and a memory card. First, select from the following options. Exit MNO Copy pictures from internal memory to memory card. ONM Copy pictures from memory card to internal memory. Then, select the desired - Nikon 25552 | User Manual - Page 128
Shooting, Playback, and Setup Menus Basic Camera Setup: The Setup Menu The setup menu contains the following options. R H V W Z f u h I i M/O j k n B Menus Choose how menus are displayed. Quick startup Enable or disable welcome screen and start-up sound. Welcome screen Select screen displayed - Nikon 25552 | User Manual - Page 129
Basic Camera Setup: The Setup Menu Displaying the Setup Menu First, display the mode-selection menu by pressing D. Then select Z (use the rotary multi selector), press d. Set up Set up Menus Quick startup Welcome screen Date Monitor settings Exit • Use the rotary multi selector to choose and - Nikon 25552 | User Manual - Page 130
Basic Camera Setup: The Setup Menu H Quick Startup Choose [On] to disable the welcome screen and start-up sound. The camera will be ready for shooting as soon as it is turned on. Set to [Off] when enabling the welcome screen. Quick startup On Off Exit V Welcome Screen You can select the welcome - Nikon 25552 | User Manual - Page 131
Basic Camera Setup: The Setup Menu W Date Set the camera clock and choose home and travel destination time zones. Date 10.10.2006 15:30 Date Time zone Exit Date Set camera clock to current date and time. See "Setting Display Language, Date, and Time" (c 20-21) for more information. Time zone - Nikon 25552 | User Manual - Page 132
Basic Camera Setup: The Setup Menu 4 Choose the travel destination time zone and press d. The setting is enabled. Press m to return to shooting or playback mode. While the travel destination time zone is selected, the Y icon will be displayed in the monitor when the camera is in shooting mode. New - Nikon 25552 | User Manual - Page 133
Basic Camera Setup: The Setup Menu k Time Zones (c 20) The camera supports the time zones listed below. Increments of less than one hour are not supported; when travelling to or from destinations at half- or quarter-hour increments from Greenwich Mean Time (GMT), such as Afghanistan, Central - Nikon 25552 | User Manual - Page 134
. Shooting mode Playback mode Show info Auto info M M 2006.10.10 100NIKON 15:30 0009.JPG M E NO 8 44 The current settings or operation guide is displayed for five seconds as in [Show info] above. After five seconds, display will be the same as [Hide info]. M Hide info Shooting - Nikon 25552 | User Manual - Page 135
Basic Camera Setup: The Setup Menu f Date Imprint Date and time of recording can be imprinted on pictures for printing this information from printers that are not DPOF-compatible (c 168). f Date imprint Off Date Date and time Date counter Exit Date Date is imprinted on the bottom right corner of - Nikon 25552 | User Manual - Page 136
Basic Camera Setup: The Setup Menu Date Counter Pictures taken while this option is in effect are imprinted with the number of days remaining until, or the number of days elapsed since a specified date. Use it to track the growth of a child or count down the days until a birthday or wedding. f - Nikon 25552 | User Manual - Page 137
Basic Camera Setup: The Setup Menu u AF Assist If [Auto] is selected, AF-assist illumination will be used to assist the focus operation when the subject AF assist Auto Off is poorly lit. Note that for some modes, AF-assist illumination turns off automatically. Exit To disable this function, - Nikon 25552 | User Manual - Page 138
Basic Camera Setup: The Setup Menu I Record Orientation Choose whether or not to record the orientation of pictures taken in "tall" orientation. Record orientation Auto Off Choose [Auto] to record the picture's orientation detected by the camera's sensor. The taken picture will be automatically - Nikon 25552 | User Manual - Page 139
Basic Camera Setup: The Setup Menu M Format Memory/O Format Card Format the internal memory or a memory card. Formatting the Internal Memory If no memory card is inserted, this option is labeled [Format memory] and formats internal memory. Remove the memory card from the camera to format the - Nikon 25552 | User Manual - Page 140
Basic Camera Setup: The Setup Menu j Language Choose one of 20 languages for display of camera menus and messages. Czech Danish German (default) Spanish French Indonesian Italian Dutch Norwegian Polish Portuguese Russian Finnish Swedish Simplified Chinese Traditional Chinese Japanese Korean Thai - Nikon 25552 | User Manual - Page 141
Basic Camera Setup: The Setup Menu n Reset All This option restores the following settings to their default values: Reset all Reset all settings to default values No Reset Exit Pop-up menu Flash mode (c 32) Self-timer (c 34) Macro close-up (c 35) Scene mode Scene mode (c 37) Portrait assist (c 39 - Nikon 25552 | User Manual - Page 142
Shooting, Playback, and Setup Menus Basic Camera Setup: The Setup Menu Shooting menu Image mode (c 97) White balance (c 99) Exposure compensation (c 101) Continuous (c 102) BSS (c 104) ISO sensitivity (c 105) Color options (c 105) AF area mode (c 106) Electronic VR (c 106) Setup menu Menus (c 115) - Nikon 25552 | User Manual - Page 143
Basic Camera Setup: The Setup Menu • Choosing [Reset all] also clears the current file number (c 160) from the memory. Numbering will continue from the lowest number available. To reset file numbering to "0001", delete all pictures (c 111) before selecting [Reset all]. • Settings for [Date] (c 117), - Nikon 25552 | User Manual - Page 144
memory or on a memory card can be viewed by your family and friends via e-mail and webpage. For more information on the COOLPIX CONNECT service, refer to "Uploading Pictures to COOLPIX CONNECT" (c 145). PC Connection • Pictures stored in the camera's internal memory or on a memory card can be - Nikon 25552 | User Manual - Page 145
home wireless LAN uses a proxy server to connect to the Internet, the COOLPIX CONNECT service is not available. l Ad-hoc Mode and Infrastructure Mode • Ad-hoc mode establishes printing. • See the Quick Start Guide for more information on installing the Setup Utility. 131 Wireless Transfer Mode - Nikon 25552 | User Manual - Page 146
The Features Available in the Wireless Transfer Mode The features below are available in the COOLPIX S7c's wireless transfer mode. 1 Wireless LAN Features COOLPIX CONNECT (via home wireless LAN) COOLPIX CONNECT can be used by connecting the camera directly to the Internet via home wireless LAN. - Nikon 25552 | User Manual - Page 147
• Optional PD-10 wireless printer adapter • Connection setup for the camera P OWER and the PD-10. LINK BUSY S TART c 158 Refer to the PD-10 instruction manual. Wireless Transfer Mode 133 - Nikon 25552 | User Manual - Page 148
For Connection via Home Wireless LAN Connect to a home wireless LAN wirelessly and make necessary configurations for connecting to COOLPIX CONNECT (via home wireless LAN), connecting to a computer wirelessly, and for wireless printing. Configuration Procedure This section gives a brief description - Nikon 25552 | User Manual - Page 149
(Camera to Computer) net- work profile Create Infrastructure (Access Point) and Adhoc (Camera to Computer) net- work profiles Create Profile manually: • Fixed IP addressing • Operating sys- tem other than Windows • Windows XP SP1 • Macintosh 9 Configure wireless LAN settings between the camera - Nikon 25552 | User Manual - Page 150
For Connection via Home Wireless LAN Configuring the Camera This section describes the "Configuration Procedure" (c 134) in detail. • To display more information on each step, click [Help]. To cancel configur- ing a profile device, click [Cancel]. 1 Prepare a wireless LAN-capable computer. 2 - Nikon 25552 | User Manual - Page 151
For Connection via Home Wireless LAN 5 Start the Setup Utility. For the initial installation run, the Setup Utility will launch automatically when installation is complete. From the second time, start the Setup Utility by following the procedure below: Windows: Start the computer and select [Start] - Nikon 25552 | User Manual - Page 152
] on Windows XP • When configuring a profile device using an ad-hoc network between the camera and computer, the computer's fixed IP address (manually entered IP address) will be automatically set to "169.254.x.x". When adding an infrastructure network later, set the computer to automatically obtain - Nikon 25552 | User Manual - Page 153
name from the [Network Name (SSID)] list. This name will be used when connecting the camera and computer. When selecting [Create Profile manually] in step 8, manually enter the same values set in the computer for all items except those that are automatically provided. See "Settings for the Setup - Nikon 25552 | User Manual - Page 154
For Connection via Home Wireless LAN 12Configure wireless printing. If a printer is connected to the computer, check [Create Wireless Printing Profile] and select the printer to be used for wireless printing (c 158). Enter a profile name (up to 16 single-byte alphanumeric characters), select a - Nikon 25552 | User Manual - Page 155
For Connection via Home Wireless LAN Settings for the Setup Utility When configuring a profile using the Setup Utility, refer to the description for each item listed below. Settings are the same for Windows and Macintosh. * Mandatory items Settings Network name (SSID)* Network type* Channel - Nikon 25552 | User Manual - Page 156
via Home Wireless LAN Settings Configure* IP Address Descriptions Select [Auto] (default setting) or [Manual] for the method of setting the camera IP address. When [Configure] is set to [Manual], enter the IP address for the camera. Wireless Transfer Mode j Wireless LAN Channels Wireless LAN - Nikon 25552 | User Manual - Page 157
Transferring Pictures Establishing a Wireless Connection 1 Enter wireless transfer mode by pressing D in shooting mode, selecting n (use the rotary multi selector), and then pressing d. The wireless LAN start-up screen will be displayed and the camera will search for available SSIDs. Wireless LAN - Nikon 25552 | User Manual - Page 158
Transferring Pictures When Transfer is Complete The message shown at right is displayed when the transfer is complete. Mail sent. Closed • To repeat the transfer, press d. • To exit wireless transfer mode, press D and connection to alias. choose another mode, or turn off the camera. Select - Nikon 25552 | User Manual - Page 159
Transferring Pictures Uploading Pictures to COOLPIX CONNECT To use COOLPIX CONNECT, perform the following procedures. 1 Choose [COOLPIX CONNECT] in step 3 of "Establishing a Wireless Connection" (c 143) and press d. Function selection menu COOLPIX CONNECT Easy Transfer (PM) Easy Trans. (no PM) - Nikon 25552 | User Manual - Page 160
Transferring Pictures 3 Choose [All images] or [Choose date] and press d. Picture selection All images Choose date When choosing [All images], select the desired pictures (up to 30) and press d to mark. Then press the shutter-release button to apply selection. Select image 5/30 When choosing [ - Nikon 25552 | User Manual - Page 161
Transferring Pictures 5 Choose recipient e-mail address and press the shutter-release button. Choose e-mail address and press d to mark. Choose address New x x x@x x x. x xx Choose [New] and press d to add recipients. Enter email address correctly in the address screen and press the shutter- - Nikon 25552 | User Manual - Page 162
Transferring Pictures j Entering Characters on the Camera When using COOLPIX CONNECT service, you can set profiles with the camera, without using the Setup Utility. From the camera you can enter characters for information such as the e-mail - Nikon 25552 | User Manual - Page 163
Transferring Pictures Transferring Pictures to a Computer (PC Connection) The following transfer method can be selected in step 3 of "Establishing a Wireless Connection" (c 143): • Highlight an option and press d. The message "Connecting to (profile name)" will be displayed while the camera - Nikon 25552 | User Manual - Page 164
Transferring Pictures Transferring Pictures Not Yet Saved on a Computer Easy Transfer 1 Use the rotary multi selector to choose [Easy Transfer (PM)] or [Easy Trans. (no PM)] in step 3 of "Establishing a Wireless Connection" (c 143) and press d. When multiple computers are set as profiles for the - Nikon 25552 | User Manual - Page 165
Transferring Pictures Transferring Pictures Taken on Selected Date - Shooting Date 1 Use the rotary multi selector to choose [Shooting date] in step 3 of "Establishing a Wireless Connection" (c 143) and press d. When multiple computers are set as profiles for the infrastructure network, the - Nikon 25552 | User Manual - Page 166
Transferring Pictures Transferring Selected Pictures - Selected Images 1 Use the rotary multi selector to choose [Selected Images] in step 3 of "Establishing a Wireless Connection" (c 143) and press d. When multiple computers are set as profiles for the infrastructure network, the profile - Nikon 25552 | User Manual - Page 167
Transferring Pictures Immediately Transferring Pictures Taken - Shoot & Transfer 1 Use the rotary multi selector to choose [Shoot & Transfer] in step 3 of "Establishing a Wireless Connection" (c 143) and press d. When multiple computers are set as profiles for the infrastructure network, the - Nikon 25552 | User Manual - Page 168
Transferring Pictures l Changing Settings for Shoot and Transfer Press m in the shooting screen (for shoot and transfer) and the shoot and transfer menu will be displayed. Shoot & Transfer Confirm Transfer Save Images Image mode White balance Exp. +/- Exit Shoot & Transfer ISO sensitivity Color - Nikon 25552 | User Manual - Page 169
Transferring Pictures Transferring Pictures Marked with the Transfer Icon Marked Images 1 Use the rotary multi selector to choose [Marked images] in step 3 of "Establishing a Wireless Connection" (c 143) and press d. Function selection menu Shoot & Transfer Marked images PC mode Wireless Printing - Nikon 25552 | User Manual - Page 170
installed, it will be launched automatically. To transfer pictures, click the [Transfer] button in PictureProject Transfer. See the PictureProject Reference Manual (on CD) for details. Connected to My Network Profile-A • When the selected computer does not have PictureProject installed, drag and - Nikon 25552 | User Manual - Page 171
Transferring Pictures j Message Displayed During Transfer The message shown at right is displayed in the monitor during picture transfer. The antenna icon indicates signal strength (5-levels). The icon changes to red when outside the network area. When signal strength is poor, remove any obstacles - Nikon 25552 | User Manual - Page 172
The message "Connecting to wireless printer adapter" will be displayed. Set up profiles on the camera and PD-10 as described in the PD-10 instruction manual, starting from step 3. Once the profile is stored in the camera, pictures can be printed directly by selecting the PD10 in the profile list and - Nikon 25552 | User Manual - Page 173
Technical Notes Optional Accessories Rechargeable battery Battery charger AC adapter Cradle ImageLink-compatible printer adapter USB cable A/V cable Wireless printer adapter Nikon EN-EL8 rechargeable lithium-ion battery MH-62 battery charger EH-64 AC adapter MV-15 COOL-STATION PV-11 dock insert UC - Nikon 25552 | User Manual - Page 174
Image File and Folder Names Pictures, movies, and voice memos are assigned file names as follows: DSCN0001.JPG Identifier (not shown on camera monitor) Original still pictures (voice memo attachment included), still pictures for which electronic VR was used during shooting, movies, voice memos - Nikon 25552 | User Manual - Page 175
Image File and Folder Names • Files copied using [Copy] > [Selected images] or [Copy sound files] > [Selected files] are copied to the current folder, where they are assigned new file numbers in ascending order starting from the largest file number in memory. [Copy] > [All images] and [Copy sound - Nikon 25552 | User Manual - Page 176
Caring for the Camera To ensure continued enjoyment of this Nikon product, observe the following precautions when using or storing the device. j Keep dry The device will be damaged if immersed in water or subjected to high humidity. j Do not drop The product may malfunction if subjected to strong - Nikon 25552 | User Manual - Page 177
j The AF-Assist Illuminator LED The light-emitting diode (LED; c 6, 123) used in the AFassist illuminator conforms to the following IEC standard: Caring for the Camera k The Battery • Check the battery level when taking the camera out and charge the battery if necessary (c 18). Do not continue - Nikon 25552 | User Manual - Page 178
to see under bright lighting. • The monitor is lit by an LED backlight. Should the monitor begin to dim or flicker, contact 164 your Nikon service representative. Technical Notes - Nikon 25552 | User Manual - Page 179
table lists the error messages and other warnings displayed in the monitor, as well as the solutions for dealing with them. Display Problem Solution c S (blinks) Clock not set. Set clock. 117 w Battery running low. Prepare to charge or 14 change battery. Warning! Battery exhausted - Nikon 25552 | User Manual - Page 180
Error Messages Display Problem Solution c Out of memory M or O Memory card is full. • Choose smaller image size. 97 • Delete pictures or 23, 76, sound files. 80 • Insert new memory - Nikon 25552 | User Manual - Page 181
Error Messages Display Problem Solution c File contains no image data r File not created with COOLPIX S7c. View file on computer or - other device. This file cannot be played back. - Nikon 25552 | User Manual - Page 182
Error Messages Display Problem Solution c This image has been Image cannot be com- Copies from check printer status printer error. u Check printer. After - checking the ink or solv- ing the problem, select [Resume] and press d to resume printing. (Depending on the error, [Resume] may - Nikon 25552 | User Manual - Page 183
Error Messages Wireless Transfer Mode Display Problem Solution Transfer error Error during image transfer. Check signal strength. Move the camera closer to the profile device or remove obstruction between the camera and - Nikon 25552 | User Manual - Page 184
Error Messages Display Problem Solution c Connection error. Wireless connection to Check signal strength. . Mailbox is full The online album is full. Delete unnecessary pic- - tures. Service not available Cannot use COOLPIX Start Wireless Camera 134 CONNECT network ser- Setup Utility, - Nikon 25552 | User Manual - Page 185
Troubleshooting If the camera fails to function as expected, check the list of common problems below before consulting your retailer or Nikon representative. Refer to the page numbers in the right-most column for more information. Display, Settings and Power Supply Problem Monitor is blank Monitor - Nikon 25552 | User Manual - Page 186
Troubleshooting Problem Date not appearing on pictures even when [Date imprint] is not recorded to internal memory or the memory card at the time the problem occurred. Data already recorded will not be affected. Shooting Problem Cause/Solution c No picture taken when shutter- • Camera is in - Nikon 25552 | User Manual - Page 187
Troubleshooting Problem Pictures are blurred Bright specks appear in pictures taken with flash Flash does not fire Optical zoom cannot be used Digital zoom cannot be used [ - Nikon 25552 | User Manual - Page 188
Troubleshooting Problem Pictures are too dark (underexposed) Pictures are too bright (overexposed) with movies and may not be available with pictures created with other cameras. Select picture that supports crop, D-Lighting, or small picture. 76, 54 Camera may be unable to create Pictmo- - Nikon 25552 | User Manual - Page 189
Troubleshooting Problem Cause/Solution c Custom Pictmotion background Memory card Computer is not set to launch - PictureProject automatically. See the supplied PictureProject Refer- ence Manual (on CD) (silver) for more information on PictureProject. Cannot mark pictures for transfer No - Nikon 25552 | User Manual - Page 190
Troubleshooting Wireless Transfer Problem Cause/Solution c The camera is not detected by the Wireless Camera Setup Utility. • Set the camera to L (auto) mode. • Select [PTP] for [Interface] > [USB] in - Nikon 25552 | User Manual - Page 191
is an industry-wide standard that allows pictures to be printed from print orders stored on the memory card. • Exif version 2.2: This camera supports Exif (Exchangeable Image File Format for Digital Still Cameras) version 2.2, a standard that allows information stored with photographs to be used for - Nikon 25552 | User Manual - Page 192
AF Focus range (from • 30 cm (1 ft.)-∞ lens) • Macro close-up mode: 4 cm (1.6 in.)-∞ (wide zoom position) Focus-area selection Center, manual (99 focus area) AF-assist illumination Class 1 LED product (IEC 60825-1 Edition 1.2-2001); max. output: 1,600 µW Vibration reduction Electronic Monitor - Nikon 25552 | User Manual - Page 193
in.-13 ft. Flash control Sensor flash system Interface USB Video output Can be selected from NTSC and PAL I/O terminals Multi connector (supports ImageLink) Wireless Standards IEEE 802.11b/g (standard wireless LAN protocol), ARIB STDT66 (standard for low power data communications systems - Nikon 25552 | User Manual - Page 194
Specifications Charging time Battery life Approximately 2 hours Approximately 200 shots (EN-EL8)* Dimensions 100.5 × 60 × 21 mm/3.9 × 2.4 × 0.8 in. (W × H × D, excluding projections) Weight 140 g (4.9 oz) without battery or memory card Operating environment Temperature 0 to +40 °C (+32 to - Nikon 25552 | User Manual - Page 195
× 1.9 × 0.2 in. (W × H × D, excluding projections) Approximate weight 17 g (0.6 oz), excluding terminal cover j Specifications Nikon will not be held liable for any errors this manual may contain. The appearance of this product and its specifications are subject to change without notice. 181 - Nikon 25552 | User Manual - Page 196
Index Technical Notes Symbols F Anti-shake mode 49 F Anti-shake mode/electronic vibration mode 7, 49, 57 d Apply selection button 7 L Auto mode 24-31 J Calendar mode 60 T Delete button 11, 30, 53 i D-Lighting button 6, 56 l Help 13 K High-sensitivity shooting mode 36 L List-by-date mode 61 m Menu - Nikon 25552 | User Manual - Page 197
120 face-priority 50 Folder names 160 Format 23, 125 Framing 26 indicators in 8-9 Monitor settings 120 MOV 160 Movie menu 71 assist 37-42 guides 38-42 FSCN 160 Movie mode 70 Movie options 72 maximum movie length 72 183 - Nikon 25552 | User Manual - Page 198
button 6 Slide show 110 Small picture 58 Smear 164 Sound settings 123 Sports (P) 41 SSCN 160 SSID 132, 141, 143 Strap, Camera 6 Sunset (I) 44 Support information 2 T Television 82 connecting to 82 Thumbnail playback 52 Time zone 20-21, 117, 119 Transfer 85 mark 86, 112, 126 Transfer marking 112 - Nikon 25552 | User Manual - Page 199
U USB 126 cable 85, 88 connection 83-84, 126 V Video mode 126 Voice Memos 59 Voice recordings Copying 81 making 77 menu 78 Playing 79 W WAV 160 Welcome screen 114 White balance 99, 107 preset 100 Wireless Camera Setup Utility 131 Wireless LED 6 Wireless Printer Adapter PD-10 158 Wireless Printing - Nikon 25552 | User Manual - Page 200
No reproduction in any form of this manual, in whole or in part (except for brief quotation in critical articles or reviews), may be made without written authorization from NIKON CORPORATION. Fuji Bldg., 2-3
-
 1
1 -
 2
2 -
 3
3 -
 4
4 -
 5
5 -
 6
6 -
 7
7 -
8
-
9
-
10
-
11
-
12
-
13
-
14
-
15
-
16
-
17
-
18
-
19
-
20
-
21
-
22
-
23
-
24
-
25
-
26
-
27
-
28
-
29
-
30
-
31
-
32
-
33
-
34
-
35
-
36
-
37
-
38
-
39
-
40
-
41
-
42
-
43
-
44
-
45
-
46
-
47
-
48
-
49
-
50
-
51
-
52
-
53
-
54
-
55
-
56
-
57
-
58
-
59
-
60
-
61
-
62
-
63
-
64
-
65
-
66
-
67
-
68
-
69
-
70
-
71
-
72
-
73
-
74
-
75
-
76
-
77
-
78
-
79
-
80
-
81
-
82
-
83
-
84
-
85
-
86
-
87
-
88
-
89
-
90
-
91
-
92
-
93
-
94
-
95
-
96
-
97
-
98
-
99
-
100
-
101
-
102
-
103
-
104
-
105
-
106
-
107
-
108
-
109
-
110
-
111
-
112
-
113
-
114
-
115
-
116
-
117
-
118
-
119
-
120
-
121
-
122
-
123
-
124
-
125
-
126
-
127
-
128
-
129
-
130
-
131
-
132
-
133
-
134
-
135
-
136
-
137
-
138
-
139
-
140
-
141
-
142
-
143
-
144
-
145
-
146
-
147
-
148
-
149
-
150
-
151
-
152
-
153
-
154
-
155
-
156
-
157
-
158
-
159
-
160
-
161
-
162
-
163
-
164
-
165
-
166
-
167
-
168
-
169
-
170
-
171
-
172
-
173
-
174
-
175
-
176
-
177
-
178
-
179
-
180
-
181
-
182
-
183
-
184
-
185
-
186
-
187
-
188
-
189
-
190
-
191
-
192
-
193
-
194
-
195
-
196
-
197
-
198
-
199
-
200
 |
 |
The Nikon Guide to Digital Photography
with the
En
DIGITAL CAMERA