Nikon R1C1 Wireless Close-Up Speedlight System Users Manual - English - Page 76
Setting the manual flash output level for group C., Setting a channel number on the SU-800., Setting
 |
View all Nikon R1C1 Wireless Close-Up Speedlight System manuals
Add to My Manuals
Save this manual to your list of manuals |
Page 76 highlights
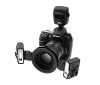
3 Procedures for close-up flash operation CHANNEL 34 2 1 7 Setting the manual flash output level for group C. Press the [SEL](FUNC.) button to display manual flash output level (blinking) for group C, then press the [W] or [X] button to increase or decrease the value. Press the [SEL](FUNC.) button once again and the flash output level stops blinking. The last value to blink is the one that has been set automatically. • Manual flash output level can be set separately for each group. • The flash output level can be set from M1/1 to M1/64. (M1/8 is preset when shipped from the factory.) • Press and hold the [W] or [X] button to quickly increase or decrease the value. • The flash output level ratio blinks during adjustment and stops after blinking six times unless an adjustment is made. The last value to blink is the one that has been set automatically. 8 Setting a channel number on the SU-800. Set the communication channel numbers of the SU-800 and SB-R200. Press the [SEL](FUNC.) button to display the channel number (blinking). Press the [W] or [X] button to set the channel number. Press the [SEL](FUNC.) button once again and the channel number stops blinking. The last channel number to blink is the one that has been set automatically. • Select one of the four available channels. The same channel number is set for all groups. • The channel number blinks during adjustment and stops after blinking six times unless an adjustment is made. The last channel number to blink is the one that has been set automatically. 9 Setting a channel number on the SB-R200. Rotate the [CHANNEL] select dial on the SB-R200 to set the channel number. Be sure to set the same channel number as set on the SU-800. 76
-
 1
1 -
2
-
3
-
4
-
5
-
6
-
7
-
8
-
9
-
10
-
11
-
12
-
13
-
14
-
15
-
16
-
17
-
18
-
19
-
20
-
21
-
22
-
23
-
24
-
25
-
26
-
27
-
28
-
29
-
30
-
31
-
32
-
33
-
34
-
35
-
36
-
37
-
38
-
39
-
40
-
41
-
42
-
43
-
44
-
45
-
46
-
47
-
48
-
49
-
50
-
51
-
52
-
53
-
54
-
55
-
56
-
57
-
58
-
59
-
60
-
61
-
62
-
63
-
64
-
65
-
66
-
67
-
68
-
69
-
70
-
 71
71 -
 72
72 -
 73
73 -
 74
74 -
 75
75 -
 76
76 -
 77
77 -
 78
78 -
 79
79 -
 80
80 -
 81
81 -
82
-
83
-
84
-
85
-
86
-
87
-
88
-
89
-
90
-
91
-
92
-
93
-
94
-
95
-
96
-
97
-
98
-
99
-
100
-
101
-
102
-
103
-
104
-
105
-
106
-
107
-
108
-
109
-
110
-
111
-
112
-
113
-
114
-
115
-
116
-
117
-
118
-
119
-
120
-
121
-
122
-
123
-
124
-
125
-
126
-
127
-
128
-
129
-
130
-
131
-
132
-
133
-
134
 |
 |
