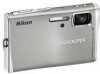
Nikon S51c S51c Public Wireless LAN Connection Guide - Page 21
Con a network profile
 |
UPC - 018208255757
View all Nikon S51c manuals
Add to My Manuals
Save this manual to your list of manuals |
Page 21 highlights
Step 3 Configure a network profile 1 Choose the desired SSID (wireless LAN net- work name) and press d. Select SSID AP1 AP2 Back - If the WEP key entry screen is displayed, enter the n WEP key 10 26 WEP key and press the shutter-release button. 1234123412 - The screen for connecting to the access point will be displayed. Confirm Back Delete I AP1 Connecting to access point Cancel - The screens for connecting to the server, and for uploading pictures to the server, will be displayed in order. When the upload is complete, the message shown below will be displayed. I Connecting to server I 11MB:Available Transferring images to server. 002/030 K Transfer complete. Connection terminated. Cancel Cancel - If there is Picture Mail in the queue (as described on page 12), queued Pic- ture Mails will be sent at the same time. - Once upload is complete, the camera turns off, the power-on lamp blinks orange, and the battery begins charging. 21
-
 1
1 -
2
-
3
-
4
-
5
-
6
-
7
-
8
-
9
-
10
-
11
-
12
-
13
-
14
-
15
-
 16
16 -
 17
17 -
 18
18 -
 19
19 -
 20
20 -
 21
21 -
 22
22 -
 23
23 -
 24
24
 |
 |
