NordicTrack Grt470 English Manual - Page 23
Weight Resistance Chart - exercises
 |
View all NordicTrack Grt470 manuals
Add to My Manuals
Save this manual to your list of manuals |
Page 23 highlights
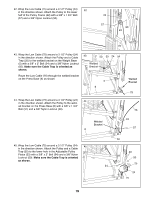
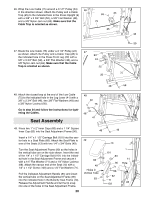
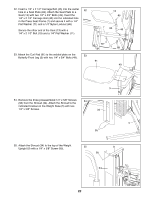
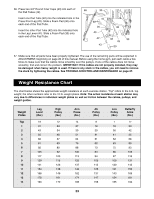
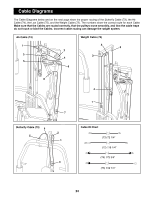
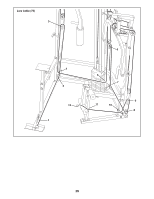
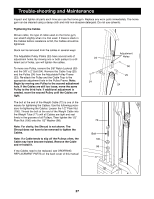
56. Press two 3/4Ó Round Inner Caps (43) into each of 56 30 the Pad Tubes (42). Insert one Pad Tube (42) into the indicated hole in the Press Front Leg (20). Slide a Foam Pad (30) onto each end of the Pad Tube. Insert the other Pad Tube (42) into the indicated hole in the Leg Lever (41). Slide a Foam Pad (30) onto each end of the Pad Tube. 41 30 20 43 43 42 42 30 43 43 30 57. Make sure that all parts have been properly tightened. The use of the remaining parts will be explained in ADJUSTMENT, beginning on page 26 of this manual. Before using the home gym, pull each cable a few times to make sure that the cables move smoothly over the pulleys. If one of the cables does not move smoothly, find and correct the problem. IMPORTANT: If the cables are not properly installed, they may be damaged when heavy weight is used. If there is any slack in the cables, you will need to remove the slack by tightening the cables. See TROUBLE-SHOOTING AND MAINTENANCE on page 27. Weight Resistance Chart The chart below shows the approximate weight resistance at each exercise station. ÒTopÓ refers to the 6 lb. top weight; the other numbers refer to the 10 lb. weight plates. Note: The actual resistance at each station may vary due to differences in individual weight plates as well as friction between the cables, pulleys, and weight guides. Weight Plates Top 1 2 3 4 5 6 7 8 9 10 11 12 13 14 Leg Lever (lbs.) 19 31 43 55 68 81 92 105 117 129 141 154 166 178 190 High Pulley (lbs.) 12 23 34 46 57 69 80 92 103 115 126 138 149 161 172 Arm Press (lbs.) 14 27 39 51 64 76 88 100 113 125 137 149 162 174 186 Ab Pulley (lbs.) 9 19 30 41 51 62 73 83 94 105 115 126 137 147 158 Low Pulley (lbs.) 7 18 30 41 52 63 75 86 97 109 120 131 143 154 165 Butterfly Arms (lbs.) 17 30 42 55 68 80 93 105 118 131 143 156 169 181 194 23
-
 1
1 -
2
-
3
-
4
-
5
-
6
-
7
-
8
-
9
-
10
-
11
-
12
-
13
-
14
-
15
-
16
-
17
-
 18
18 -
 19
19 -
 20
20 -
 21
21 -
 22
22 -
 23
23 -
 24
24 -
 25
25 -
 26
26 -
 27
27 -
 28
28 -
29
-
30
-
31
-
32
-
33
 |
 |
