NordicTrack Netl99017 Instruction Manual - Page 23
How To Use A Distance Or Time Workout
 |
View all NordicTrack Netl99017 manuals
Add to My Manuals
Save this manual to your list of manuals |
Page 23 highlights
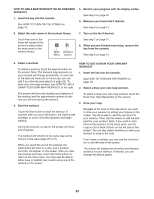
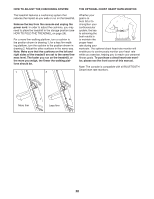
4. Save your workout. HOW TO USE A DISTANCE OR TIME WORKOUT Touch the Save New Workout button in the lowerleft corner of the screen. If desired, change the title of the workout or add a description, and then press the > symbol on the screen. Note: To use a distance or time workout, the console must be connected to a wireless network (see HOW TO USE THE WIRELESS NETWORK MODE on page 26). An iFit account is also required. 5. Start the workout. 1. Add workouts to your schedule on iFit.com. Touch the Start button on the screen to start the workout. A moment after you touch the button, the walking belt will begin to move. Hold the handrails and begin walking. 6. Monitor your progress with the display modes. See step 5 on page 20. 7. Measure your heart rate if desired. See step 6 on page 21. On your computer, smartphone, tablet, or other device, open an internet browser, go to iFit.com, and sign in to your iFit account. Next, navigate to Menu > Library on the website. Browse the workout programs in the library and join the desired workouts. Then, navigate to Menu > Schedule to view your schedule. All of the workouts that you have joined will appear on your schedule; you can arrange or delete the workouts on your schedule as desired. 8. Turn on the fan if desired. See step 7 on page 21. 9. When you are finished exercising, remove the key from the console. Take time to explore the iFit.com website before you log out. 2. Insert the key into the console. See HOW TO TURN ON THE POWER on page 18. See step 8 on page 21. 3. Select the main menu. See step 2 on page 20. 4. Log in to your iFit account. If you have not already done so, touch the Login button to log in to your iFit account. The screen will ask for your iFit.com username and password. Enter them and touch the Submit button. Touch the Cancel button to exit the login screen. 23
-
 1
1 -
2
-
3
-
4
-
5
-
6
-
7
-
8
-
9
-
10
-
11
-
12
-
13
-
14
-
15
-
16
-
17
-
 18
18 -
 19
19 -
 20
20 -
 21
21 -
 22
22 -
 23
23 -
 24
24 -
 25
25 -
 26
26 -
 27
27 -
 28
28 -
29
-
30
-
31
-
32
-
33
-
34
-
35
-
36
-
37
-
38
-
39
-
40
 |
 |