Oki MB480 Setup and Reference Guide Americas - Page 7
Configuring the MFP
 |
View all Oki MB480 manuals
Add to My Manuals
Save this manual to your list of manuals |
Page 7 highlights
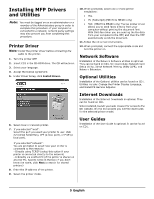
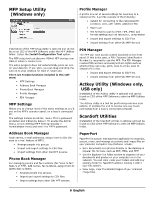
OmniPage SE ScanSoft OmniPage SE converts paper and Adobe PDF files into editable digital documents. Using OCR (optical character recognition) and page layout preservation capabilities, OmniPage eliminates re-typing of static documents and unlocks content in PDF files. Key features include: • Set up custom workflows, such as a template to automatically recognize a 20 page PDF file, convert it into a Word document, e-mail it, and save a copy to your local hard drive. • OmniPage Pro 14 Office lets you automate the conversion of paper and PDF documents into industrystandard XML documents. Configuring the MFP Note: In the United States, as required by FCC regulations, a heading must be included on all FAX messages. The heading must include the date and time it is sent and an identification of the business or other entity, or other individual sending the message, and the telephone number of the sending machine or such business, other entity, or individual. Default Passwords/PIN Before using this MFP, a few basic settings have to be carried out. Ensure that you have the relevant permission/PIN numbers before starting. The Factory set default passwords/PIN are: Administrator aaaaaa PIN 000000 Network (web page) aaaaaa Fax Receiving (MB470 & MB480 only) This MFP's fax will automatically answer the telephone after the Ring Response delay. For information on setting this, see "Setting the Ring Response" on page 7. Setting Fax Parameters Follow these instructions to set the Date and Time (clock adjustment), Country Code, Local Phone No., and Sender ID. 1. Using the Down arrow key, scroll to Menu and press Enter. 2. Using the Down arrow key, scroll to Admin Setup and press Enter. 3. Using the arrow keys and on-screen keypad, enter the Administrator password. Highlight Done and press Enter. 4. Using the Down arrow key, scroll to Fax Setup and press Enter. 5. Press Enter to select the Clock Adjustment menu. 6. Using the arrow keys and keypad, enter the time and date. 7. Press Enter to confirm. 8. Using the Down arrow key, scroll to Basic Setup and press Enter. 9. Using the Down arrow key, scroll to Country Code and press Enter. 10. Using the arrow keys, scroll to the country in which the MFP is situated and press Enter to confirm. 11. Using the Down arrow key, scroll to Local Phone No. and press Enter 12. Using the keypad or arrow keys, type in the local phone number press Enter to confirm. 13. Using the Down arrow key, scroll to Sender ID and press Enter. 14. Using the keypad or arrow keys and the on-screen keypad, type in the sender ID. 15. Highlight Done and press Enter. Setting the Ring Response The fax facility of this MFP will automatically answer the incoming ringtone after the delay period set by the ring response. The factory default for ring response is 1 ring. This can be set up to 20 seconds in the Admin Menu as follows (you need to have administrator rights to alter this setting): 1. In the top level screen, scroll down to Menu and select using the Enter key. 2. In the drop down menu, scroll down to the Admin Menu and select using the Enter key. Enter the password. 3. In the drop down menu, scroll down to Fax Setup and select using the Enter key. 4. In the drop down menu, scroll down to Basic Setup and select using the Enter key. 5. In the drop down menu, scroll down to the Ring Response and select using the Enter key. 6. In the drop down menu, scroll down to the response time required and select using the Enter key. 7. Using the Left arrow key, return to the top level menu. 7 English
-
 1
1 -
 2
2 -
 3
3 -
 4
4 -
 5
5 -
 6
6 -
 7
7 -
 8
8 -
 9
9 -
 10
10 -
 11
11 -
 12
12 -
13
-
14
-
15
-
16
-
17
-
18
-
19
-
20
-
21
-
22
-
23
-
24
-
25
-
26
-
27
-
28
-
29
-
30
-
31
-
32
-
33
-
34
-
35
-
36
-
37
-
38
-
39
-
40
 |
 |
