Olympus DS 4000 DS-4000 Online Instructions (English) - Page 39

While in Stop or Playback Mode
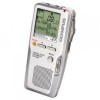
Page 39 highlights

LCD Display Information Before using the DISPLAY function, it should be programmed to A or B button. The LCD screen on the recorder can display 7 different formats of information by pressing the DISPLAY button. This helps review and confirm different recorder settings and file information. 1 Press the DISPLAY (A or B) button. The LCD display will switch view every time the DISPLAY button is pressed. 3 While in Stop or Playback Mode LCD Display Information When pressing DISPLAY button, the recorder will cycle through 1 1 to 7. If there is no file, only 5, 6, 7 will display instead. 1 File length Shows how long a file is. AUTHOR A 00M00S } LENGTH : 2H27M58S 7 Current time and date Shows the current time and AUTHOR A TIME&DATE : 3M16D2004Y 12:00AM date. (During the playback operation, the "TIME & DATE" or the counter appears.) { { 2 Time stamp Shows the year, month, and date that the file was recorded. AUTHOR A 00M00S REC DATE : 3M16D2004Y 6 Work type ID Shows the selected Work Type ID. AUTHOR A 00M00S WORKTYPE : SURGICAL { { 3 Time stamp Shows the time that the file was recorded. AUTHOR A 00M00S REC TIME : 3M16D 12:56 A M 5 Memory remaining Shows the remaining recording AUTHOR A 00M00S REMAIN : 1H50M12S time. { 4 File comment* Shows a comment added to the file. (If there is no comment, "----" will appears.) AUTHOR A 00M00S COM_M_E_N_T : * If a comment contains many characters, it will scroll horizontally to display the complete comment. 39

  • 1
  • 2
  • 3
  • 4
  • 5
  • 6
  • 7
  • 8
  • 9
  • 10
  • 11
  • 12
  • 13
  • 14
  • 15
  • 16
  • 17
  • 18
  • 19
  • 20
  • 21
  • 22
  • 23
  • 24
  • 25
  • 26
  • 27
  • 28
  • 29
  • 30
  • 31
  • 32
  • 33
  • 34
  • 35
  • 36
  • 37
  • 38
  • 39
  • 40
  • 41
  • 42
  • 43
  • 44
  • 45
  • 46
  • 47
  • 48
  • 49
  • 50
  • 51
  • 52
  • 53
  • 54
  • 55
  • 56
  • 57
  • 58
  • 59
  • 60
  • 61
  • 62
  • 63
  • 64
  • 65
  • 66
  • 67
  • 68
  • 69
  • 70
  • 71
  • 72
  • 73
  • 74
  • 75
  • 76
  • 77
  • 78
  • 79
  • 80
  • 81
  • 82
  • 83
  • 84
  • 85
  • 86
  • 87
  • 88

39
3
The LCD screen on the recorder can display 7 different formats of information by pressing the
DISPLAY button. This helps review and confirm different recorder settings and file information.
1
Press the
DISPLAY (A
or
B)
button.
The LCD display will switch view every time the DISPLAY button
is pressed.
While in Stop or Playback Mode
When pressing DISPLAY button, the recorder will cycle through
1
to
7
. If there is no file, only
5
,
6
,
7
will display instead.
AUTHOR
A
00M00S
LENGTH :
2H27M58S
AUTHOR
A
00M00S
REC
DATE :
3M16D2004Y
AUTHOR
A
00M00S
REC
TIME :
3M16D
12:56
A
M
AUTHOR
A
00M00S
COMMENT :
_ _ _ _
AUTHOR
A
00M00S
REMAIN :
1H50M12S
AUTHOR
A
TIME&DATE :
3M16D2004Y
12:00AM
}
{
{
{
{
1
File length
Shows how long a file is.
2
Time stamp
Shows the year, month, and
date that the file was recorded.
3
Time stamp
Shows the time that the file was
recorded.
7
Current time and date
Shows the current time and
date. (During the playback
operation, the
TIME & DATE
or the counter appears.)
5
Memory remaining
Shows the remaining recording
time.
4
File comment*
Shows a comment added to the
file. (If there is no comment,
----
will appears.)
* If a comment contains many
characters,
it
will
scroll
horizontally to display the
complete comment.
LCD Display Information
{
6
Work type ID
Shows the selected Work Type
ID.
1
AUTHOR
A
WORKTYPE :
00M00S
SURGICAL
Before using the DISPLAY function, it should be programmed to A or B button.