Onkyo AVX-290 Owner Manual - Page 26
Muting the AV Receiver, Using Headphones, Recording, Recording Separate AV Sources
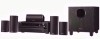 |
View all Onkyo AVX-290 manuals
Add to My Manuals
Save this manual to your list of manuals |
Page 26 highlights
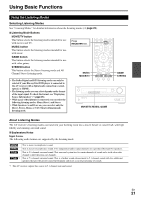
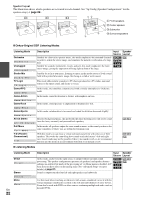
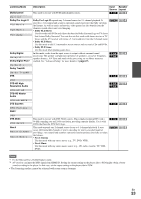
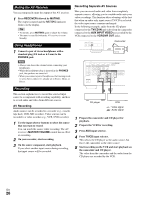
Muting the AV Receiver You can temporarily mute the output of the AV receiver. 1 Press RECEIVER followed by MUTING. The output is muted and the MUTING indicator flashes on the display. Tip • To unmute, press MUTING again or adjust the volume. • The mute is cancelled when the AV receiver is set to Standby. Using Headphones 1 Connect a pair of stereo headphones with a standard plug (1/4 inch or 6.3 mm) to the PHONES jack. Note • Always turn down the volume before connecting your headphones. • While the headphones plug is inserted in the PHONES jack, the speakers are turned off. • When you connect a pair of headphones, the listening mode is set to Stereo, unless it's already set to Stereo, Mono, or Direct. Recording Separate AV Sources Here you can record audio and video from completely separate sources, allowing you to overdub audio onto your video recordings. This function takes advantage of the fact that when an audio-only input source (TV/CD) is selected, the video input source remains unchanged. In the following example, audio from the CD player connected to the TV/CD IN and video from the camcorder connected to the AUX INPUT VIDEO are recorded by the VCR connected to the VCR/DVR OUT jacks. Camcorder Recording This section explains how to record the selected input source to a component with recording capability, and how to record audio and video from different sources. AV Recording Audio sources can be recorded to a recorder (e.g., cassette tape deck, CDR, MD recorder). Video sources can be recorded to a video recorder (e.g., VCR, DVD recorder). 1 Use the input selector buttons to select the source that you want to record. You can watch the source while recording. The AV receiver's MASTER VOLUME control has no effect on recording. 2 On your recorder, start recording. 3 On the source component, start playback. If you select another input source during recording, that input source will be recorded. CD player VCR : Video signal : Audio signal 1 Prepare the camcorder and CD player for playback. 2 Prepare the VCR for recording. 3 Press AUX input selector. 4 Press TV/CD input selector. This selects the CD player as the audio source, but leaves the camcorder as the video source. 5 Start recording on the VCR and start playback on the camcorder and CD player. The video from the camcorder and the audio from the CD player are recorded by the VCR. En 26
-
 1
1 -
2
-
3
-
4
-
5
-
6
-
7
-
8
-
9
-
10
-
11
-
12
-
13
-
14
-
15
-
16
-
17
-
18
-
19
-
20
-
 21
21 -
 22
22 -
 23
23 -
 24
24 -
 25
25 -
 26
26 -
 27
27 -
 28
28 -
 29
29 -
 30
30 -
 31
31 -
32
-
33
-
34
-
35
-
36
-
37
-
38
-
39
-
40
-
41
-
42
-
43
-
44
-
45
-
46
-
47
-
48
-
49
-
50
-
51
-
52
-
53
-
54
-
55
-
56
 |
 |
