Onkyo AVX-290 Owner Manual - Page 34
Hardware, HDMI Setup, Remote Control, Tuner, Auto Standby, UP-A1
 |
View all Onkyo AVX-290 manuals
Add to My Manuals
Save this manual to your list of manuals |
Page 34 highlights
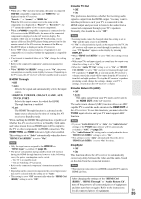
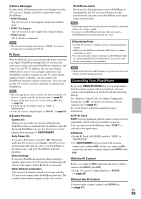
. Hardware Menu Hardware OSD ■ Volume OSD ` On ` Off You can select if you wish to display the volume level onscreen, when it is adjusted. Remote Control ■ Remote ID `1, 2, or 3 When several Onkyo components are used in the same room, their remote ID codes may overlap. To differentiate the AV receiver from the other components, you can change its remote ID from "1", to "2" or "3". Note • If you do change the AV receiver's remote ID, be sure to change the remote controller to the same ID (see below), otherwise, you won't be able to control it with the remote controller. Changing the remote controller's ID 1 While holding down RECEIVER, press and hold down SETUP until the remote indicator lights (about 3 seconds) (➔ page 27). 2 Use the number buttons to enter ID 1, 2, or 3. The remote indicator flashes twice. Tuner ■ AM/FM Freq Step (North American and Brazilian models) ` 10kHz/200kHz: ` 9kHz/50kHz: Select the frequency step according to your area. ■ AM Freq Step (European and Asian models) ` 10kHz: ` 9kHz: Select the frequency step according to your area. For AM/FM tuning to work properly, you must specify the AM/FM frequency step used in your area. Note that when this setting is changed, all radio presets will be deleted. Auto Standby ■ Auto Standby ` Off ` On When "Auto Standby" is set to "On", AV receiver will automatically perform standby operation if there is no operation for 30 minutes with no audio and no video signal input. "Auto Standby" will display on the display and OSD from 30 seconds before the Auto Standby functions. Default setting: On (European and Asian models), Off (North American and Brazilian models) Note • Depending on some sources, the Auto Standby function may activate during playback. UP-A1 ■ UP-A1 ChargeMode ` Auto: Power feeding is interrupted when your iPod/iPhone is fully charged. ` On: Power feeding continues even if your iPod/iPhone is fully charged. ` Off: Your iPod/iPhone is not charged. You can specify how the power is fed to your iPod/iPhone when the AV receiver is in Standby Mode. Note • This setting cannot be selected when: - the UP-A1 Dock with docked iPod/iPhone is not connected to the AV receiver, or - the docked iPod/iPhone model is not supported. • When the "UP-A1 ChargeMode" setting is set to "On", or to "Auto" with your iPod/iPhone recharging, the SLEEP indicator is dimly lit in standby mode. In such conditions, the power consumption of the AV receiver slightly increases. HDMI Setup Menu HDMI Setup ■ HDMI Ctrl (RIHD) ` Off ` On Turn this setting on to allow Q-compatible components connected via HDMI to be controlled by the AV receiver (➔ page 50). En 34
-
 1
1 -
2
-
3
-
4
-
5
-
6
-
7
-
8
-
9
-
10
-
11
-
12
-
13
-
14
-
15
-
16
-
17
-
18
-
19
-
20
-
21
-
22
-
23
-
24
-
25
-
26
-
27
-
28
-
 29
29 -
 30
30 -
 31
31 -
 32
32 -
 33
33 -
 34
34 -
 35
35 -
 36
36 -
 37
37 -
 38
38 -
 39
39 -
40
-
41
-
42
-
43
-
44
-
45
-
46
-
47
-
48
-
49
-
50
-
51
-
52
-
53
-
54
-
55
-
56
 |
 |
