Onkyo TX SR804 Instruction Manual - Page 46
Changing the Input Display, Minimum Speaker Impedance, Use the Left and Right
 |
View all Onkyo TX SR804 manuals
Add to My Manuals
Save this manual to your list of manuals |
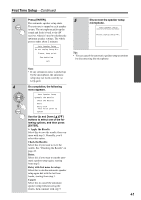
Page 46 highlights
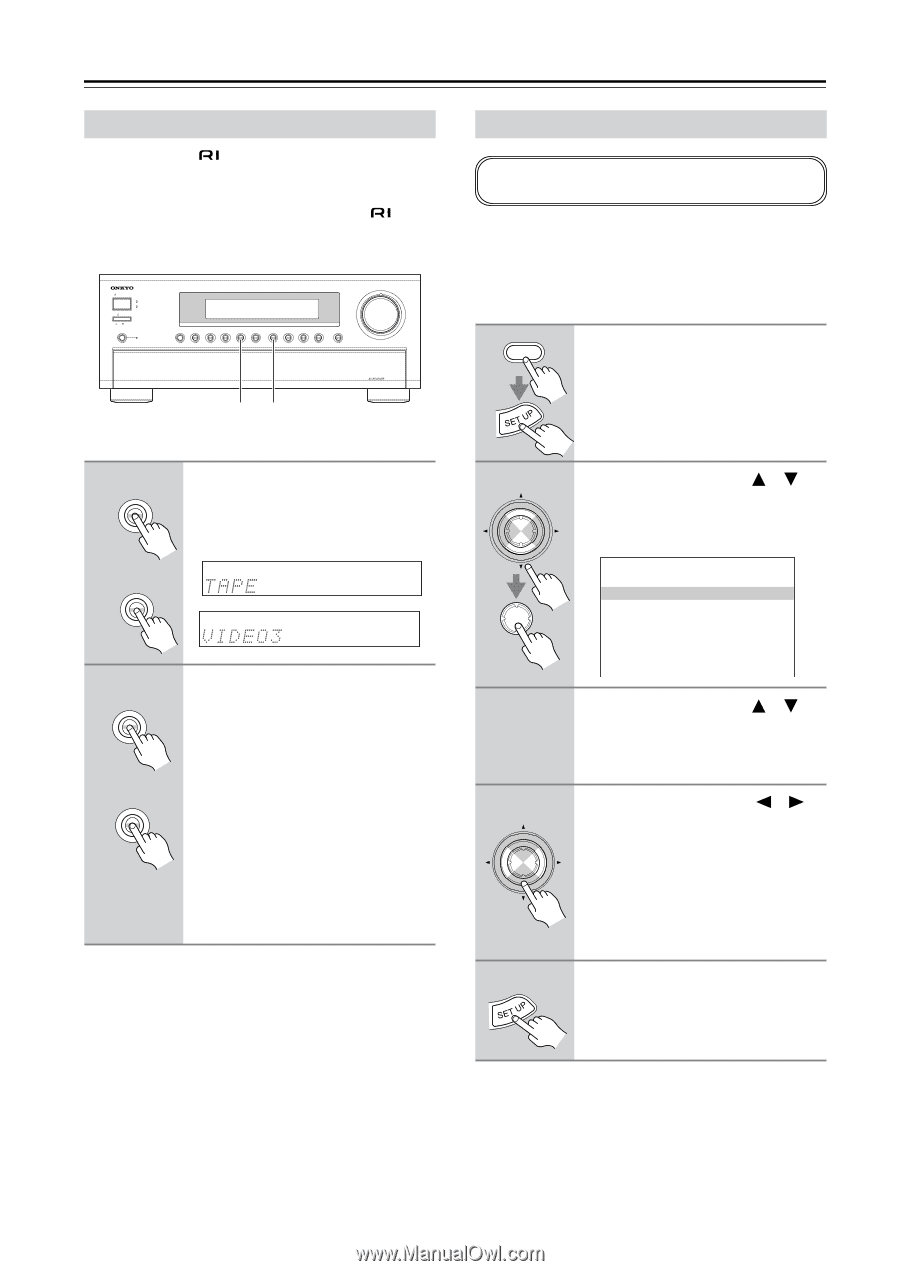
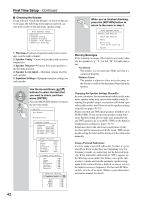
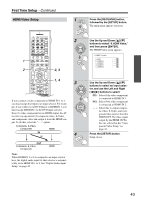
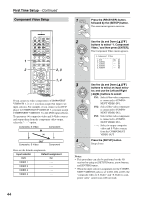
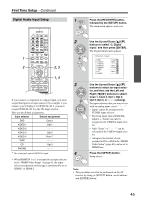
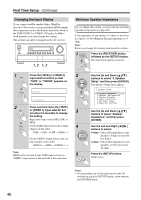
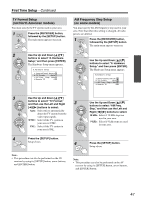
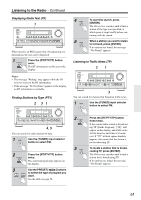
First Time Setup-Continued Changing the Input Display If you connect an -capable Onkyo MiniDisc recorder, CD recorder, or next generation HDD-compatible component, such as the Remote Interactive Dock, to the TAPE IN/OUT or VIDEO 3 IN jacks, for to work properly, you must change this setting. This setting can only be changed on the AV receiver. STANDBY/ON POWER STANDBY ZONE 2 ON OFF PURE AUDIO MULTI CH DVD VIDEO 1 VIDEO 2 VIDEO 3 VIDEO 4 TAPE TUNER CD PHONO DISPLAY MASTER VOLUME PUSH TO OPEN 1, 2 1, 2 Minimum Speaker Impedance If you change this setting, you must run the automatic speaker setup again (see page 40). If the impedance of any speaker is 4 ohms or more but less than 6, set the Minimum Speaker Impedance to 4 ohms. Note: Before you change this setting, turn down the volume. 1 RECEIVER Press the [RECEIVER] button, followed by the [SETUP] button. The main menu appears onscreen. 1 TAPE or VIDEO 3 Press the [TAPE] or [VIDEO 3] input selector button so that "TAPE" or "VIDEO3" appears on the display. 2 TAPE or VIDEO 3 Press and hold down the [TAPE] or [VIDEO 3] input selector button (about 3 seconds) to change the setting. Repeat this step to select MD, CDR, or HDD. For the TAPE input selector, the setting changes in this order: TAPE → MD → CDR → HDD → For the VIDEO 3 input selector, the setting changes in this order: VIDEO 3 → HDD → VIDEO 3 → Note: HDD can be selected for the TAPE input selector or VIDEO 3 input selector, but not both at the same time. 2 ENTER ENTER 3 4 ENTER 5 Use the Up and Down [ ]/[ ] buttons to select "3. Speaker Setup," and then press [ENTER]. The Speaker Setup menu appears. 3.Speaker Setup 01.Speaker Impedance 2.Speaker Configuration 3.Speaker Distance 4.Level Calibration 5.THX Audio Setup 6.Equalizer Settings Use the Up and Down [ ]/[ ] buttons to select "Speaker Impedance," and then press [ENTER]. Use the Left and Right [ ]/[ ] buttons to select: 4 ohms: Select if the impedance of any speaker is 4 ohms or more but less than 6. 6 ohms: Select if the impedances of all speakers are between 6 and 16 ohms. Press the [SETUP] button. Setup closes. Notes: • This procedure can also be performed on the AV receiver by using its [SETUP] button, arrow buttons, and [ENTER] button. 46
-
 1
1 -
2
-
3
-
4
-
5
-
6
-
7
-
8
-
9
-
10
-
11
-
12
-
13
-
14
-
15
-
16
-
17
-
18
-
19
-
20
-
21
-
22
-
23
-
24
-
25
-
26
-
27
-
28
-
29
-
30
-
31
-
32
-
33
-
34
-
35
-
36
-
37
-
38
-
39
-
40
-
 41
41 -
 42
42 -
 43
43 -
 44
44 -
 45
45 -
 46
46 -
 47
47 -
 48
48 -
 49
49 -
 50
50 -
 51
51 -
52
-
53
-
54
-
55
-
56
-
57
-
58
-
59
-
60
-
61
-
62
-
63
-
64
-
65
-
66
-
67
-
68
-
69
-
70
-
71
-
72
-
73
-
74
-
75
-
76
-
77
-
78
-
79
-
80
-
81
-
82
-
83
-
84
-
85
-
86
-
87
-
88
-
89
-
90
-
91
-
92
-
93
-
94
-
95
-
96
 |
 |