Oreck XL 2600HH Owners Guide - Page 7
eplacement, djust or, eplace - bags
 |
View all Oreck XL 2600HH manuals
Add to My Manuals
Save this manual to your list of manuals |
Page 7 highlights
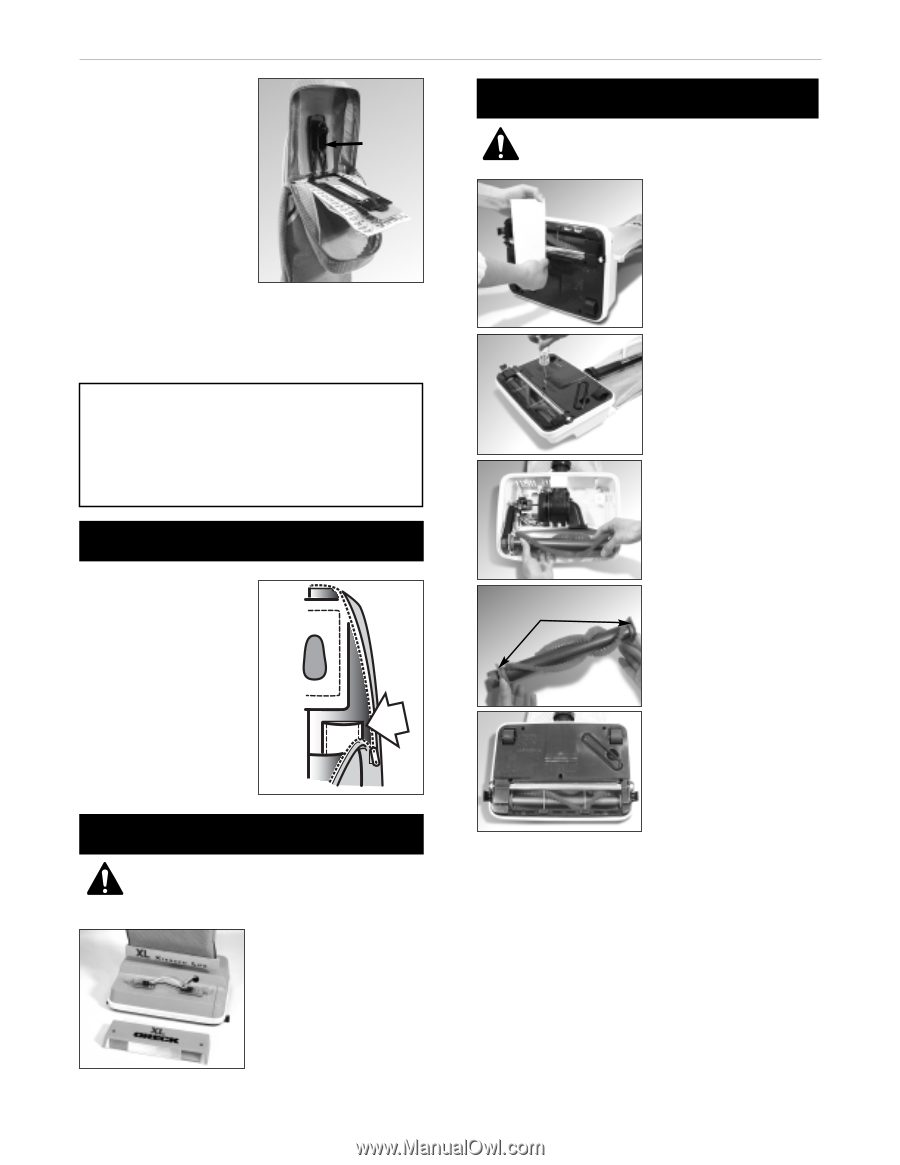
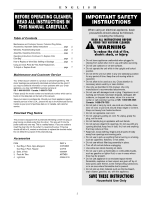
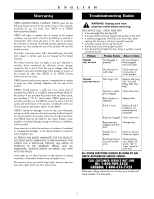
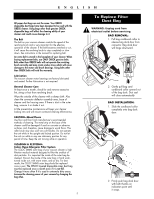
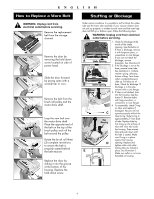
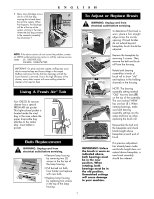
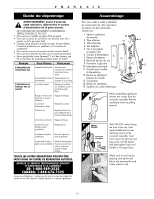
ENGLISH 5. Many times blockage occurs due to a full dust bag causing dirt to back down the air flow system. When that happens, the blockage will be at the top of the system, starting in the area where the dust bag connects to the connector assembly. See illustration F. F Connector Deflector Opening NOTE: If the above actions do not correct the problem, contact an ORECK authorized service center or call the customer service center. US: 1-800-989-3535 CANADA: 1-888-676-7325 IMPORTANT: On plush and new carpets, stuffing may occur due to excessive fuzz and loose cuttings in the carpet. Stuffing could occur for the first few cleanings until all the loose material is removed. Due to the high efficiency of the cleaner, many older carpets will cause stuffing when the cleaner is first used on them. Using A Fresh Air® Tab Your ORECK XL vacuum cleaner has a special FRESH AIR tab pocket. This light-colored pocket is located inside the vinyl bag in the area where the paper disposable bag attaches to the intake tube. Insert tablet in pocket. Bulb Replacement WARNING: Unplug cord from electrical outlet before servicing. • Remove lamp housing by removing two (2) screws in the the top of the lamp housing. • Pull burned out bulb from holder and replace with new bulb. • Replace lamp housing by replacing two screws in the top of the lamp housing. To Adjust or Replace Brush WARNING: Unplug cord from electrical outlet before servicing. To determine if the brush is worn, place a firm straight edge across the nozzle opening. If brush bristles do not extend beyond baseplate, brush should be adjusted. Remove the baseplate by removing 5 screws. Then, remove the belt and brush roll from the housing. Rotate both bearing assemblies at ends of brush roll to show "old" and replace in the holding channels in the housing. Rotate and match bearing assemblies NOTE: The bearing assembly setting marked "OLD" has two bars (ll) on the top of the assembly. The one marked "NEW" has one bar ( l ). When rotating bearings, make sure both bearing assembly settings are the same and face up when replacing the brush roll. Reassemble the belt and the baseplate and check bristle height above baseplate at each end of brush. IMPORTANT: Unless the brush is worn as indicated above, both bearings must be in the new position. When rotating, both bearings must be in the old position. Unmatched settings will cause damage to your machine. If a previous adjustment has already been made and bristle height does not extend above baseplate, a new brush assembly should be ordered. 7
-
 1
1 -
 2
2 -
 3
3 -
 4
4 -
 5
5 -
 6
6 -
 7
7 -
 8
8 -
 9
9 -
 10
10 -
 11
11 -
 12
12 -
13
-
14
-
15
-
16
-
17
-
18
-
19
-
20
 |
 |