Panasonic AG-AC90A Operating Instructions Advanced - Page 92
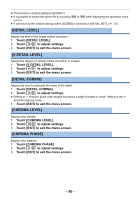
GAMMA], KNEE], Touch [GAMMA]., Touch the desired setting item., Touch [EXIT] to exit the menu screen.
 |
View all Panasonic AG-AC90A manuals
Add to My Manuals
Save this manual to your list of manuals |
Page 92 highlights
[GAMMA] Tone or contrast of the image is set in accordance with the recorded scenes. 1 Touch [GAMMA]. 2 Touch the desired setting item. [HD NORM]: This gamma setting is suitable for high defenition picture quality recording. [LOW]: This is a gamma setting with gradual slope at the low illuminated area. It will produce tranquil image with sharper contrast. [SD NORM]: This is the standard picture quality images setting. [HIGH]: This is a gamma setting with sharp slope at the low illuminated area. It will produce brighter image with wider gradation on the low illuminated area with softer contrast. [B.PRESS]: Makes the contrast shaper than [LOW]. [CINE-LIKE D]: This is a gamma setting to make the image look like cinema. [CINE-LIKE V]: This is a gamma setting to make the image look like cinema with higher contrast than [CINE-LIKE D]. ≥ Next (Previous) page can be displayed by touching / . ≥ When you select [CINE-LIKE D] or [CINE-LIKE V], we recommend setting the iris darker than normal image for optimal results. (l 42) 3 Touch [EXIT] to exit the menu screen. [KNEE] To avoid overexposure, select the compression level of the high intensity video signals received through the image sensor. 1 Touch [KNEE]. 2 Touch the desired setting item. [AUTO]: Sets up automatically depending on the signal from the image sensor. [LOW]: Low setting (Compression starts at approx. 80%.) [MID]: Medium setting (Compression starts at approx. 90%.) [HIGH]: High setting (Compression starts at approx. 100%.) 3 Touch [EXIT] to exit the menu screen. ≥ The unit goes to [AUTO] and the setting cannot be changed in the following cases: j When [DRS] is set to [ON] j When [GAMMA] is set to [CINE-LIKE D] or [CINE-LIKE V] - 92 -
-
 1
1 -
2
-
3
-
4
-
5
-
6
-
7
-
8
-
9
-
10
-
11
-
12
-
13
-
14
-
15
-
16
-
17
-
18
-
19
-
20
-
21
-
22
-
23
-
24
-
25
-
26
-
27
-
28
-
29
-
30
-
31
-
32
-
33
-
34
-
35
-
36
-
37
-
38
-
39
-
40
-
41
-
42
-
43
-
44
-
45
-
46
-
47
-
48
-
49
-
50
-
51
-
52
-
53
-
54
-
55
-
56
-
57
-
58
-
59
-
60
-
61
-
62
-
63
-
64
-
65
-
66
-
67
-
68
-
69
-
70
-
71
-
72
-
73
-
74
-
75
-
76
-
77
-
78
-
79
-
80
-
81
-
82
-
83
-
84
-
85
-
86
-
 87
87 -
 88
88 -
 89
89 -
 90
90 -
 91
91 -
 92
92 -
 93
93 -
 94
94 -
 95
95 -
 96
96 -
 97
97 -
98
-
99
-
100
-
101
-
102
-
103
-
104
-
105
-
106
-
107
-
108
-
109
-
110
-
111
-
112
-
113
-
114
-
115
-
116
-
117
-
118
-
119
-
120
-
121
-
122
-
123
-
124
-
125
-
126
 |
 |
