Panasonic AW-UE4 Basic Operating Instructions - Page 52
Tilting the Camera Up and Down, Perpendicular fixing screw, Horizontal fixing screw
 |
View all Panasonic AW-UE4 manuals
Add to My Manuals
Save this manual to your list of manuals |
Page 52 highlights
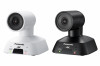
12 13 14 15 12. Perpendicular fixing screw 13. Horizontal fixing screw 14. Drop-prevention wire mounting portion 15. Mount hole [Screw: I-head type, 1/4 x 20 UNC Clamping torque: 1.47N ·m(15kgf · cm)] Tilting the Camera Up and Down When the perpendicular fixing screw A is loosened, the camera can be tilted approximately 25°up or down. After adjusting the position of the camera, firmly tighten the screw to fix the camera in position. 52
-
 1
1 -
2
-
3
-
4
-
5
-
6
-
7
-
8
-
9
-
10
-
11
-
12
-
13
-
14
-
15
-
16
-
17
-
18
-
19
-
20
-
21
-
22
-
23
-
24
-
25
-
26
-
27
-
28
-
29
-
30
-
31
-
32
-
33
-
34
-
35
-
36
-
37
-
38
-
39
-
40
-
41
-
42
-
43
-
44
-
45
-
46
-
 47
47 -
 48
48 -
 49
49 -
 50
50 -
 51
51 -
 52
52 -
 53
53 -
 54
54 -
 55
55 -
 56
56 -
 57
57 -
58
-
59
-
60
-
61
-
62
-
63
-
64
-
65
-
66
-
67
-
68
 |
 |

52
12
13
14
15
12. Perpendicular fixing screw
13. Horizontal fixing screw
14. Drop-prevention wire mounting
portion
15. Mount hole
[Screw: I-head type, 1/4 x 20 UNC
Clamping torque: 1.47N · m(15kgf · cm)]
Tilting the Camera Up and Down
When the perpendicular fixing screw
A
is loosened, the camera can be tilted approximately 25°up
or down.
After adjusting the position of the camera, firmly tighten the screw to fix the camera in position.