Panasonic CQVX100U In-dash Dvd Monitor - Page 28
AV1/AV2
 |
UPC - 037988758432
View all Panasonic CQVX100U manuals
Add to My Manuals
Save this manual to your list of manuals |
Page 28 highlights
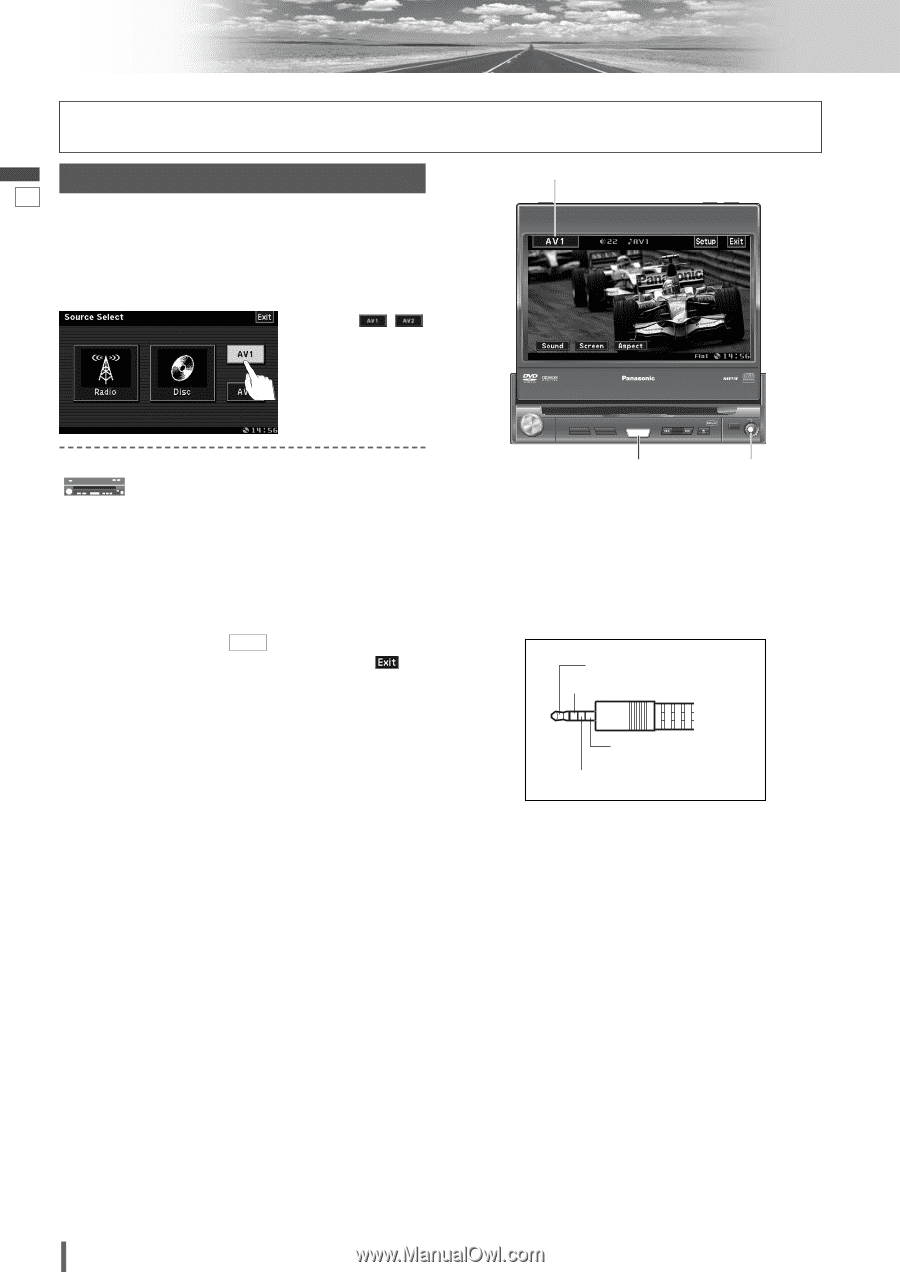
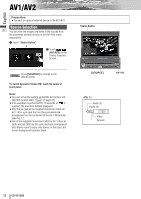
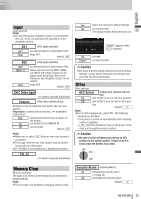
AV1/AV2 English Preparation: ¡Connect an optional external device to the AV1/AV2. Source Selection 27 You can view the images and listen to the sounds from the connected external devices in the AV1/AV2 mode respectively. q Touch "Source Button". d w Touch / (AV1/AV2) on the Source Selection Screen. Press [SOURCE] to change to the desired mode. To switch Operation Screen ON, touch the center of touch panel. Note: ¡You can set up the system so that the AV mode is not selected (source skip). ( Input a page 33) ¡If no operation is performed for 10 seconds or is touched, the operation buttons disappear. ¡Only the pin jack of the supplied Conversion Cable for AV 1 IN or a pin jack that has the same electrode arrangement can be connected to the AV 1 IN terminal. (See Fig. 1.) ¡Use of the supplied Conversion Cable for AV 1 IN or an audio pin jack that has the same electrode arrangement also allows users to enjoy only music. In this case, the screen background becomes black. Source Button DIMMER TILT CLOSE IN-DASH 7" WIDESCREEN COLOR LCD MONITOR / DVD RECEIVER DIMMER DIM CQ-VX100U CQ-VD5005W TILT TEXT OPEN VOL PUSH SEL MUTE SETUP POWER SOURCE TUNE / TRACK AV1 IN [SOURCE] AV1 IN Audio (L) Audio (R) Video Ground 28 CQ-VX100U
-
 1
1 -
2
-
3
-
4
-
5
-
6
-
7
-
8
-
9
-
10
-
11
-
12
-
13
-
14
-
15
-
16
-
17
-
18
-
19
-
20
-
21
-
22
-
 23
23 -
 24
24 -
 25
25 -
 26
26 -
 27
27 -
 28
28 -
 29
29 -
 30
30 -
 31
31 -
 32
32 -
 33
33 -
34
-
35
-
36
-
37
-
38
-
39
-
40
-
41
-
42
-
43
-
44
-
45
-
46
-
47
-
48
 |
 |