Panasonic CQVX100U In-dash Dvd Monitor - Page 32
Basic Setting, Adjust, Display - cq vx100u id code
 |
UPC - 037988758432
View all Panasonic CQVX100U manuals
Add to My Manuals
Save this manual to your list of manuals |
Page 32 highlights
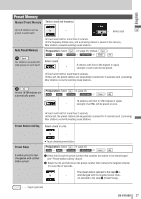
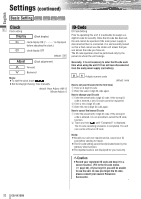
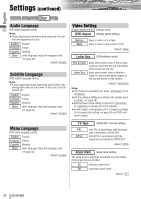
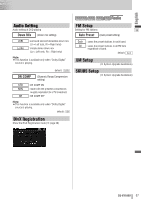
Settings (continued) English Basic Setting Screen Sound Disc Radio Clock 31 Clock setting Display (Clock display) On : clock display ON ("- -:- -" is displayed before adjusting the clock.) Off : clock display OFF default: Off Adjust (Clock adjustment) } : Forward { : Backward Note: ¡To start the clock, touch . ¡Set the Daylight Saving Time manually. default: Hour Adjust: AM 12 Minute Adjust: 0 ID-Code ID Code Setting Prior to operating this unit, it is advisable to assign a 4digit ID code for security. Once the ID code has been set, the unit cannot be operated if the main power supply is disconnected then re-connected. It is electronically locked so that a thief cannot use the stolen unit unless that person knows the code you have set. The ID code operation must be performed only by the person to whom the unit belongs. Generally, it is not necessary to enter the ID code each time when using the unit if it has not been disconnected from the main power supply (car battery). 0 to 9 4 digits numeric code default: none How to set your ID code (for the first time) q Enter an 4 digit ID code. w Enter the same 4 digit ID code again. How to change your ID code q Enter the preset (old) 4 digit ID code. If the wrong ID code is entered, a new ID code cannot be registered. w Enter a new 4 digit ID code. e Enter the new 4 digit ID code again. How to cancel the known ID code q Enter the preset (old) 4 digit ID code. If the wrong ID code is entered, it is not possible to cancel the ID code function. w Touch and hold until "Completed!" is displayed. The ID code cancelling procedure is completed. The unit now works without an ID code. Note: ¡Should your unit ever require service, cancel your ID code before sending for repair. ¡The ID code setting cannot be eliminated even by the memory clear function. ¡The inputted code is not displayed for your security. Caution ¡Record your registered ID code and keep it in a secure location. (Fill in the ID code memo (a page 42).) If you forget it, you will be unable to use the unit. In case you forget the ID code, please consult your nearest Panasonic Servicenter. 32 CQ-VX100U
-
 1
1 -
2
-
3
-
4
-
5
-
6
-
7
-
8
-
9
-
10
-
11
-
12
-
13
-
14
-
15
-
16
-
17
-
18
-
19
-
20
-
21
-
22
-
23
-
24
-
25
-
26
-
 27
27 -
 28
28 -
 29
29 -
 30
30 -
 31
31 -
 32
32 -
 33
33 -
 34
34 -
 35
35 -
 36
36 -
 37
37 -
38
-
39
-
40
-
41
-
42
-
43
-
44
-
45
-
46
-
47
-
48
 |
 |
