Panasonic KXTVA50 KXTVA200 User Guide - Page 49
Changing Device Numbers
 |
UPC - 037988851461
View all Panasonic KXTVA50 manuals
Add to My Manuals
Save this manual to your list of manuals |
Page 49 highlights
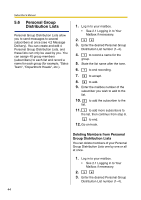
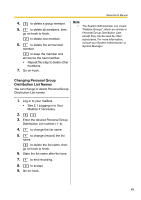
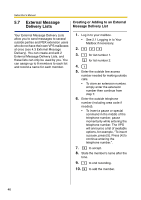
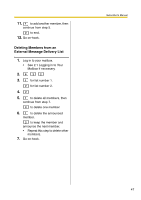
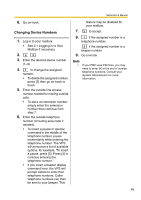
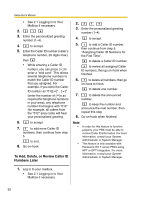
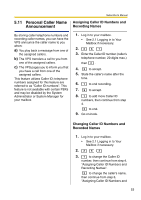
Subscriber's Manual 6. Go on-hook. Changing Device Numbers 1. Log in to your mailbox. • See 2.1 Logging in to Your Mailbox if necessary. 2. 5 3 3. Enter the desired device number (1-3). 4. 1 to change the assigned number. • To delete the assigned number, press [3] then go on-hook to finish. 5. Enter the outside line access number needed for making outside calls. • To store an extension number, simply enter the extension number then continue from step 7. 6. Enter the outside telephone number (including area code if needed). • To insert a pause or special command in the middle of the telephone number, pause momentarily while entering the telephone number. The VPS will announce a list of available options, for example, "To insert a pause, press [5]. Press [4] to continue entering the telephone number.". • If you insert a beeper display command here, the VPS will prompt callers to enter their telephone numbers. Caller telephone numbers can then be sent to your beeper. This feature may be disabled for your mailbox. 7. 2 to accept. 8. 1 if the assigned number is a telephone number. 2 if the assigned number is a beeper number. 9. Go on-hook. Note • If your PBX uses PRI lines, you may need to enter [#] at the end of outside telephone numbers. Consult your System Administrator for more information. 49
-
 1
1 -
2
-
3
-
4
-
5
-
6
-
7
-
8
-
9
-
10
-
11
-
12
-
13
-
14
-
15
-
16
-
17
-
18
-
19
-
20
-
21
-
22
-
23
-
24
-
25
-
26
-
27
-
28
-
29
-
30
-
31
-
32
-
33
-
34
-
35
-
36
-
37
-
38
-
39
-
40
-
41
-
42
-
43
-
 44
44 -
 45
45 -
 46
46 -
 47
47 -
 48
48 -
 49
49 -
 50
50 -
 51
51 -
 52
52 -
 53
53 -
 54
54 -
55
-
56
-
57
-
58
-
59
-
60
-
61
-
62
-
63
-
64
-
65
-
66
-
67
-
68
-
69
-
70
-
71
-
72
-
73
-
74
-
75
-
76
-
77
-
78
-
79
-
80
-
81
-
82
-
83
-
84
-
85
-
86
-
87
-
88
-
89
-
90
-
91
-
92
-
93
-
94
-
95
-
96
-
97
-
98
-
99
-
100
-
101
-
102
-
103
-
104
-
105
-
106
-
107
-
108
-
109
-
110
-
111
-
112
-
113
-
114
-
115
-
116
-
117
-
118
-
119
-
120
-
121
-
122
-
123
-
124
-
125
-
126
-
127
-
128
-
129
-
130
-
131
-
132
-
133
-
134
-
135
-
136
-
137
-
138
-
139
-
140
-
141
-
142
-
143
-
144
-
145
-
146
-
147
-
148
-
149
-
150
-
151
-
152
-
153
-
154
-
155
-
156
-
157
-
158
-
159
-
160
-
161
-
162
-
163
-
164
-
165
-
166
-
167
-
168
-
169
-
170
-
171
-
172
 |
 |
